Warning
After June 30, 2023, Transport Layer Security (TLS) 1.0 and 1.1 connection requests to Duo will not receive a response, resulting in blocked multi-factor authentication.
Who will be affected?
This may affect FDU community users using Windows 7, Windows 8.1, Android Devices with Android OS version 9 or lower, and Apple devices with iOS versions that don’t support TLS 1.2.
Check if you are using the supported endpoints by reading the information below:
Windows
Supported Windows operating system (OS) versions will support TLS 1.2 by default. If you are running a supported Windows OS, no action is required.
Unsupported Versions for Windows Operating Systems
Note
If your operating system was manually changed to disable TLS 1.2 for some reason, connection requests will fail. Verify your system is properly configured for TLS 1.2 with the suggested steps below.
Verifying TLS 1.2 on your Operating System
Check OS Version
- Open the Windows Search box and type “About your PC” and click on “Open“
- Under Windows Specifications, check which edition and version of Windows your device is running
Enabling TLS 1.2 on your Operating System
If your operating system was manually changed to disable TLS 1.2 for some reason, you can verify or configure your system for TLS 1.2.
Before making any changes, create a backup of the registry:
- In the Windows Registry Editor, locate and click the “Protocols registry key” or “subkey“
that needs to be backed up
- Click “File”, then “Export”
- In the Export Registry File dialog box, select the filename and location of where to save the backup
- Click “Save”
After creating a backup of the registry, follow the steps below to enable TLS 1.2 on your system:
- Click the Start menu, type “regedit” and press the Enter key. The Registry Editor window should be opened.
- Navigate to follow the registry path: HKEY_LOCAL_MACHINE\SYSTEM\CurrentControlSet\Control\SecurityProviders\SCHANNEL\Protocols
- Check if the subkey of TLS v1.2 is enabled for both the server and the client. Each protocol’s state is controlled by two keys: Enabled and DisabledByDefault
- Make sure the Enabled value is 1 and the DisabledByDefault value is 0 or missing, the protocol is enabled.
- If the Enabled value is 1 but the DisabledByDefault value is 1, the protocol is disabled by default – it will not be used unless another host explicitly requests it during negotiation.
- If the Enabled value is 0, the protocol is disabled
- Restart the system to ensure the new settings take effect
close
DUO Mobile
Supported Duo Mobile applications running on supported OS versions will support TLS 1.2+ by default. If you are running a supported Duo Mobile application on a supported OS, no action is required.
- Supported Android OS versions: Android 10.0 and greater
- Supported iOS versions: iOS 14.0 and greater
Note
Using a mobile device with unsupported versions can still receive DUO push or generate one-time passcode as before, but it will prevent you from logging in to any systems that are accessed through our FDU Single Sign On Login Page.
Web Browsers
Common web browsers like Google Chrome, Microsoft Edge, Mozilla Firefox, Opera, etc. with their latest version are supporting TLS 1.2.
Note
If your browser was manually changed to disable TLS 1.2 for some reason, connection requests will fail. Please verify your browser is properly configured for TLS 1.2 with the suggested steps below.
Check TLS Support on a Web Browser
Chrome and Microsoft Edge
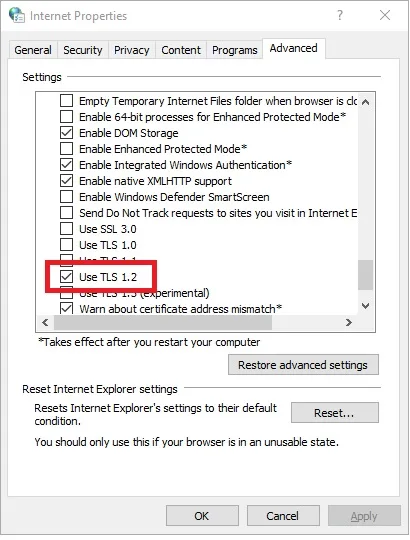
- In the Windows menu search box, type “Internet Options”
- In the Internet Properties window, on the Advanced tab, scroll down to the Security section
- Make sure the “User TLS 1.2” checkbox is checked
- Click “OK” and restart the browser
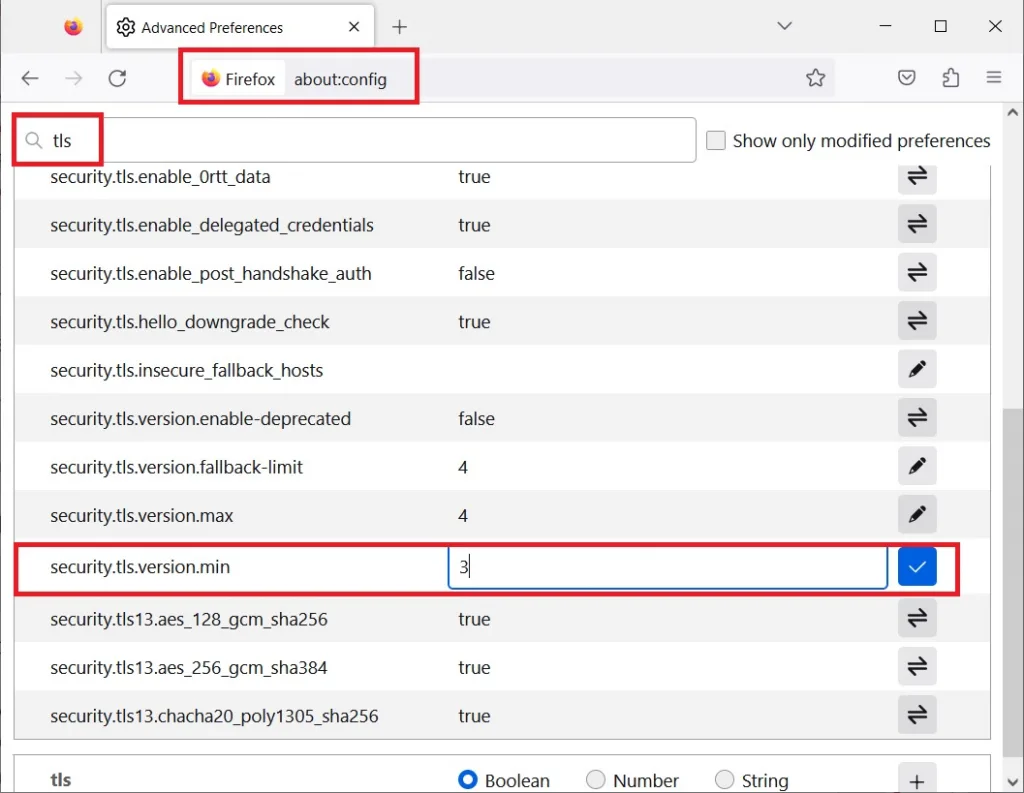
Mozilla Firefox
- Open the Mozilla Firefox Browser
- In the address bar, type “about:config” and press “Enter“
- In the Search Field type “tls”. Find and double-click the entry for “security.tls. version. min”
- Make sure the integer value is 3 to force a minimum protocol of TLS 1.2
- Click “OK” and restart the browser
close
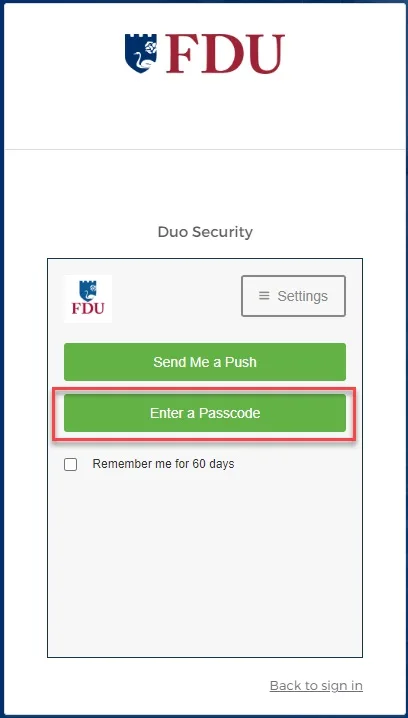
We understand that upgrading your device is not always an option. In these instances, you can still use Duo Passcodes to perform multi-factor authentication.
- To use this method, select “Enter a passcode” upon receiving your browser’s Duo security prompt
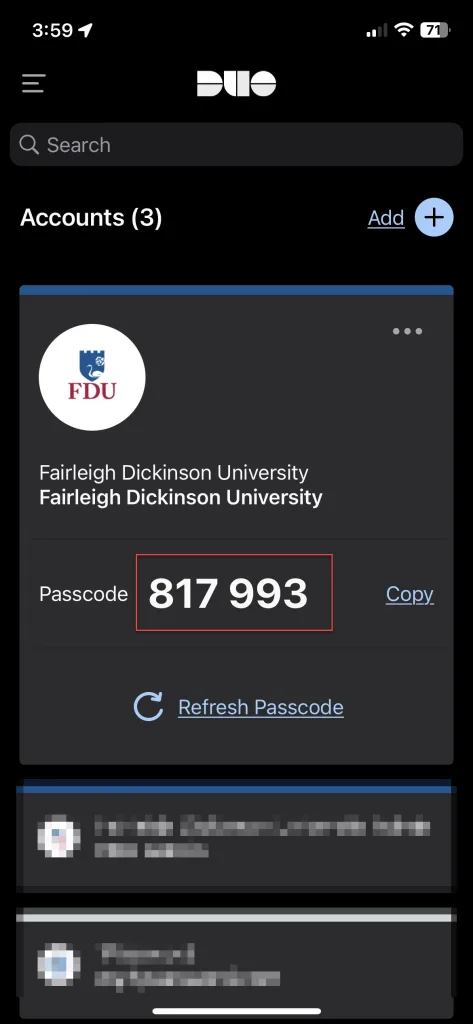
- Next, open the Duo app and click “Show”. This will provide a six-digit passcode which you can enter into the browser prompt
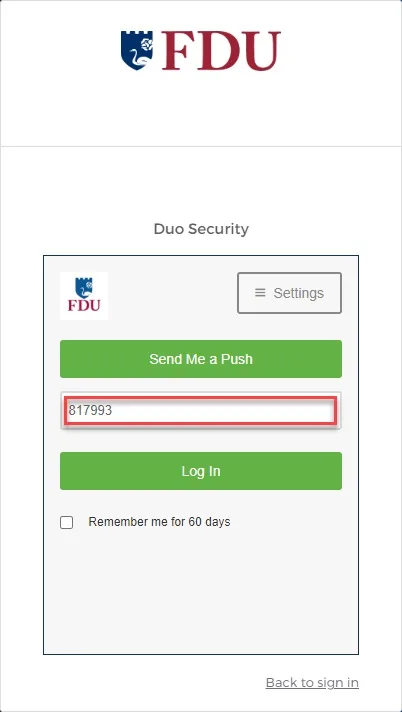
- Enter the six-digit passcode from the DUO app and click “Log in”