Zoom is a web-based video conferencing tool that allows users to meet online, with or without video. Zoom users can choose to record sessions, collaborate on projects, and share or annotate on one another’s screens, all with one easy-to-use platform. It offers quality video, audio, and a wireless screen-sharing performance across Windows, macOS, Linux, iOS, and Android. Zoom has a feature-rich, mobile app for both iOS and Android, allowing you to virtually connect from anywhere with an Internet connection.
Installing the Zoom Browser Client
- The web browser client will download automatically when you start or join your first Zoom meeting, and is also available for manual download.
- Once downloaded, you can go to the Zoom folder in your “START” menu and click “Start Zoom” on a PC or click on the “Zoom.us” app located in the applications folder on a Mac. Alternatively, you can open the application by searching for Zoom in your computers search bar.
Zoom Login
- Click on “Sign In” at the top-right corner of the page and type your FDU NetID credentials
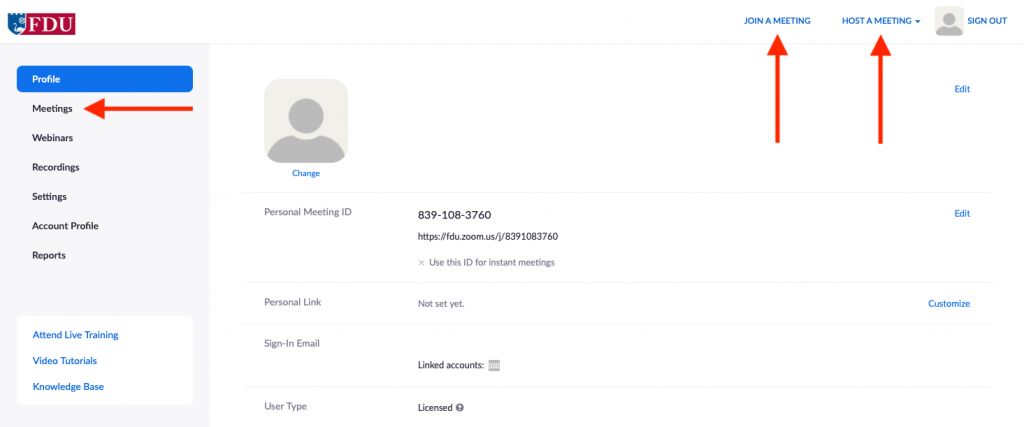
- After logging in, you will see your profile information.
- Joining a meeting – Click on the link and enter the meeting ID number provided by the host.
- Hosting a meeting – You can host a meeting with or without video. Click on the option that you need and the meeting should start automatically.
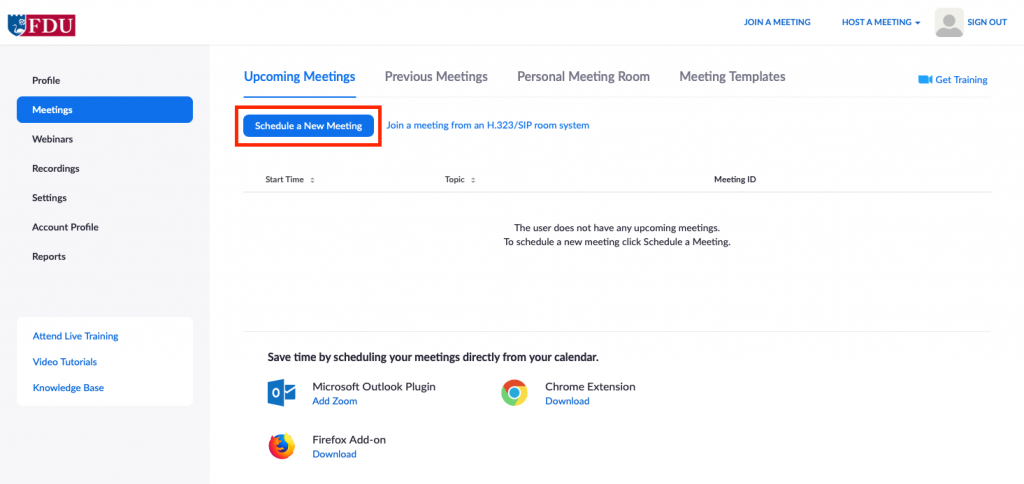
- Scheduling a meeting – Click on Meetings on the left navigation area and then click on Schedule a New Meeting.
close
Installing the Zoom Native Client
The following steps are for users who have already downloaded the Zoom desktop client or are planning to use the client. These instructions are NOT for users who will be using the web browser to participate in a Zoom meeting.
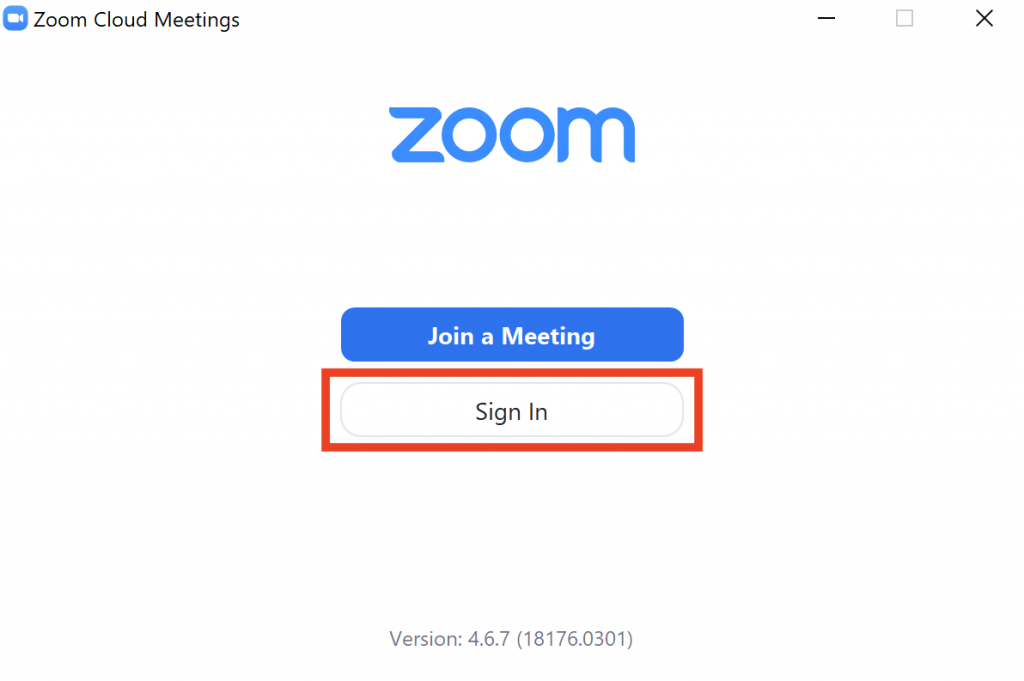
- Launch the Zoom Desktop client
- Click on “Sign In“
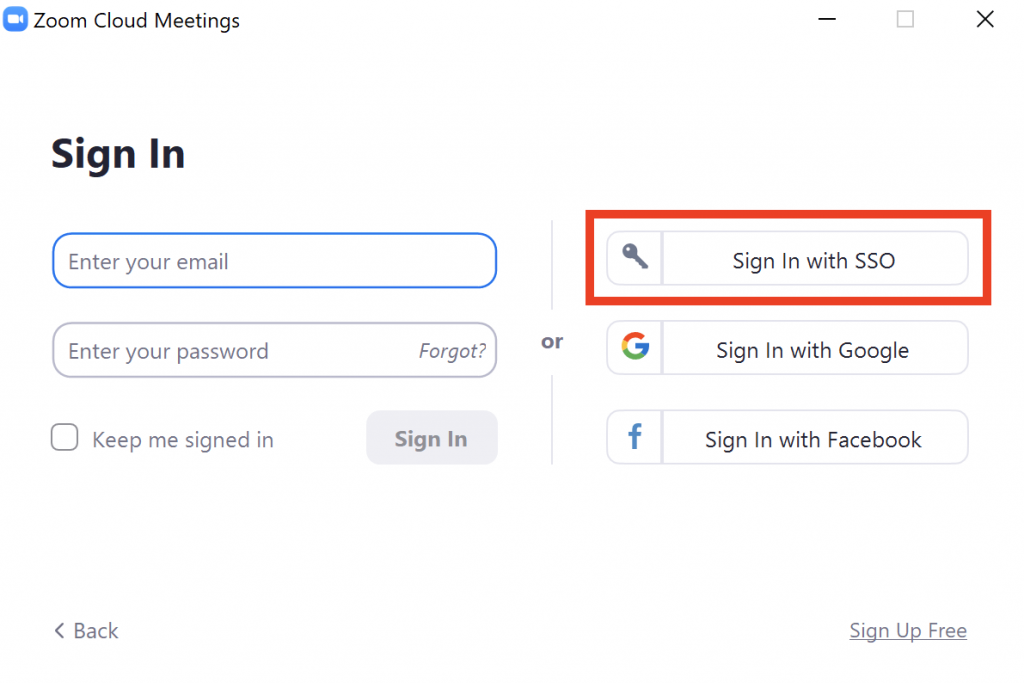
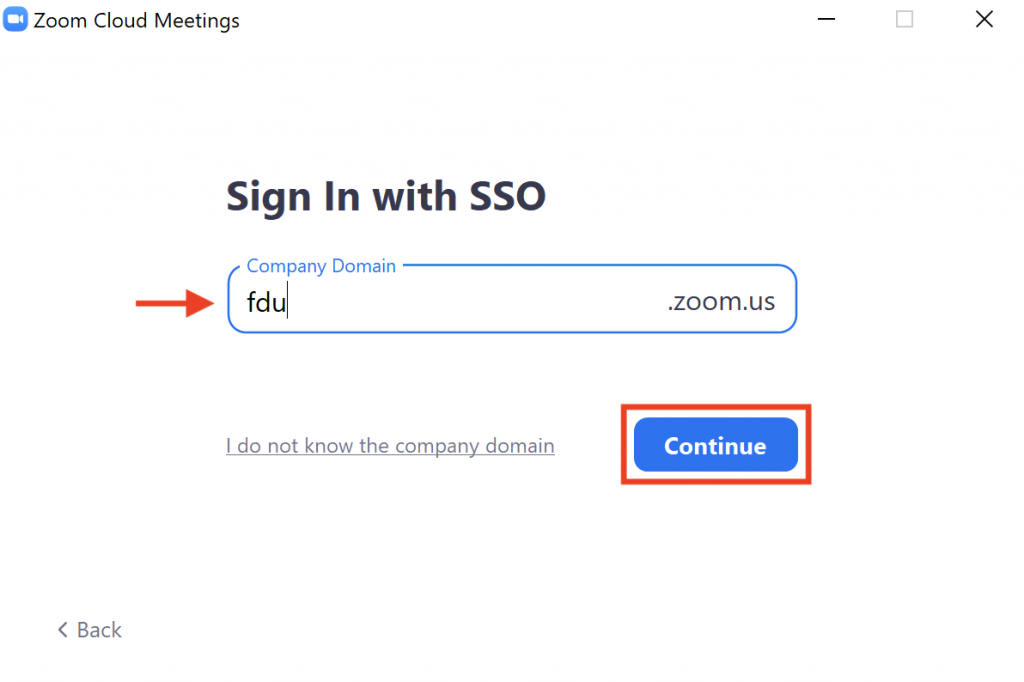
- Click “Sign In with the SSO“
- Type “FDU” in the company domain field and click “Continue“
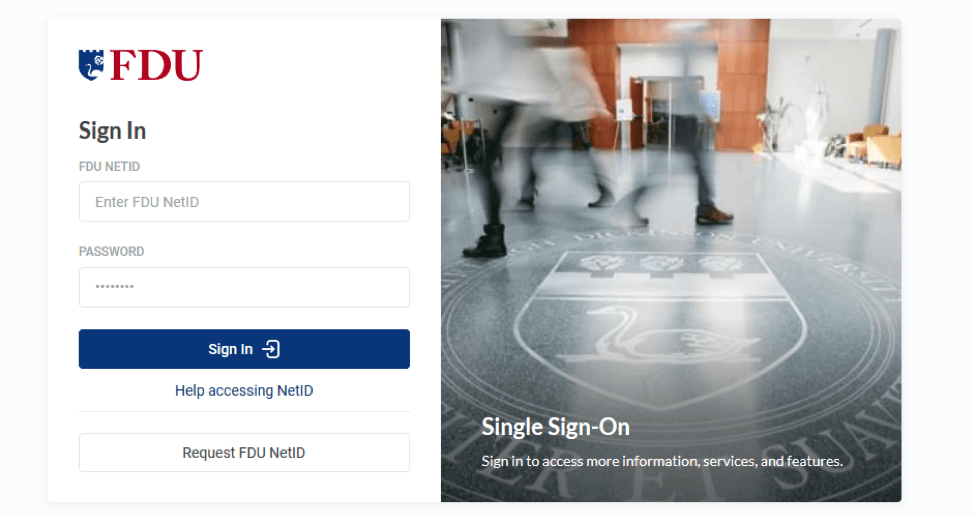
- You will be redirected to a page where you will be asked to login using your FDU NetID credentials
- After signing in click “Open Zoom Meetings“
close
Zoom Mobile Apps and Plugins Install Links
Outlook Plugin
Mobile Apps
close
Resources for Troubleshooting Issues with Zoom
The following troubleshooting guide gives support for all devices that Zoom supports.
General Troubleshooting


 Email
Email 

