icon

University Systems and Networking

University Systems and Networking (USAN) oversees the University's Data Centers and Wired / Wireless Network. We support both the Metropolitan and Florham campuses, as well as our international campuses in Vancouver and Wroxton. USAN enables the access, flow and storage of information within the University while defending our network against all threats and maintaining the integrity of our data.

icon Help Desk
background
Search Department Resources

Accept a New Certificate for FDU-Secure Wireless Network

Resources for:
icon Close

FDU-Secure uses current encryption standards to connect to the FDU wireless network via secure wireless traffic. This is an evolving technology and occasionally, one of the changes made by FDU IT requires us to issue a new certificate. When this occurs, you will need to accept the certificate using the process below.

Note

Your process may vary slightly based on the version of the Operating System that your device is using.

How to Accept the New Certificate for FDU-Secure Wireless

Windows
  1. Login to your Windows 10 computer
  2. Go to the bottom right taskbar > Click on the “Networks” icon:
    • From the Networks list, select: “FDU-Secure
    • Click “Connect
  3. At the “Continue connection?” prompt, click “Connect
  1. Open your browser and test your Internet connection
close
macOS
  1. Login to your Mac computer
  2. Go to top right menu bar > Click “Wi-Fi” icon:
    • From the Wi-Fi list, select: “FDU-Secure
    • Click “Join
  3. At the “Authenticating to network FDU-Secure” prompt, click “Continue
  1. Click “OK
  2. Open your browser and test your Internet connection
close
iOS
  1. Login your iOS device (eg. iPhone)
  2. Go to your device’s Settings App > Select “Wi-Fi” > Select “FDU-Secure” > Click “Forget This Network
  3. Tap the “Back” button and select “Wi-Fi “once again to reload the available Wi-Fi networks:
    • From the Wi-Fi list, select: “FDU-Secure
    • Enter your complete FDU NetID as in the examples below: “username@fdu.edu, username@student.fdu.edu, username@alumni.fdu.edu”
    • Enter your FDU NetID Password
    • Click Join
  1. At the “Certificate” prompt, tap “Trust
  1. Open your browser and test your Internet connection
close
Android
  1. Login to your Android Device
  2. Open the “Settings” Application > Select “Wi-Fi” > Select the Gear icon next to FDU-Secure
  1. Select “Forget This Network
  1. Select FDU-Secure from the Wi-Fi menu
  1. Select “EAP method” and select “PEAP” from the dropdown menu
  2. Enter your complete FDU NetID and password
  3. In the “CA Certificate” field, select “Use System Certificates
  4. In the Domain field, enter fdu.edu
  5. Enable “Auto Reconnect
  6. Tap “Connect
  1. Open your browser and test your Internet connection
close
Last Modified: Copy Link

Authorization, Authentication and Access Management Policy

Resources for:
icon Close

Revision Date: New Policy
Effective Date: 11/1/2023

Section A – University Systems and Applications

I. Purpose

The purpose of this policy is to establish information security standards for individuals receiving credentials to Fairleigh Dickinson University (“FDU” or “University”) resources and how those resources are accessed.

II. Scope and Applicability

This policy applies to all university system resources. All Users are responsible for adhering to this policy.

III. Definitions

Capitalized terms shall have the meaning ascribed to them herein and shall have the same meaning when used in the singular or plural form or any appropriate tense.

  1. Account: An established relationship between a User and a computer, network, or Information System which is assigned a credential such as a username and password.
  2. System Administrative Account: An Account with elevated privileges intended to be used only when performing management tasks, such as installing updates and application software, managing user accounts, and modifying operating system and application settings.
  3. Entitled Account: A user who has met the minimum requirement to be granted authorization to access electronic Fairleigh Dickinson University Resources.
  4. Authorized User: A User who has been granted authorization to access electronic Fairleigh Dickinson University Resources and is current and active in their privileges.
  5. Contractor or Vendor: A person or a company that undertakes a contract to provide materials or labor to perform a service.
  6. Employee: University staff faculty and adjunct, including nonexempt, exempt, and overseas staff and collegiate faculty.
  7. Multi-Factor Authentication (MFA): Authentication using two or more different factors to achieve authentication. Factors include something you know (e.g., PIN, password); something you have (e.g., cryptographic identification device, token); or something you are (e.g., biometric).
  8. Privileged Account: An Account that is authorized to perform security-relevant functions that an ordinary Account is not authorized to perform.
  9. Single Sign-On (SSO): An authentication process that allows an Authorized User to access multiple applications with one set of login credentials. SSO is a common procedure in enterprises, where a client accesses multiple resources connected to a local area network (LAN).
  10. User: A member of the University community, including but not limited to Staff and Faculty, and other individuals performing services on behalf of University, including Contractors, volunteers and other individuals who may have a need to access, use or control University Data.

IV. Authentication

  1. Any service, application or Information System, whether on-premise or in the cloud, that contains WISP protected information, especially PI or PHI; OR is accessed by a large group of employees (20 or more), must use Single Sign-on authentication.
    • If the service or application is being provisioned by a business unit, the unit must engage University Systems to work with the provider to enable SSO.
    • If SSO is not supported by the service or application, it will not be approved for use by the university.
    • See Section V for exceptions.
  2. Multi-factor authentication (MFA) must be used to access University resources.
  3. Passwords must be constructed in accordance with the minimum requirements as listed below:
    • Authorized User Account passwords must meet a minimum length of 8 characters.
    • Administrative and Privileged Account passwords must meet a minimum of 10 characters.
    • Passwords must contain a mix of alphanumeric characters. Passwords must not consist of all digits, all special characters, or all alphabetic characters.
    • Automated controls must ensure that passwords are changed at 90-day intervals for both general users and administrative-level accounts.
    • NetIDs associated with a password must be disabled for a period of time after 10 consecutive failed login attempts. A minimum of 30 minutes is required for the reset period.
    • Passwords must not be the same as the NetID.
    • Passwords must not be displayed on screens.
    • Users must not share passwords.
    • Initial passwords and password resets must be issued pre-expired forcing the user to change the password upon first use.
    • Password reuse must be limited by not allowing the last 10 passwords to be reused. In addition, the password must be at least 2 days old in order to be voluntarily changed.
    • Access will be disabled 90 days past the date that a password expired if not changed.
    • Access will be disabled after 30 days of creation if NetID is not claimed.
    • Expired passwords must be changed before any other system activity is allowed.
  4. Server Password Protocol
    • If, at any time, a member of the Community is granted permission to install a server, and access to that server is restricted via Login, and if that process is granted SSO exception through section VII., that system can not hold passwords in clear text. That system must use an approved irreversible cryptographic transform to protect its users’ passwords.

VI. Enforcement

  • This policy will be enforced by technical controls wherever feasible; otherwise, this policy will be enforced by OIRT under the direction of the CIO. All members of FDU’s faculty and staff have a responsibility to promptly report any known instances of noncompliance to AVP of University Systems and Networking or the Director of Systems.
  • Failure to comply with this policy can result in disciplinary action. Any such discipline shall be in accordance with processes and procedures of Human Resources and subject to any protections afforded under the University’s agreement with “Office & Professional Employees International Union”, the “Faculty Handbook”, and similar documents. Third parties who violate this Policy may have their relationship with the University terminated and their access to campus restricted.

VII. Exceptions

  • Exceptions to this policy should be submitted to the AVP, USAN for review. Approval of the Chief Information Officer (CIO) or Data Security Incident Response Team (DSIRT) may be required.

Last Modified: Copy Link

Availability and Use of Google Apps

Resources for:
icon Close

Effective Date: April 1st, 2021

I. Objective

Fairleigh Dickinson University (FDU) has adopted and standardized use of the Microsoft Office 365 Suite of products for University business. Some external entities, however, that conduct business with University employees utilize the Google Suite of products. This policy stipulates which Google applications will be made available to faculty and staff (not students) to enable collaboration with these external entities to conduct University business.

II. Purpose

Fairleigh Dickinson University (FDU) has adopted and standardized use of the Microsoft Office 365 Suite of products for University business. However, it is recognized that not all entities use Microsoft Office 365 as their platform and, from time to time, FDU faculty and staff may need the ability to collaborate with external entities that may be using the Google Suite of products. This policy stipulates which Google applications will be made available to faculty and staff to enable collaboration with these external entities.

  • Faculty and staff are reminded that in accordance with the University’s WISP policy, WISP protected data must not be stored or transmitted through any service, without the prior written authorization from the University Chief Information Security Officer.
  • As stated in the “Policy for Acceptable Use for Email”, Google Gmail is not available for use. All University business must be conducted through an FDU email account on Microsoft Office 365.
  • Faculty and staff may not use, or attempt to use, Google apps as a method of collaboration with students, faculty or staff. This FDU Policy on the Availability and use of Google Apps is expressly for the use with external entities only.
  • This Policy on the Availability and use of Google Apps applies only to use of Google applications by faculty and staff, and not FDU students.
  • Microsoft Office 365 is the only FDU supported platform for email and collaboration.
  • Google Apps are not supported by FDU IT personnel.

III. Scope

This policy applies to all FDU faculty and staff, wherever located throughout the world. Students will NOT have access to the fdu.edu Google Apps suite of products.

IV. Data Security Coordinator

The University has designated the Chief Information Security Officer, working together with the Data Security Information Response Team (DSIRT) and the USAN Director of Systems, to implement, supervise and maintain this Policy.

V. Internal Risks

To combat internal risks to the security, confidentiality, and integrity of any electronic, paper or other records, adherence to this Policy and the WISP will be strictly enforced.

VI. External Risks

To combat external internal risks to the security, confidentiality, and integrity of any electronic, paper or other records, adherence to this policy and the WISP will be strictly enforced.

VII. In Case of Questions

Questions regarding the availability of Google Apps can be directed to the Fairleigh Dickinson University Technical Assistance Center (UTAC). The UTAC is available 24×7.

Note:

Please note that the UTAC is not able to provide application support on the Google suite of products.

VIII. Other Applicable Policies

IX. Exceptions

Requests for exceptions to this Policy should be directed in writing to the Chief Information Security Officer via the Fairleigh Dickinson University Technical Assistance Center (UTAC).

X. Appendix

X1.1 Google Apps Available to Faculty and Staff

Note

These applications may only be used in collaboration with outside entities who use Google applications as their sole source of collaboration and request the use of any one of these application for official FDU business use. Any other use of these applications by FDU faculty and staff is a violation of this Policy.

Services Descriptions
AssignmentsAssignments brings together the capabilities of Google Docs, Drive and Search into a tool for collecting and grading student work.
CalendarGoogle Calendar is a web-based tool for personal scheduling and calendar sharing. It can be accessed through either a Web browser or through a third-party calendar client.
ClassroomGoogle Classroom enables teachers to create an online classroom area in which they can manage all the documents that their students need.
Drive and DocsGoogle Docs is an online word processor that lets you create and format text documents and collaborate with other people in real time. Google Drive on the web lets you store, access, and edit your files anywhere — on the web, on your hard drive, or on the go.
Google MeetGoogle Meet enables conversations with photos, emoji, group video calls for free. You can connect across computers, Android and Apple devices.
Google VaultVault is an information governance and eDiscovery tool for Google Workspace. With Vault, you can retain, hold, search, and export users’ Google Workspace data.
Groups for BusinessGoogle Groups for Business is an extended service available for G Suite users that allows you and other members in your organization to access the main Google Groups interface located at groups.google.com.
JamboardGoogle Jamboard is an online, collaborative whiteboarding application that lets you create, edit, and collaborate with other people in real time. Google Jamboard applications can be accessed on the Web, Android, and iOS.
KeepGoogle Keep is a note-taking service included as part of the free, web-based Google Docs Editors suite offered by Google
TasksGoogle Tasks is a simple to-do list—but with lists, subtasks, and mobile notifications, it has the basics you need to stay productive and keep track of the most important things you need to do.
Applied Digital SkillsApplied Digital Skills is a free, flexible video-based curriculum that prepares students for the growing number of jobs that require basic digital skills, such as email and spreadsheets.
Google Ad ManagerGoogle Ad Manager is an ad exchange platform introduced by Google on June 27, 2018. It combines the features of two former services from Google’s DoubleClick subsidiary, DoubleClick for Publishers and DoubleClick Ad Exchange.
Google AdsGoogle Ads is Google’s online advertising program. Through Google Ads, you can create online ads to reach people exactly when they’re interested in the products and services that you offer
Google AdSenseGoogle AdSense is an advertising program launched by Google in 2003 that allows website publishers to display targeted text, video, or image advertisements on website pages.
Google AlertsGoogle Alerts is a tool that allows you to track your chosen keywords and phrases so that you never miss another important conversation.
Google AnalyticsGoogle Analytics generates detailed statistics about a website’s traffic and traffic sources and measures conversions and sales
Google Cloud PlatformGoogle Cloud Platform is a suite of public cloud computing services offered by Google. The platform includes a range of hosted services for compute, storage and application development that run on Google hardware.
Google Cloud PrintGoogle Cloud Print is a web service offered by Google. Users associate printers with their Google Account.
Google Data StudioData Studio is Google’s reporting solution for power users who want to go beyond the data and dashboards of Google Analytics.
Google EarthGoogle Earth is the most photorealistic, digital version of our planet.
Google My MapsGoogle My Maps is your way to keep track of the places that matter to you.
Google PaymentsGoogle Pay (stylized as G Pay; formerly Pay with Google and Android Pay) is a digital wallet platform and online payment system developed by Google to power in-app and tap-to-pay purchases on mobile devices, enabling users to make payments with Android phones, tablets or watches.
Google PlayIn Google Play, the app description is split into two fields: Short Description, a limited 80 characters preview field and. the Full Description field, giving you space for an up to 4000 characters long app description.
Google Play ConsoleGoogle App Store
Google Search ConsoleThe Search Console lets you, as a webmaster, check on the status of the indexing Google does on your site, helping you to optimize your page visibility in Google search results. Get data, tools and diagnostics for a healthy, Google-friendly site.
Google TakeoutGoogle Takeout is a service that allows users of Google products, such as YouTube, Gmail, etc., to export their data to a downloadable ZIP file.
Managed Google PlayManaged Google Play Managed Google Play is a version of Google Play that’s optimized for enterprises.
Material GalleryMaterial Gallery is a collaborative tool for uploading design work, getting feedback, and tracking revisions – quickly and efficiently.
Partner DashPartner Dash is a service that hosts several applications used by Google’s partners to manage their relationships with us. Some of these applications are invite-only, while others are publicly available to anyone logged in with a Google Account.
Scholar ProfilesThe Google Scholar Profile search pane in Publish or Perish allows you to look up a Google Scholar profile and analyze the associated publication metrics.
Search And AssistantGoogle Assistant is Google’s artificial intelligence-powered voice assistant, which grew out of Google Now.
close
Last Modified: Copy Link

Blocking Peer to Peer Applications

Resources for:
icon Close

FDU’s Acceptable Use Policy prohibits running software that accepts incoming connections from other computers. Programs such as BitTorrent or other P2P file sharing hosting program all contain server components that allow others to connect to your computer and retrieve files off of your system. In addition to the legal implications of sharing copyrighted materials, file sharing software creates a security concern. Improper use of these programs could result in the compromise of your private files and may leave your system open to attacks from other computers.

To view FDU’s stance on this issue in its entirety, please view the document below.

Last Modified: Copy Link

Change and Sync NETID Password on Mac via Jamf Connect

Resources for:
icon Close

This article offers a detailed, step-by-step guide, on how to change your NETID password directly from your Mac using the Jamf Connect and how to synchronize this updated NETID password with your Mac’s user account password.

Changing and Syncing your NET ID Password on your Mac

  1. Click on the “FDU shield icon” located in the top right of your screen’s menu bar
  1. Select “Change Password at FDU Identity
  1. Sign in to the “FDU Identity Portal” that opens up
  1. Scroll to “Change My Password” section and enter your old password and new password in the appropriate fields. Then click the “Change My Password” button
  1. You will see the password successfully changed in the red bar when successful. Click “Done
  1. Enter your “FDU NetID” and “Password” in the corresponding fields. Click “Sign In”
  1. Enter your old password in the “Local Password” prompt and click “Sync” to synchronize the new password with your Mac’s login password

Note

You will need to reauthenticate your Office 365 apps and FDU-Secure.

Synchronizing NETID Password with your Mac Password

If you changed your NETID password outside of your FDU Mac, you will be prompted automatically to sync your password to your Mac’s password the next time you are connected to the internet. You will first need to log in to the machine using your old password and then proceed with the synchronization following the steps below.

    1. The following dialog box will appear once you are connected to the internet automatically. Enter your “FDU NetID” and “Password” and click “Sign In
    1. Enter your old password in the “Local Password” prompt and click the “Sync” button to synchronize the new password with your Mac’s login password

    Note

    You will need to re-authenticate to your Office 365 apps and FDU-Secure.

    Last Modified: Copy Link

    Cisco Duo FAQ’s

    Resources for:
    icon Close

    Two-factor Authentication

    Two-factor authentication also referred to as multi-factor authentication, provides an additional layer of security when logging in to a website. Two-factor authentication is becoming the standard in cybersecurity. Google, Apple, and other services all have their two-factor authentication methods. In short, passwords are no longer sufficient in protecting our sensitive data; we’ve got to add another layer of security to our accounts.

    Common FAQ’s for Duo Authentication

      • DUO Push – if you have the DUO Mobile App installed on your smartphone or tablet, you can receive a push notification. From the app, you can approve or deny the login attempt.
      • Passcodes via DUO Mobile App – If you have the DUO Mobile app installed, you can receive a single passcode by tapping the FDU logo in the mobile app. This code must be used immediately.
      • Passcodes via SMS (Faculty/Staff Only) – users can receive a one-time use code via text message. To get you a one-time code, click Enter Passcode, then click on the blue button “Text me new codes.”  These codes do not expire, and they are valid until used.    You do not have to have a smartphone for this option.
      • Phone Call
      • (Faculty/Staff Only) – you can receive a phone call on your mobile phone or landline phone. The call will give instructions on approving or denying the login attempt.
    • DUO is required for all FDU Staff, Faculty, and Students.

    • If you opt-out of the DUO Mobile Application push notifications, there are a variety of passcode options to utilize as your second verification method.

      • Passcodes via DUO Mobile App – If you have the DUO Mobile app installed, you can receive a single passcode by tapping the FDU logo in the mobile app. This code must be used immediately.


      • Passcodes via SMS (Faculty/Staff Only) – users can receive a one-time use code via text message. To get you one-time code click Enter Passcode, then click on the blue button “Text me new codes.”These codes do not expire, and they are valid until used. You do not have to have a smartphone for this option.


    • Selecting this option will allow you to bypass DUO authentication for the next 60 days. This only works if cookies are enabled, and you are logging in from the same computer and browser. You will still be prompted to verify once – with your username and password. You will not be able to access your settings on that particular browser during the 60 days. Please note that if you have tools or policies running that regularly delete or clean cookies, the remember me feature will not work. If you do need to access your settings (perhaps to add another device), just try another browser or visit the FDU Self-Service Portal. Remember me will not work if your browser is set to private browsing mode.

    • The remember me feature relies on browser cookies. For remember me to work, your Internet browser must allow cookies to be stored. Visit your browser content settings to ensure cookies are being stored. Some departments on campus do not allow cookies to be stored. If the remember me feature does not work on your browser, check with desktop support in your area.

    • If you do not have your device with you, you can obtain a batch of temporary passcodes. To obtain a temporary passcode, call the Fairleigh Dickinson University Technical Assistance Center (UTAC).  Each of the passcodes can only be used once and will expire in 7 days.

      NOTE: If you have lost your device, please report it to the Fairleigh Dickinson University Technical Assistance Center (UTAC).  We want to ensure someone else does not maliciously authenticate your account with your device.

    • DUO is available to all faculty,staff, and Students. At this time, DUO is not available to FDU retirees, past employees, or alumni.

    • Yes, the passcode option on the DUO app does not require WiFi or cellular connectivity, it even works on airplane mode. To use this option, visit the DUO app on your smartphone, and tap the key icon to obtain a passcode. Enter the passcode into the DUO prompt when logging into any website that requires DUO authentication.

    • DUO Authentication is required by any application the utilizes the university Single Sign-On (SSO) service.  Examples of some websites that require DUO authentication are listed below.

      • WebAdvisior
      • WebCampus
      • Office365 (Office365.fdu.edu)
      • Blackboard
      • Zoom
    • You may have trouble receiving push requests if there are network issues between your phone and Duo’s service. Many phones have difficulty determining whether to use the Wi-Fi or cellular data channel when checking for push requests and simply turning the phone to airplane mode and back to normal operating mode again often resolves these types of issues, if there is a reliable internet connection available. Similarly, the issue may be resolved by turning off the Wi-Fi connection on your device and using the cellular data connection.

      Check the time and date on your phone and make sure they are correct. If the date and time on your phone are manually set, try changing your device’s configuration to sync date and time automatically with the network.

      iOS users can run a troubleshooting tool from within Duo Mobile version 3.32.0 or later. To run the tool:

      1. Open the Duo Mobile app on your iOS device and tap the Edit button in the top left of the accounts list screen, then tap the name of the account for you aren’t receiving push requests.
      2. Next, tap the Get Started button in the “Missing Notifications?” section of the “Account Details” screen.
      3. Duo Mobile performs the test. If any step fails, you’ll receive further troubleshooting suggestions. After taking the suggested actions, press “Run test again” to retry.

      The steps that Push Troubleshooting performs automatically are as follows:

      • Check device settings.
      • Check internet connectivity.
      • Check that the device can contact Duo’s cloud service.
      • Attempts to send a test Duo Push notification.

      Should none of these actions help, see the Duo Knowledge Base for additional iOS and Android troubleshooting steps.

      If you can’t get Duo Push working on your own, you can log in with a passcode generated by the Duo Mobile app and send a new activation link to your phone.

      If you’ve tried the suggestions here but can’t get Duo Push working or reactivate your device yourself, please contact the Fairleigh Dickinson University Technical Assistance Center (UTAC).

    • Press the red “X to deny access to your account, then promptly change your FDU NetID password.

    • Yes! Visit the app store on your smartphone to download DUO Mobile.

      DUO for iOS >

      DUO for Android >

      NOTE: Google Play Services are required to receive push notifications on Android. Users without Google Play Services installed will have to “fetch” by swiping down in the DUO Mobile app.

      1. If your phone number has not changed, login to FDU Self-Service Portal then choose the “Call my Phone” option.
      2. Choose your device from the list, and then click “Device Options” next to your phone.
      3. Next click the “Reactivate Duo Mobile” button (you will need to install the Duo app on your phone to proceed). Then follow the instructions to activate DUO Mobile on your new device.

      If you have a new phone number, you will first need to obtain a temporary passcode (see the ‘What are Passcodes?’ section above).

      1. Login to FDU Self-Service Portal and enter the temporary passcode.
      2. Click on “Add a new device.”
      3. Once you complete adding your new device, please delete the device you are replacing.
    • Yes, you can add devices by visiting your DUO settings. When you see the DUO prompt with the three notification options, click “Settings” at the top right.

      NOTE: If you are using the Remember Me for 60 days feature, you will need to visit FDU Self-Service Portal access your settings.)

      After you click Settings, click “Add a New Device“. You can register smartphones, cell phones, tablets, and landline phones.

    • The DUO smartphone application serves only to provide two-factor authentication. It does not access any personal information on your device, nor does it track your location. Learn more about DUO’s commitment to privacy on its website.

    • For additional support, please visit the Fairleigh Dickinson University Technical Assistance Center (UTAC).

    Last Modified: Copy Link

    Claim or Create an FDU NetID Account

    Resources for:
    icon Close

    Welcome to Fairleigh Dickinson University. As a new member of our campus community, one of your first priorities will be gaining access to FDU NetID. With an FDU NetID, you will have access to a variety of IT resources, including Office365. Depending on your role within the University, you will either be creating an account or claiming an account that has already been created for you. Please follow the process below which applies to you.

    New Student through Welcome Email (US Students)

    If you are a new student of our New Jersey campuses and you have received a Welcome email from fdu-it@fdu.edu, please visit the link below


    New Student

    If you are a new student at FDU Vancouver or if you are a New Jersey based student that has not received a Welcome Email, please visit the link below


    New Faculty, Staff Member Temporary Employee, or On-Campus Contractor

    If you are a new Faculty, adjunct Faculty, Staff member, temporary employee, or contractor who works on campus and requires a NetID, please visit the link below


    All Others

    If you are entitled to an FDU NetID account and either do not fall under any of the categories above or attempted to claim their NetID and received a message that your NetID has not been created, please visit the link below

    Last Modified: Copy Link

    Code42 Tutorial

    Resources for:
    icon Close

    Code42 is a backup agent that will back up all data on a university device under the primary owner’s profile. The backup sets can be used for restoring data to a machine, whether it has been reformatted, replaced, or compromised. This document will outline the steps needed to install, activate, and restore data to a new or existing device.

    index

    Index

    About Code 42

    Code42 Policy

    Code42 is required on all University provided desktops and laptops to backup all University Business data to prevent data loss.

    Who Can use Code42?

    Code42 is presently licensed for full-time faculty and full-time staff only. The University mandates Code42 for proper data security practices. If a user has personal data that they wish to exclude from being backed up, a folder labeled “Personal Documents” can be found and utilized in your “Documents” folder. This folder and its contents will be ignored by Code42 when your system is being backed up.

    Personal Documents folder locations:

    Windows PCC:\users\username\Documents\Personal Documents\
    macOS/users/username/documents/Personal Documents/

    Tip

    If the Personal Documents folder does not exist in your Documents folder, you can manually create it and the folder will be automatically ignored by Code42.

    Is My Data Secure?

    Code42 uses AES-256 encryption is used when storing your backups and can only be accessed by the Code42 account owner and administrators.

    What is Backed Up?

    All data found in a user profile will be backed up by Code42.

    Location of User Profile:

    Windows PCC:\users\UserName\
    macOS/users/username/

    Warning Warning

    Any data not stored in the user profile will NOT be backed up by Code42. It is highly encouraged to store university business data within your user profile.

    How to Install on a Windows PC

    To install Code42 on your Windows PC, please follow the instructions below.

    Note

    Code42 is being automatically deployed to all systems owned by Faileigh Dickinson University.

    Before Installing Code42, you must be logged in as the owner of the machine using your NetID Credentials.

    1. Open FDU Self Service Portal for Software on your University PC
    2. Click on Code42 Backup and then click “Install” on the right-hand side

    Note

    It could take several minutes for the client to make the first connection and start the first backup.

    The entire process will take approximately 5-7 minutes, depending on your internet speed. Once Code42 is installed, your account is automatically provisioned in the Code42 system, and your backup will begin shortly.

    How to Install on macOS

    To install Code42 on your macOS device, please follow the instructions below.

    Note

    Code42 is being automatically deployed to all systems owned by Faileigh Dickinson University.

    1. Locate the FDU Self Service Portal in your applications folder or locating the icon on your dock
    2. Locate Code42 Backup and click “Enroll”
    1. After the package installs, you will be prompted to enter your FDU email address and then click “OK

    Note

    It could take several minutes for the client to make the first connection and start the first backup.

    The entire process will take approximately 5-7 minutes, depending on your internet speed. Once Code42 is installed, your account is automatically provisioned in the Code42 system, and your backup will begin shortly.

    How to Replace or Add a Second Device

    This process is used when someone will be assigned a second device and wishes to have it backed up or if the Code42 needs to be re-installed on the same device. Because an account already exists, it cannot be provisioned automatically. It must be manually setup either to replace an existing device or create a new backup set on the second computer.

    Note

    In order to proceed, code42 must be installed prior to continuing, please refer back to the Install instructions for your operating system from the Code42 User Guide. A link is found at the bottom of this page.

    Tip

    A backup set is Code42’s way of describing the backup configuration and what files are being backed up.

    1. Click on the Code42 app in the system tray (PC) or Menu bar (macOS) and then click “Setup Device
    1. If prompted, log in to the FDU NetID Portal and proceed through the FDU single sign-on process
    2. Click “Replace Existing
    This image has an empty alt attribute; its file name is Code42-How-to-Add-a-Second-Device-or-Replace-an-Exisiting-Device-Figure-2.png
    1. Click “Start” to continue with the replace existing device process
    This image has an empty alt attribute; its file name is Code42-How-to-Add-a-Second-Device-or-Replace-an-Exisiting-Device-Figure-3.png
    1. Select the device from the list you are replacing and click “Continue
    This image has an empty alt attribute; its file name is Code42-How-to-Add-a-Second-Device-or-Replace-an-Exisiting-Device-Figure-4.png
    1. Click “Select Files” on the following window
    This image has an empty alt attribute; its file name is Code42-How-to-Add-a-Second-Device-or-Replace-an-Exisiting-Device-Figure-5.png
    1. Select and Choose which files you wish to replace by placing a checkmark next to each. When finished, click “Restore Files
    This image has an empty alt attribute; its file name is Code42-How-to-Add-a-Second-Device-or-Replace-an-Exisiting-Device-Figure-6.png
    1. The next window will allow you to select how you wish to restore your files. Make your selections and click “Go
    This image has an empty alt attribute; its file name is Code42-How-to-Add-a-Second-Device-or-Replace-an-Exisiting-Device-Figure-7.png
    1. The next window will display download progress for the restore process. You can continue forward by clicking “Continue” at the bottom
    This image has an empty alt attribute; its file name is Code42-How-to-Add-a-Second-Device-or-Replace-an-Exisiting-Device-Figure-8.png
    1. The next window Downloads the Files to your device. When the transfer is completed, click “Next
    This image has an empty alt attribute; its file name is Code42-How-to-Add-a-Second-Device-or-Replace-an-Exisiting-Device-Figure-9.png

    Tip

    You can close this window and continue working or you can click transfer more files and repeat the steps for additional files. This will extend the time it needs to restore.

    1. Your Transfer is now complete, click “Finish
    This image has an empty alt attribute; its file name is Code42-How-to-Add-a-Second-Device-or-Replace-an-Exisiting-Device-Figure-10.png

    Verifying a Backup Instructions

    If you are unsure if you have Code42 installed and backing up your system, this quick guide will help give you some comfort.

    1. Click on the Code42 icon from the system tray on Windows and the menu bar on macOS
    This image has an empty alt attribute; its file name is Code-42-Tray-Icon.svg

    Code42 Icon

    1. The Progress will be displayed like in the Figure below
    This image has an empty alt attribute; its file name is Code42-Verifying-Backup-Progress-Figure-2.png

    Note

    Depending on your backup size, this could take anywhere from a few minutes to a few days. Code42 will continue to run and backup in the background. After the first successful backup, incremental backups will occur.

    How to Manage Backups

    Code42 allows you to manage your backup sets.  If you want to review your backup set or request assistance, please contact the Fairleigh Dickinson University Technical Assistance Center (UTAC) to initiate a service request.

    How to Restore Files

    Accidentally deleted or unable to find a file? Code42 can help. Please follow the following guidelines in restoring lost or previous versions of files.

    1. Click the Code42 System Tray or macOS menu bar Icon
    This image has an empty alt attribute; its file name is Code-42-Tray-Icon.svg

    Code42 Icon

    1. Left-click on the gear symbol and left-click on “Open Code42….
    1. If prompted, log in to the FDU Single sign-on Portal and proceed through the FDU DUO Multifactor authentication procedures
    2. Click “Restore Files
    3. Select the device you wish to restore from
    This image has an empty alt attribute; its file name is Code42-How-to-Restore-Files-Figure-2.png

    Note

    If you have more than one backup device, please select the device from where you want to restore the file from.

    1. You can select a date range from when you wish to restore from on the right-hand side
    2. Navigate to the folder(s) and/or file(s) you wish to restore and place a check next to each one
    3. Click “Restore Files
    This image has an empty alt attribute; its file name is Code42-How-to-Restore-Files-Figure-3.png
    1. Select how Code42 will restore your files. Click “Go” when finished
    This image has an empty alt attribute; its file name is Code42-How-to-Restore-Files-Figure-4.png

    Note

    Above are the recommended options for restoring files, this will help you find them more easily.

    The time it takes to restore your files will depend on how much data is being restored, available system resources, and available bandwidth.

    How to Add Backup Sets

    Using Code42 you can create backup sets that will back up your data to additional devices utilizing a schedule. This is useful to have immediate access to critical files in the event of data loss.

    This guide is only needed if you wish to have a local backup of your data.

    Note

    If you schedule multiple backup sets to run at specific times and the backup sets go to the same destination, ensure that these times do not overlap. This ensures good backup performance.

    1. Click the Code42 System Tray or macOS menu bar Icon
    This image has an empty alt attribute; its file name is Code-42-Tray-Icon.svg

    Code42 Icon

    1. Left-click on the gear symbol and left-click on “Open Code42….
    This image has an empty alt attribute; its file name is Code-42-How-to-Add-Backup-Sets-Figure-1.png
    1. If prompted, log in to the FDU Single Sign-on Portal and proceed through the FDU DUO Multi-factor authentication procedures
    2. From the Code42 console window, click the “Dropdown Arrow” symbol next to your device name to drop down a menu, then click “Add Backup Set…
    This image has an empty alt attribute; its file name is Code42-How-to-Add-Backup-Sets-Figure-2.png
    • The next window will be the Add Backup Set configuration window.
    This image has an empty alt attribute; its file name is Code42-How-to-Add-Backup-Sets-Figure-3.png

    Note

    The “Add Set” button will be un-clickable until it is completely configured.

    1. Click “Rename” to label your backup set
    2. Changing Selected Files, click “Change”, and select the files and folders you wish to backup to a local destination
    This image has an empty alt attribute; its file name is Code42-How-to-Add-Backup-Sets-Figure-4.png
    1. When finished click “Save
    2. Click “Change” to set your destination for your backup
    This image has an empty alt attribute; its file name is Code42-How-to-Add-Backup-Sets-Figure-5.png
    1. Select your destination by clicking “Add Local Destination (usually an external hard drive) and click “Save
    This image has an empty alt attribute; its file name is Code42-How-to-Add-Backup-Sets-Figure-6.png
    1. Click “Add Set” to finalize the setup and start backing up to a local location
    This image has an empty alt attribute; its file name is Code42-How-to-Add-Backup-Sets-Figure-7.png

    Your new back upset is finished and will begin backing up as configured.

    This image has an empty alt attribute; its file name is Code42-How-to-Add-Backup-Sets-Figure-8.png

    Backup Alert Email Notifications

    Code42 will send users an email alert notifying of any incomplete backups of their devices.

    • The Code42 email alert will be sent from Code42 for Enterprise <noreply@code42.com>
    • The Subject line of the email will be labeled with: Critical: [Name of Device] not backed up

    Backup Alert

    You will receive an alert when your computer hasn’t backed up to Code42 for 5 calendar days. The email will look like the example below:

    Code42 Backup Alert Email Notification

    What to do if you get a backup alert

    After receiving a Code42 backup alert email, you should locate the device the email specifies in need of backup. The Code42 device name will be listed in the Subject: line and Computer Name: line of the Code42 backup alert email. To locate the name of a Code42 device, left-click the Code42 “C” symbol icon in the Windows System Tray, also referred to as the notification area.

    Tip

    The Windows System Tray or notification area is usually located on the bottom right of the Windows taskbar, next to the displayed digital clock.

    For macOS users left-click Code42 “C” symbol icon on the macOS icon menu bar. The Code42 device name will be displayed in the console. Ensure the Code42 application displays the same name as the Code42 backup alert email you received.

    This image has an empty alt attribute; its file name is Code-42-Tray-Icon.svg

    Code42 “C” symbol icon

    Code42 Device Name

    After locating the correct specified device stated in the Code42 backup alert email, force a backup of the device by performing the following:

    1. Left-click the “Code42” System Tray or macOS menu bar Icon
    This image has an empty alt attribute; its file name is Code-42-Tray-Icon.svg

    Code42 Icon

    1. Left-click “Run backup now

    Note

    The backup may take some time to complete. This depends on the length of time since Code42’s last complete backup and the amount of new data needed to be backed up.

    Getting Support

    For additional support, contact the Fairleigh Dickinson University Technical Assistance Center (UTAC) to initiate a service request.

    Last Modified: Copy Link

    Confidentiality Agreement and Security Policy

    Resources for:
    icon Close

    Effective Date: 11/07/2023
    Last Revision: 11/01/2013

    Select employees of Fairleigh Dickinson University may be required to engage with confidential University data. The FDU Confidentiality Agreement and Security Policy defines your obligations under Federal and State guidelines to preserve the security and confidentiality of this information.

    Confidentiality Agreement and Security Policy

    Fairleigh Dickinson University regards the security and confidentiality of data and information to be of utmost importance. Each individual granted access to electronic and/or hard copy data holds a position of trust and must preserve the security and confidentiality of the information to which he/she is granted access to. Therefore, it is the intent of this policy to ensure that University data, in any format, is not divulged outside of Fairleigh Dickinson University without explicit approval to do so by an Associate Vice-President of the University or higher who has responsibility for the data in question. As such, the University requires all users of data to follow the procedures outlined below:

    Policy on Confidential Information

    Users of University data are required to abide by all applicable Federal and State guidelines and University policies regarding confidentiality of data, including the Family Education Rights and Privacy Act (“FERPA”) and, as applicable, The Health Insurance Portability and Accountability Act of 1996 (“HIPAA”). For more information, see: FDU’s General Confidentiality Policy, FERPA and HIPAA

    Confidential Information shall be defined as:

    • regarding student, faculty or staff: any personally-identifiable records, financial records (including social security and credit card numbers), health records; contracts, research data; alumni and donor records; personnel records other than an individual’s own personnel record; 
    • regarding the University: University financial data; computer and system passwords, University issued PINS, University proprietary information/data; and 
    • any other information for which access, use, or disclosure is not authorized by: 1) federal, state, or local law; or 2) University policy.

    The individual receiving the Confidential Information shall have no obligation under this Policy with respect to Confidential Information which:

    • is or becomes publicly available without breach of this Policy by the recipient;
    • is rightfully received by the recipient without obligations of confidentiality; or
    • is developed by the recipient without breach of this Policy; provided, however, such Confidential Information shall not be disclosed until thirty (30) days after written notice of intent to disclose is given to the University officer who has responsibility for the data in question, along with the asserted grounds for disclosure;
    • is disclosed in accordance with any “whistle blower” action as provided in the U.S. False Claims Act, the New Jersey Conscientious Employee Protection Act (“NJCEPA”), or similar legislation.  (Brief overview of the NJCEPA is available here.

    Any individual with authorized access to the Confidential Information is given access solely for the business of the University and must not divulge the Confidential Information outside of the University except for University business requirements approved by the President of the University or the division head responsible for the data in question. Specifically, with respect to Confidential Information, individuals must:

    1. Access Confidential Information solely in order to perform his/her job responsibilities.
    2. Not seek personal benefit or permit others to benefit personally from any Confidential Information that has come to them throughout their work assignments.
    3. Not make or permit unauthorized use of any Confidential Information in the University’s information system or other records.
    4. Not enter, change, delete or add data to any information system or files outside of the scope of their job responsibilities.
    5. Not include or cause to be included in any record or report, a false, inaccurate or misleading entry known to the user as such.
    6. Not alter or delete or cause to be altered or deleted from any records, report or information system, a true and correct entry.
    7. Not release Confidential Information other than what is required in completion of job responsibilities which is consistent with this Policy.
    8. Not exhibit or divulge the contents of any record, file or information system to any person unless it is necessary for the completion of their job responsibilities.

    It is the individual’s responsibility to immediately report, as outlined under “Information Security Breach and Violation Reporting” at the end of this Policy, if the individual has violated this Policy. Additionally, given the potential harm that the University may suffer with the release of any Confidential Information, all employees are strongly encouraged to report any suspected violation of this policy or any other action, which violates confidentiality of data, as outlined at the end of this policy.

    Security Measures and Procedures

    All users of University information systems, including Datatel, MS File shares and FDU Office 365 email accounts, are supplied with an individual user account to access the data or systems necessary for the completion of their job responsibilities. Users of the University information systems are required to follow the procedures outlined below:

    1. All transactions, processed by a user ID and password, or PIN, are the responsibility of the person to whom the user ID was assigned. The user’s ID, password, and PIN must remain confidential and must not be shared with anyone.
      • Using someone else’s user ID, password or PIN is a violation of policy, no matter how it was obtained.
      • Your user ID, password or PIN provides access to information that has been granted specifically to you.  To reduce the risk of shared passwords – remember not to post your password or PIN on or near your workstation or share your password or PIN with anyone.
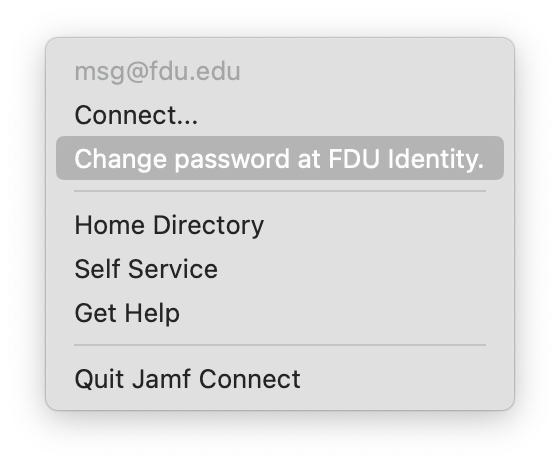
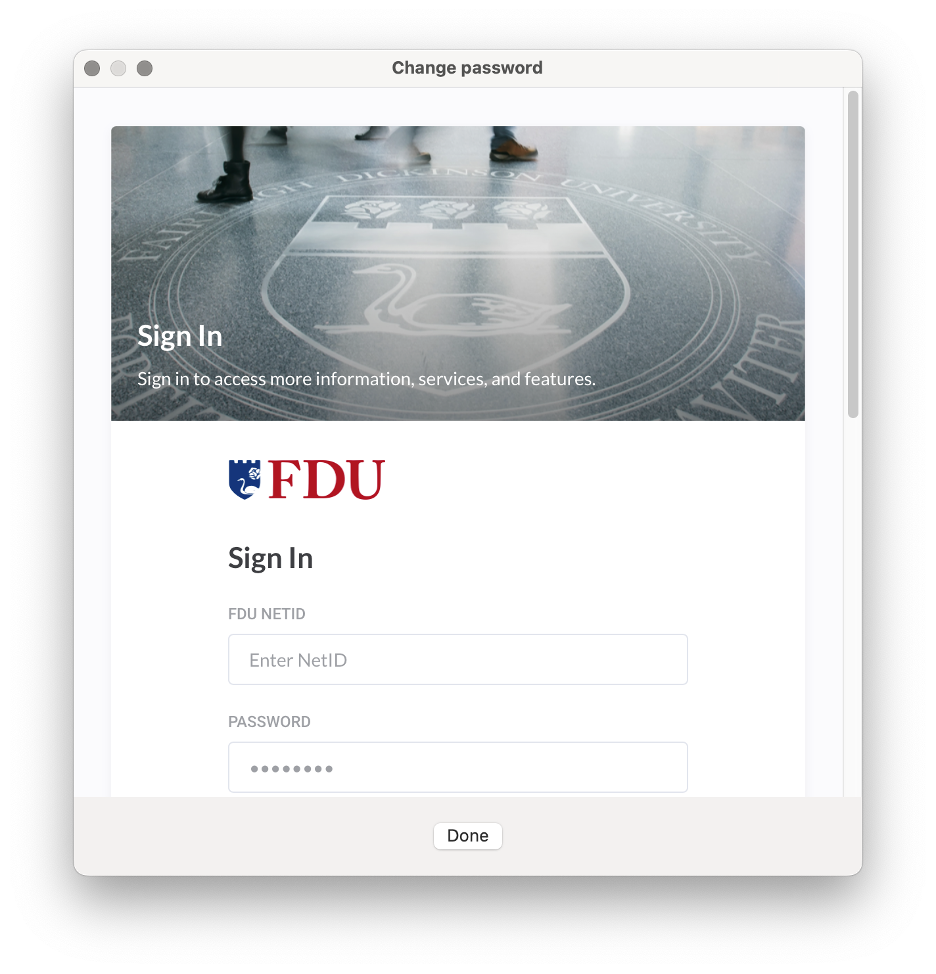
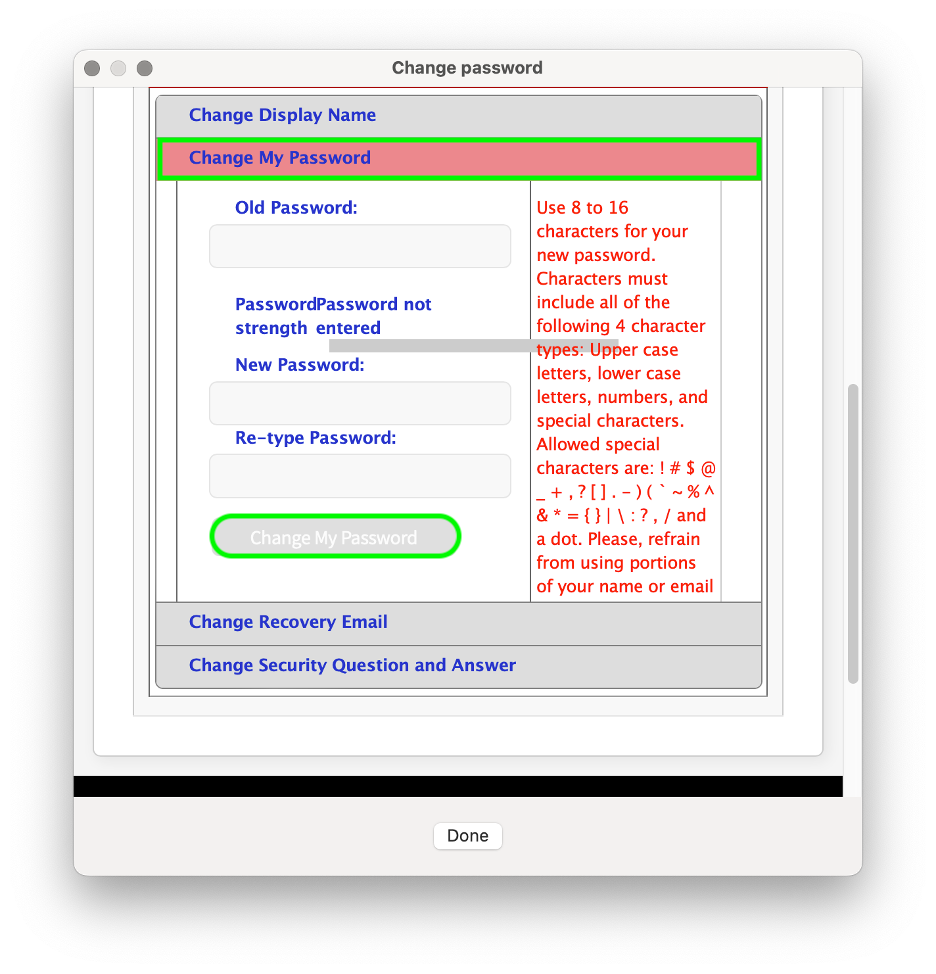
      • It is your responsibility to change your password immediately if you believe someone else has obtained it.

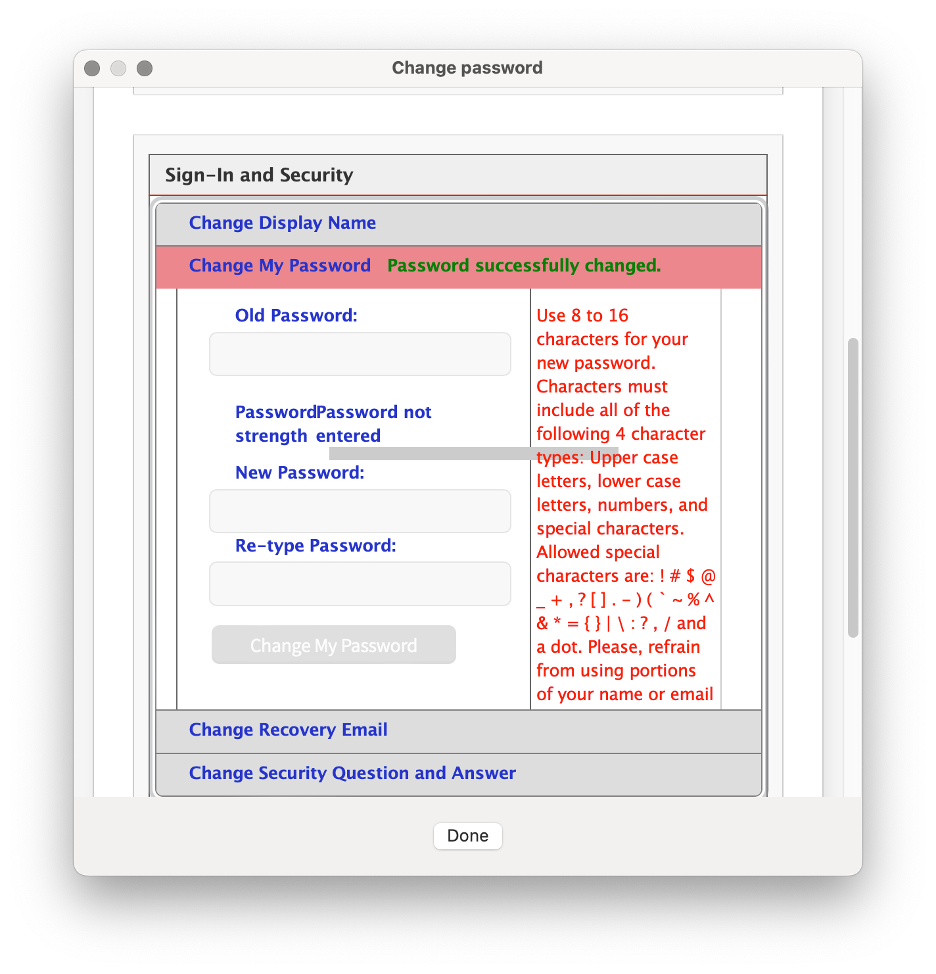
    NOTE: If you need your Password or PIN changed, please contact the Fairleigh Dickinson University Technical Assistance Center (UTAC) immediately.

    1. Access to any student or employee information (in any format) is to be determined based on specific job requirements. The appropriate Department Chair, School Director, Department Director/Manager, Dean, Provost, and/or Vice President is responsible for ensuring that access is granted only to authorized individuals, based on their job responsibilities. Written authorization must be received by the Computer Center prior to granting system access.
      • You are prohibited from viewing or accessing additional information (in any format) unless you have been authorized to do so.  Any access obtained without written authorization is considered unauthorized access.
      • In order to prevent unauthorized use, the user shall log off of all applications that provide access to confidential information, or lock their computer when leaving their workstation. This is especially important during breaks and lunch. Unless there is a specific business need, all workstations should be shut down at the end of the workday.

    NOTE:  If you require assistance in establishing your workstation password, please access the screensaver documentation or contact the Fairleigh Dickinson University Technical Assistance Center (UTAC).

    1. If you have any reason to believe your password or PIN has been compromised or revealed inadvertently, you should change your password and immediately notify one of the individuals as outlined under “Information Security Breach and Violation Reporting” at the end of this policy.

    NOTE: All University’s computer system will periodically prompt you to change your password.

    1. Upon termination or transfer of an employee, Human Resources will notify University Systems and Security, who in turn will notify the appropriate areas in the Computer Center.
    1. Generally, students, temporary employees and consultants should not have access to the University record system. Written approval by the Department Chair, School Director, Department Director/Manager, Dean, Provost, and/or Vice President in charge of the respective area is required if it is determined that access is required. The student, temporary employee or consultant is to be held to the same standards as all University employees, and must be made aware of their responsibilities to protect student and employee privacy rights and data integrity. Written authorization must be received by the Computer Center prior to granting system access.
    1. You agree to properly secure and dispose of any outputs or files you create in a manner that fully protects the Confidential Information.

    Additionally, I understand that if granted access to process transactions via Datatel data entry screens, any information I enter or change will be effective immediately. Accordingly, I understand that I am responsible for any changes made using my ID.

    I understand that my access to University data is for the sole purpose of carrying out my job responsibilities and Confidential Information is not to be divulged outside of The University, except as previously stated. Breach of confidentiality, including aiding, abetting, or acting in conspiracy with any other person to violate any part of this policy, may result in sanctions, civil or criminal prosecution and penalties, employment and/or University disciplinary action, and could lead to dismissal, suspension or revocation of all access privileges. I understand that misuse of University data and any violation of this policy or the FERPA, HIPAA or GLB policies are grounds for disciplinary action, up to and including dismissal. This Agreement shall not abridge nor supersede any rights afforded faculty members under the Faculty Handbook.

    Information Security Breach and/or Policy Violation Reporting

    If you suspect an Information Security Data Breach or a violation of this policy, report such an event to your department chair or staff supervisor and send an immediate email to violation@fdu.edu. If you do not have immediate access to email, contact the Fairleigh Dickinson University Technical Assistance Center (UTAC); do not provide details but request a ticket be opened with University Systems & Security due to an information security data breach or policy violation requesting an immediate callback. When practical, also send an email to violation@fdu.edu.


    Last Modified: Copy Link

    Connecting a Non-PC Device to Wi-Fi

    Resources for:
    icon Close

    This article is intended for students, staff, and faculty who wish to connect their non-PC, IoT, gaming, or streaming devices to the FDU-Wireless network. Devices that require registration include gaming consoles (such as Xbox, PlayStation, Switch) and streaming devices (like Amazon Fire Stick, Apple TV, and Roku).

    Note

    FDU-Wireless is only for non-PC, IoT, gaming, or streaming devices that do not support WPA2 Enterprise authentication or features a web browser.

    Registering a Non-PC Device for use on FDU-Wireless Network

    Use the link and directions below to register and manage wireless network access for your non-PC devices.

    1. Sign in into FDU MyDevices portal using the link below using your FDU NetID

    FDU MyDevices Portal

    Tip

    Ensure to select or check “I agree to the terms and conditions” before attempting to Sign On

    1. Select “Add” to begin registering a device
    1. Enter your device type and your device’s MAC Address into the corresponding text boxes. An optional description may be entered for your device as well. Your device’s MAC Address must be entered to register the device and continue. Refer to your devices manufacture for instructions on how to obtain the devices MAC Address. When finished, select “Submit

    Tip

    Some devices have their MAC Address labeled alongside it’s Serial number.

    Your device should now be listed on MyDevices Portal and allowed to connect to the FDU-Wireless network. It may be necessary to select the FDU-Wireless network on your device or restart your device before successfully connecting to the wireless network

    Note

    Once your device is added, the status will always remain as Pending. However you will be able to connect the device to FDU-Wireless regardless of this status.

    Last Modified: Copy Link
    FAQ
    • An alias is an additional email address that will direct mail to your FDU email account. Creating an alias for your account can be a useful strategy. For instance, if you are spearheading a project, it may be easier to solicit replies to an address that contains the name of the project than it would be to garner responses to your existing email address. If this solution interests you, please fill out the Email Alias form.

    • Due to the cavernous email storage offered on the Office365 platform, there has been little to no demand for FDU staff and faculty members to request an increased mail quota. Office365 email provides enough capacity for even our most prolific users. However, if special circumstances make you the exception to this rule, you can request a quota increase by completing the Quota request form.

    • FDU’s Acceptable Use Policy prohibits running software that accepts incoming connections from other computers. Programs such as BitTorrent or other P2P file sharing hosting program all contain server components that allow others to connect to your computer and retrieve files from your system. In addition to the legal implications of sharing copyrighted materials, file sharing software creates a security concern. Improper use of these programs could result in the compromise of your private files and may leave your system open to attacks from other computers. To view FDU’s stance on this issue in its entirety, please view the document below. 

    • Phishing involves the use of e-mail messages that appear to come from your bank or another trusted business in an attempt to scam the user into surrendering private information that will be used for identity theft. The phishing e-mail typically ask you to click a link to visit a Web site, where they are asked to update personal information, such as passwords and credit card, social security, and bank account numbers

      How to spot a phishing scam

      Scammers have become increasingly sophisticated in creating fraudulent emails and Web sites that look authentic. These emails and Web sites often appear to be from legitimate companies and include images and logos of these organizations.

      If you are unsure if any email you receive is a phishing scam, please contact the UTAC at (973)-443-8822.

    • The Network ID (NetID) is a Windows Active Directory account uniquely assigned to each student, faculty & staff. It serves as your login to many computing and networking services including FDU Email.

    • FDU’s Opus is a Red Hat Linux based server. Opus provides an environment for FDU students, staff, and faculty to practice using software such as:

      • Expect
      • Gcc
      • Gzip
      • Aspell (Ispell replacement)
      • Java (Now 1.8.0_181)
      • Make
      • Ncurses
      • Tcl
      • Tcsh
      • Tcl/Tk
      • Strace (Trace)
      • Emacs
      • Bison
      • Nano (Formerly Pico)
      • Perl
      • LaTeX
      • A2ps
      • Links (Lynx Alternative)

      If you require access to Opus, please fill out the form.

    • In order to provide a safe and stable computing environment, the FDU-Wireless and FDU-Secure wireless networks require NetID authentication. However, in certain instances our students, staff and faculty members will need to work on campus with people from outside of our community. This can include vendors, contractors, visiting scholars, or even a visiting family member or friend. In these instances, the FDU community member can sponsor a guest for temporary wireless access.  The sponsor of a guest account will be responsible for the actions of his or her guest. Please ensure that your guest(s) follow FDU’s Acceptable Use Policy for Computer Usage

    • In order to provide a safe and secure network environment, FDU IT requires devices to authenticate to the FDU network before connecting. This works well for computing devices such as desktop computers, laptop computers, and mobile devices such as tablets and phones. Most other electronics, including gaming consoles and streaming video boxes, cannot properly authenticate to the network. In these instances, we ask you to register the device using the online form below. Please note that each user on our network is entitled to register up to 5 devices.

    Staff Directory
    AL
    Anthony Licandro University Systems and Networking Senior Network Operations Manager
    CC
    Charles Ciccotto University Systems and Networking Operations Manager
    CB
    Christopher Bland University Systems and Networking Systems Manager Lead
    CR
    Christopher Robley University Systems and Networking Director of Systems
    CP
    Cory Palacios Merino University Systems and Networking IT Assistant – Vancouver
    DG
    Danovan Golding University Systems and Networking Senior System Technology Manager
    ER
    Estref Resuli University Systems and Networking Technician Operations – Vancouver
    KH
    Karl Henry University Systems and Networking Senior Desktop Engineer
    KA
    Kevin Atkinson University Systems and Networking Systems & Network Infrastructure Manager – Vancouver
    MR
    Michael Reekie University Systems and Networking Director of Networking
    SA
    Stuart Alper University Systems and Networking Associate Vice President
    TB
    Torence Bobbitt University Systems and Networking Tier 1 Technician