Resources

Explore our comprehensive IT resource library to discover a wealth of helpful information tailored to your needs. Utilize our filters to refine your search by role at FDU, department, or specific service for a more personalized experience.

Support
Resources Header

External Website / Hosted Service Subscriptions & Renewals

Resources for:
icon Close

In the past, website subscriptions and renewals were approved by University Systems and Security (USAS), as the department held the role of both Information Security and Networking. An email would be sent to the department, and approval would be gained via an email response.

With the separation of Information Security from University Systems and Networking (USAN), a new process has been created to better serve those within the FDU community that utilize external websites for services.

Moving forward, requests for website subscriptions and renewals should be requested through this form below:

If information is missing, a representative of UTAC might reply inquiring more about the request. When all information has been gathered, the ticket will be forwarded to our Information Security Officer. They will review the request, engage the Networking team if necessary, and then either approve or deny the request (via email response) or inquire further, before closing out the ticket.

We hope this new process will help identify, track, and move requests quickly through the process.

Last Modified:

FDU Alert Policy

Resources for:
icon Close

Revised: May 1, 2025
Last Revised: February 1, 2024
Prior Revision: February 1, 2024

1. POLICY STATEMENT

FDU has implemented the FDU Alert system to expand and enhance its emergency notification methods. In the event of an emergency, FDU Alert may be used to provide pertinent information and instructions to FDU students, faculty and staff through voice, text messaging and/or E-mail. FDU Alert uses a mass notification system that sends emergency messages instantly and simultaneously to registered mobile phones, wireless devices and E-mail addresses.

Reason For Policy

This policy establishes the proper use and testing of the FDU Alert Emergency Notification System (FDU Alert).

Who Should Read This Policy

Members of the University Community including Students, Faculty, Staff, as well as all other individuals who have been registered to receive FDU Alert emergency notifications.

Website Address For This Policy

The website for this policy as well as other related FDU Alert information can be found at the following URL or by clicking on Web Shortcuts on the top right of the FDU Homepage.

Alert System

2. DEFINITIONS

These definitions apply to these terms as they are used in this policy.

EmergencyA sudden unforeseen crisis, usually involving danger, which requires immediate action.
FDU Alert SystemThe University’s emergency notification system is designed to alert, warn and inform registered members of the University Community of what to do in case of an emergency, a disaster, a crisis or any other situation that affects the FDU community. For example, receiving these alerts and messages could keep you from driving to campus only to find that a power failure has closed the campus.
FDU Alert AuthorizerIndividual who has the authority to assess an emergency and activate the FDU Alert Emergency Notification System; this individual is authorized to contact an authorized Sender.
FDU Alert SenderIndividual who has been trained and is authorized to facilitate the actual sending of an Emergency Notification message.
CrisisAn unstable event or situation of extreme danger or difficulty, which is often sudden or unexpected, that disrupts the normal operations of the institution or its educational mission and threatens the well-being of personnel, property, financial resources and/or the reputation of the institution.
Timely WarningRefers to the need to provide timely notification to the University Community after it is determined there is a credible threat to campus persons or property or when information is considered vital to the University community.
SMSRefers to the Text Messaging method of FDU Alert delivery.
FDU Alert SpokespersonAn individual may be identified to respond to, and act as University spokesperson, to inquiries by students, faculty, staff, parents and others about an FDU Alert. Inquiries may be forwarded to the FDU Alert Spokesperson via the special call forwarding alert hotline.

3. OVERVIEW

Any time that an emergency situation arises, either on campus or in the immediate area of the campus, that in the judgment of an FDU Alert Authorizer poses an ongoing or continuing threat to the campus community, a campus “Timely Warning” will be issued. This warning may be issued through the FDU Alert system by one, all, or a combination of the following delivery methods.

  • Voice mail or telephone notification
  • E-mail
  • Posted on the University website
  • Posted notices
  • Public address announcements
  • Direct contact with individuals

Whenever possible, the FDU Alert Authorizer will consult with the University Director or Associate Director of Public Safety or another Authorizer prior to using FDU Alert messaging capabilities.

In an emergency, and upon activation by Authorizers and Senders, FDU Alert will send notifications to registered individuals at one, some, or all of the following registered points of delivery.

  • Work Phone
  • FDU E-mail
  • Cell Phone
  • SMS (Text Message)
  • Alternate E-mail
  • Home Phone
  • Parent/Significant Other E-mail
  • Parent/Significant Other Phone
  • Parent/Significant Other SMS (Text Message)
  • Parent/Significant Other Cell Phone

To provide the safest possible environment for students, faculty, staff, and visitors to FDU campuses, the University will strive to provide timely, reliable notifications by all possible means in the event of emergency. Generally, an emergency is any incident that involves the possibility of death, serious injury, or the threat of death or serious injury to people, or to University facilities, materials or property.

Fairleigh Dickinson University uses a variety of methods to provide emergency and safety information, including mass notification systems, web pages, door-to-door assistance from on-site staff and Residence Hall assistants, over-the-air broadcasts, and a consolidated communications system. Collectively, these capabilities are called “FDU-Alert“.*

The communication system permits broadcast messages to be sent quickly as voice calls to office, local home, or cell phones, and as text messages to cell phones or University and external E-mail accounts. This system will be used to announce and provide guidance in an emergency or crisis and to communicate relevant critical updates.

If an emergency occurs near but not on an FDU campus, and in other situations in which emergency responders determine and report that no apparent or imminent threat to that campus exists, an advisory may be posted on informational web sites, E-mails, or text messages only. In these cases, you may not receive an emergency notification directly to your phone.

University administration or individual campuses may, as an authorizer deems appropriate, use the communications system for other urgent messages related to administration or operation, such as campus closings due to adverse weather, unusual situations, or utility outages.


*More information about these services, as well as current emergency status or preparedness information for FDU, is planned for availability on the University’s emergency preparedness website once established.

4. POLICY

Proper Use of FDU Alert

FDU Alert is offered not to replace but to augment existing emergency notification methods, which include: University-wide broadcast E-mails, online updates via web and coordinated use of public media outlets, fire alarms, public address systems, and signs.

Any time that a serious situation arises either on campus or in the immediate area of the campus that in the judgment of the University Director or Associate Director of Public Safety, and whenever possible, in consultation with other members of the UEMT as applicable, poses an ongoing or continuing threat to the campus community, a campus “Timely Warning” will be issued. This warning may be issued through the FDU Alert system, voice mail or telephone notification, E-mail, posted on the University website, posted notices, public address announcements, and direct contact with individuals.

If, in the opinion of the local law enforcement authority, a message would hinder the police response or investigation and the local law enforcement authority has requested that we not send out a message, no message may be sent without the specific authorization of the President, or FDU legal counsel.

Limited Use of FDU Alert

Although the use of other emergency notification method(s) will be determined on a case-by-case basis, FDU Alert should only be used in the following situations:

  1. an imminent threat of physical danger to the campus community;
  2. a campus closure; and
  3. certain Campus Crime Alerts as determined by Public Safety;
  4. off-campus events that could impact health, safety, life or access to a campus.

The above situations can include but are not limited to ongoing criminal incidents, fires, chemical leaks, pandemics, campus-wide utility failures (such as gas, electrical, or water), and extreme weather conditions that result in a campus closure (e.g. snow/ice storms) or pose an imminent threat of physical danger to the campus community (e.g. tornado within close proximity to campus).

FDU Alert Authorizers

Only the people in the following positions have the authority to activate the FDU Alert emergency message system and author an appropriate message:

  • President of the University
  • University Provost & Senior Vice President for Academic Affairs
  • Senior Vice President for Finance & Administration
  • Campus Executives
  • Deputy Campus Executive, Metropolitan Campus
  • Associate Vice President for Communications
  • Executive Director of Communications and News
  • Director of Public Safety, Florham Campus
  • Assistant Director, Public Safety, Florham Campus
  • Director of Public Safety, Metropolitan Campus
  • Campus Investigator, Public Safety, Metropolitan Campus
  • Campus Executive, Vancouver Campus
  • Business Manager, Vancouver Campus

FDU Alert Authorizers (“Authorizers”) have the authority to activate the system without consulting other Authorizers; however, when circumstances permit, an Authorizer should consult with at least one other Authorizer before sending a message.

FDU Alert Authorizer Responsibilities

Responsibility of Creating FDU Alert Messages

Authorizers have the responsibility to write and disseminate the appropriate message to be sent by Sender. For consistency, simplicity, and to minimize confusion, whenever possible, the Authorizer should base the message on one of the sample alert messages included in the Standard Operating Procedures manual.

This responsibility carries forward to writing and disseminating subsequent messages that must be sent to keep the recipients apprised of the status of the emergency event through to the conclusion of the emergency event with the transmission of an “All Clear-Resume Normal Schedule” message.

In the event more than thirty (30) minutes has passed while an emergency event is in progress, and there is no new information to communicate, the Authorizer should write a message(s) stating that the status of the emergency event remains the same, e.g., “Investigation continues, will communicate updates as new information becomes available.”

Messages should be written to support text to speech. Minimum or preferably no use of abbreviations and acronyms should be used. All messages must include an appropriate lead-in, for example, “!!FDU Florham Emergency Alert!!,” which includes where appropriate, the campus affected. Examples of these lead-in statements are included with the sample messages in the FDU Alert Confidential Operations Manual.

Responsibility of Authorizer to Prepare Additional Information

Alert Notifications and Updates Published via the FDU Website

Detailed messages and updates regarding the FDU Alert can also be made available on the University Website. Should it be necessary or appropriate to post additional information on the FDU website, it is the responsibility of the Authorizer to work with the Vice President for Communications or designee, to prepare and post the information on the University website in a timely manner. As this information will have wide and general exposure, it is critical to ensure that the information is current, correct, adequate, and consistent with the University messaging strategy.

It is the responsibility of the Authorizer, or designee as assigned by the Authorizer and the Vice President for Communications or designee, to keep vigil over the messaging to ensure accuracy and timeliness and message removal upon event termination.

FDU Alert Spokesperson to Other Inquiries

FDU Alerts will stimulate telephone inquiries to the switchboard, Residence Life, Public Safety, Enrollment Services & other key offices. Callers should be directed to the University mailbox for announcements and updates. In the unusual event where it is determined to be necessary to have a Spokesperson available for call handling, callers will be directed to a special hotline with ultra-call forwarding setup to transfer to the FDU Alert Spokesperson.

The FDU Alert Spokesperson is an individual identified by the FDU emergency response teams to respond to inquiries by students, faculty, staff, parents, and others about an FDU Alert. Inquiries will be forwarded via the special call forwarding alert hotline.

The following are attributes for The FDU Alert Spokesperson:

  • Must provide contact information (and back up) to the switchboard and emergency management teams
  • Must be available to take calls continuously throughout the emergency*
  • Must be aware of the event and current activities and commentable actions
  • Must be media aware
  • Must have the power to speak to the event with autonomy and authority

*A special phone number with Remote Call Forwarding will be utilized for this purpose.

Emergency Event Status Reports on the FDU Website

The FDU Website Homepage provides an FDU Alert Icon under Web Shortcuts that links to a dedicated webpage containing information on the current status of the University’s operations. As referenced above in Section 4.3.1.3, in the event there is an emergency, the Authorizer will work with the Vice President for Communications or designee to prepare and post a message providing current information concerning the emergency event and the status of the University’s operations, which will be posted on the website.

FDU Alert Senders

FDU Alert Senders (“Senders”), upon the request of Authorizer(s), have the authority to activate the system, enter messages under the direction of the FDU Alert Authorizer(s), and initiate the send message process. All FDU Alert Senders are provided with appropriate access to the secured FDU Alert emergency notification system and necessary training.

Sender names and contact information are included in the FDU Alert Operations Manual.

FDU Alert Senders Responsibilities

Senders are required to respond to Authorizer requests to facilitate the timely activation of the FDU Alert System. Senders acknowledge that time may be of the essence and will fulfill the request or immediately notify another Sender to fulfill the request. The transfer of such transfer of control requires Authorizer and/or emergency response team acknowledgment.

FDU Alert Senders will advise the FDU Alert Authorizer(s) when the message send process has been initiated and the sender can confirm delivery of such messaging.

Message Content

Any message sent using FDU Alert should be as brief as possible and should, if appropriate, typically contain the following information:

  • The reason for the message;
  • Any response required;
  • Location (campus) of event;
  • The duration of the emergency and any relevant dates and times;
  • Methods to obtain further information; and

When circumstances permit, before sending a message, Authorized Senders should consult with the relevant University administrator(s) regarding message content.

While brevity and abbreviations will reduce a message size, care must be taken to ensure that all messages are brief, concise, accurate, and understandable. Sample messages are included in the FDU Alert Confidential Operations Manual.

After Message Review

After a message is sent using FDU ALERT, the Authorized Senders and the University Emergency Management Team will meet as appropriate to discuss the emergency, the results of the alert, and compliance with the FDU Alert Policy.

FDU Alert System Testing

System Wide Delivery Testing

Once every Fall and Spring semester, a live test of the FDU Alert system will be conducted. During the test, one or more messages will be transmitted to every individual registered in the system using every delivery method for each point of contact (phone, e-mail, SMS, etc.) The FDU Alert message(s) sent during the test will clearly state “THIS IS A TEST,” so that it is clear that there is no actual emergency.

FDU Alert Senders

At least once per calendar month, FDU Alert senders will test the FDU Alert system by sending themselves a test message. The message sent during this test will clearly state “THIS IS A TEST BY AUTHORIZED SENDER,” so that it is clear that there is no actual emergency

Service Provisioning

Regular Reminders to University Community to Register/Update FDU Alert Individual Database Record

The effectiveness of any alert system depends upon the accuracy of the contact information in its database. All students, faculty, and staff will therefore receive notices/reminders prior to the semester’s scheduled test to review/update their emergency contact information. Emergency contact information can be modified at any time by logging onto Self-Service.

5. EMERGENCY LEVELS AND INSTITUTIONAL MESSAGING GOVERNANCE

The following are three levels of emergencies and suggested methods of communications and notifications for each. No other use of this FDU Alert System is permitted.

Level 1 Emergency – Informational

Circumstance:

  • incident has occurred
  • incident is contained and/or well defined
  • continuing activity/investigation
  • caution conditions exists
  • timely follow up communications required

Examples include:

  • natural disaster
  • aircraft crash, or similar event, near campus
  • major structural collapse
  • snow closings
  • elevator accident
  • must know information – (e.g. “Because of bad weather the University will close at…” and “An electrical cable to the SUB has been damaged and electrical power will not be restored until…”)

The “Authorizer” should use the following formats: E-mail/WWW/Text Messaging/Posted Notices/Public Address Announcements. Based on the event and any unusual circumstances, voice messaging may be used at the “Authorizer’s” discretion…

Level 2 Emergency – Life and Safety Alert

Circumstance:

  • incident has occurred and/or is continuing
  • incident is contained but may be extensive
  • cautions exist
  • continuing/on-going activity/investigation
  • timely follow up communications required

Examples include:

  • bomb threat
  • contained/small scale explosion/fire
  • act of violence on campus
  • fire confined to an area
  • contained/small hazardous material spill or release
  • buildings without electricity, heat or water
  • major building flooding

The “Authorizer” should use the following formats: E-mail/WWW/Text Messaging/Posted Notices/Public Address Announcements/Direct Contact with Individuals as necessary.

Level 3 Emergency – Imminent Life or Safety Alert – Immediate Action Required

Circumstance:

  • incident has occurred and/or is continuing
  • scope of incident may be undefined
  • alert action required
  • cautions exist
  • continuing/On-going activity/investigation
  • time is of the essence follow up communications

Examples include:

  • evacuations
  • on-going violent campus demonstrations
  • intruder alerts
  • radiological incident
  • contained or uncontained hazmat/hazardous material spill or release
  • large explosion/fire
  • aircraft crash, or similar event, on campus
  • acts of terrorism
  • confirmed explosives devices

The “Authorizer” should use all available formats: Voice Message/Voice Mail/E-mail/WWW/Text Messaging/Posted Notices/Public Address Announcements/Direct Contact with Individuals as necessary

No other use of this FDU Alert System is permitted.

6. FDU ALERT EMERGENCY NOTIFICATION SYSTEM:  CONFIDENTIAL OPERATIONS MANUAL

The Confidential Operations Manual is provided to all members of the University Emergency Management Team. The following information will be included in the Confidential Operations Manual.

  • Notification Process
  • FDU Alert Authorizer Contact List
  • FDU Alert Sender Contact List
  • Recipient Groups
  • FDU Alert Activation Options Screen
  • Sample Messages

Neal Sturm
Vice President and CIO
sturm@fdu.edu

Gail Lemaire
Office of Risk Management
gail_lemaire@fdu.edu


Last Modified:

FDU Anywhere Tutorial

Resources for:
icon Close

FDU provides remote access to many of the software applications typically found in university computer labs.
index

Index

What is FDU Anywhere?

FDU provides remote access to many software applications typically found in university computer labs. This new Virtual Desktop Infrastructure (VDI) gives users access to a Windows desktop environment along with many General Lab Software, without requiring downloading and installing programs on a user’s personal equipment. The service, called FDU Anywhere, is powered by University Systems and Networking (USAN) and can be found at anywhere.fdu.edu.

FDU Anywhere

Using FDU Anywhere is like walking into one of FDU’s computer labs. Upon logging in with your FDU NetID and password, you will have access to the virtual platform. To find a list of currently available software on FDU Anywhere, use the FDU Software Catalog. A listing of available Free and Open Source software can also be found by visiting the FDU Software Catalog.

The FDU Software Catalog provides an up-to-date catalog of software available to Faculty, Staff, and Students at the university:

System & Network Requirements

System Requirements

FDU Anywhere is a powerful resource with a lightweight footprint. In order to utilize FDU Anywhere, you must have the following:

  • Any device with a browser that supports HTML 5 will work. HTML 5 is supported by almost all desktop and mobile browsers including Google Chrome, Apple Safari, Microsoft Edge, and Mozilla Firefox
  • An internet connection
  • FDU NetID credentials

Tip

Your system hardware specifications may impact the performance of FDU Anywhere, such as systems with less than 8GB of memory.

Network Requirements

For the best experience, while using FDU Anywhere, your network should:

  • Have a download speed of at least 5Mb/s or more
  • If your download speed falls below 5Mb/s, the connection could become unstable and cause issues with your stream
  • Have an upload speed of 5Mb/s or higher
  • An upload speed of 5Mb/s is enough to use a basic mouse, keyboard, and controller. More bandwidth-heavy devices such as webcams, microphones, and external storage devices can use up to 100Mb/s
  • Wired network connections are preferred over Wi-Fi network connections whenever possible
  • Wired network connections are more stable and offer more bandwidth over Wi-Fi

For graphics-intensive applications, like Adobe Creative Cloud and Autodesk, we recommend using a wired network connection instead of Wi-Fi, ideally with a bandwidth of 5 Mbp/s.

Wi-Fi networks with 5Ghz rated wireless connections are preferred over 2.4Ghz wireless routers and provide better performance.

VPN Applications and Connections

Warning Warning

The use of any VPN Software within FDU Anywhere is not allowed. Using a VPN client in FDU Anywhere may interrupt your session and disable your access for approximately 15 minutes.

Testing your Connection

Your experience with FDU Anywhere greatly depends on your internet connection. Testing your connection can help you identify and correct most issues.

To test your Internet connection speed, click the link below:

Internet Speed Test

Using FDU Anywhere

FDU Anywhere is available to all students and accessible by following the instructions below:

Accessing FDU Anywhere

  1. From any web browser, visit “anywhere.fdu.edu

FDU Anywhere

Tip

For the best overall experience using FDU Anywhere, Google Chrome is the browser of choice.

  1. Use your FDU Credentials (NetID and associated password) to complete the login to the FDU Anywhere

General Lab

Note

When you login to the General Lab experience, it may take about 60 seconds to get to the desktop. This is because your profile is being created or loaded.

  1. The selected app or desktop opens in a new browser tab

Note

Depending on your screen resolution, your desktop experience view may differ from the picture above.

Log Out of FDU Anywhere

Logging out is a critical step in making sure others continue to be able to easily access FDU Anywhere services. To log out of FDU Anywhere, follow these steps:

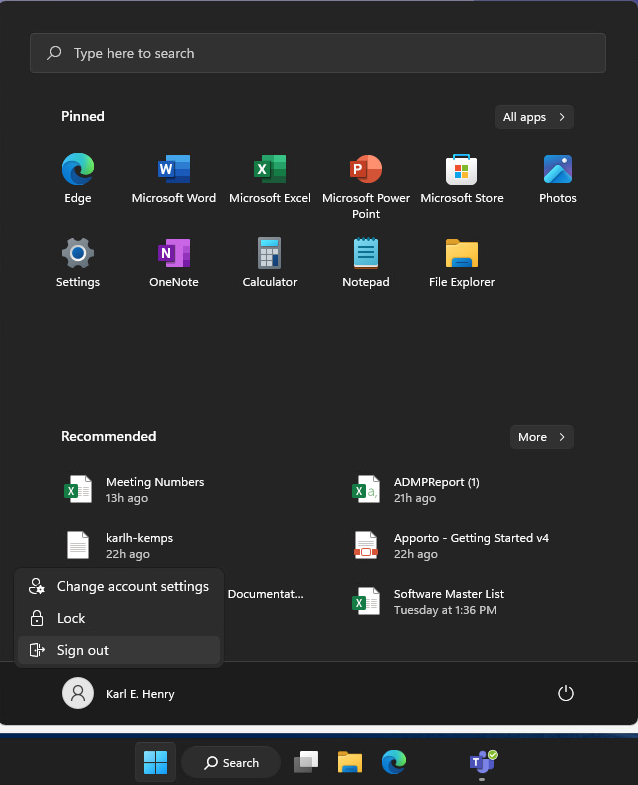
  1. Click the Windows “Start” button
  2. Click your “Name
  3. Click “Sign Out
  1. On the upper left-hand side, click the “Hamburger” menu icon
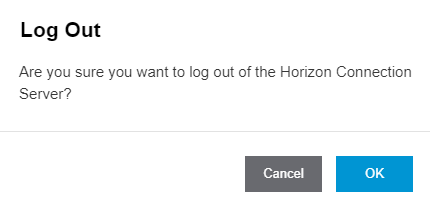
  1. Click “Log Out
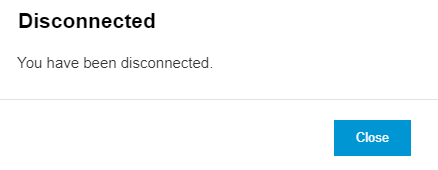
  1. Click “OK” to confirm Logout

Automatic Session Logout Policy

To help make FDU Anywhere as available as possible to all students, accounts that have been inactive (or idle) for 15 minutes will automatically be logged out.

Accessing and Using OneDrive

There are many ways in which you can access and save files within FDU Anywhere. Fairleigh Dickinson University highly recommends saving all files on your FDU Microsoft 365 OneDrive which is accessible within FDU Anywhere. There will be a first-time setup and initialization process required to use OneDrive within FDU Anywhere.

Setup and Initialization Process

Accessing your Microsoft 365 OneDrive account is done easily by following these instructions:

  1. From the FDU Anywhere General Lab, single click on the “OneDrive” icon found on the Windows desktop
  1. Enter your FDU NetID and click “Next
    • Follow the FDU standard single sign-on prompts to complete the login process

Note

Your FDU NetID may already be filled in, just click Sign in.

  1. You have successfully logged into OneDrive, click “Next
  1. Microsoft OneDrive may prompt you to backup your folders, click “Next” to skip this step
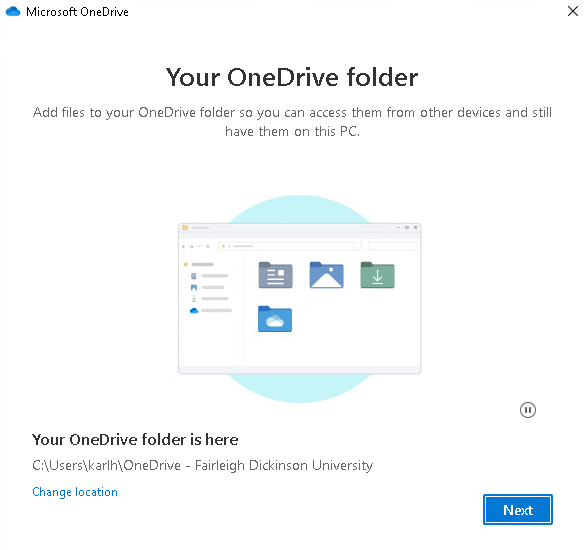
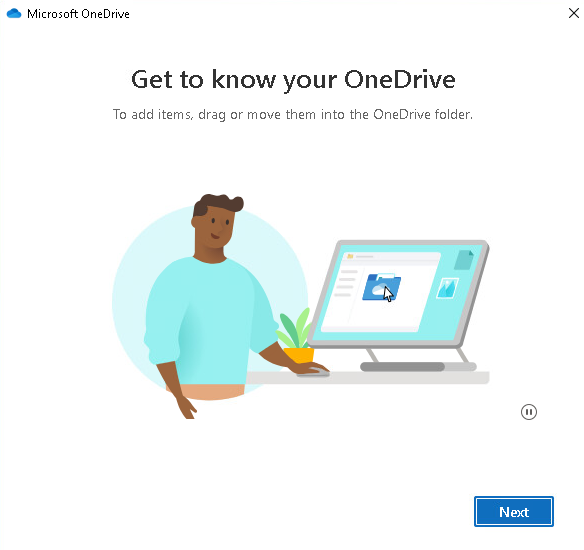
  1. A brief overview will be given on OneDrive, to begin, click “Next
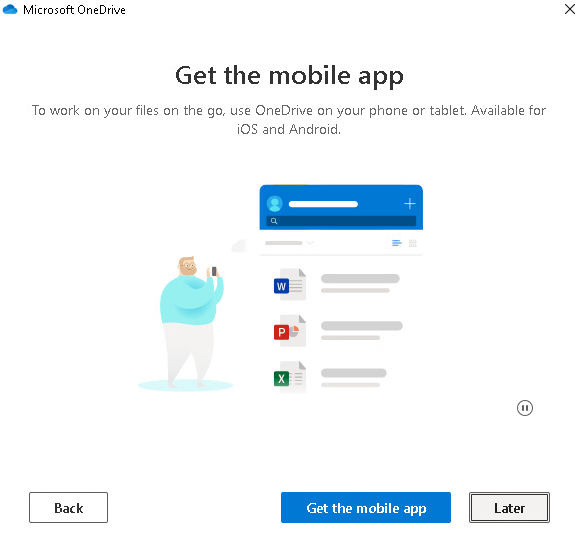
  1. When the tutorial is finished, click “Later
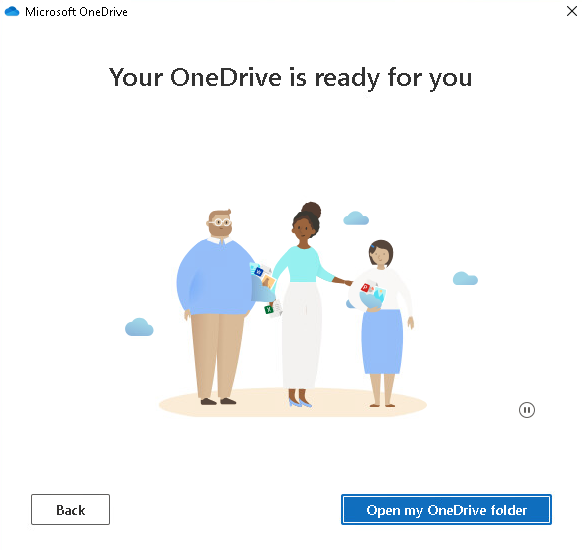
  1. OneDrive setup is complete and ready to use. Click the “X” to close the window or “Open My OneDrive Folder” to access files

Using OneDrive

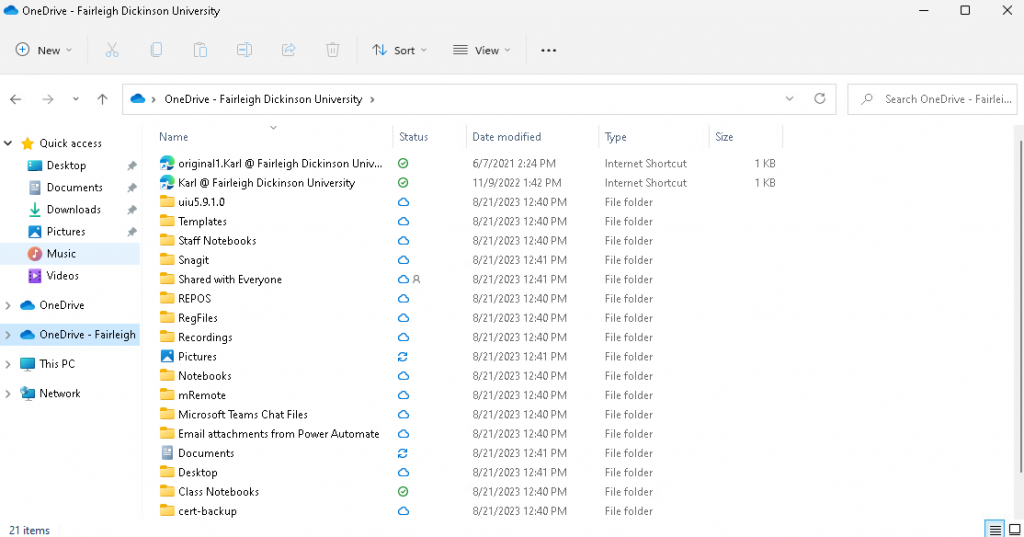
Using Microsoft OneDrive within FDU Anywhere is very similar to accessing, saving, and opening files on a computer. Just open up File Explorer and look for OneDrive – Fairleigh Dickinson University.

Working With Files

Zipping Files

if you need to zip files to submit them to Webcampus, please follow these instructions:

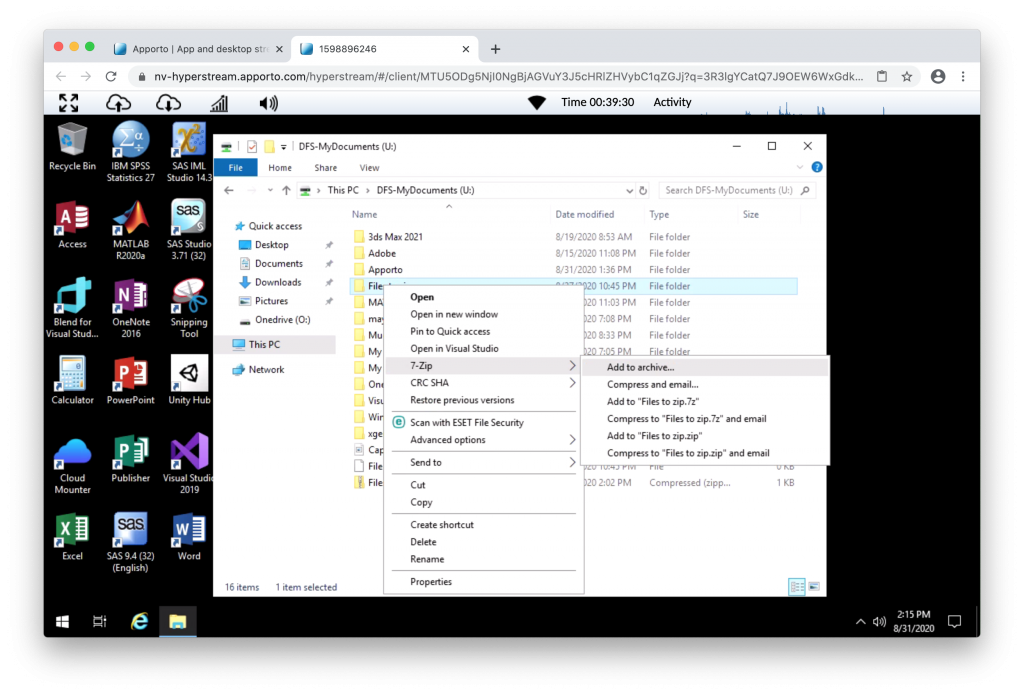
  1. Click the file or folder

Note

For macOS users, you can use the “Two Finger” click method on the trackpad in order to initiate the right click. For additional information, please see the link below for “FDU Anywhere – Keyboard Shortcuts”.

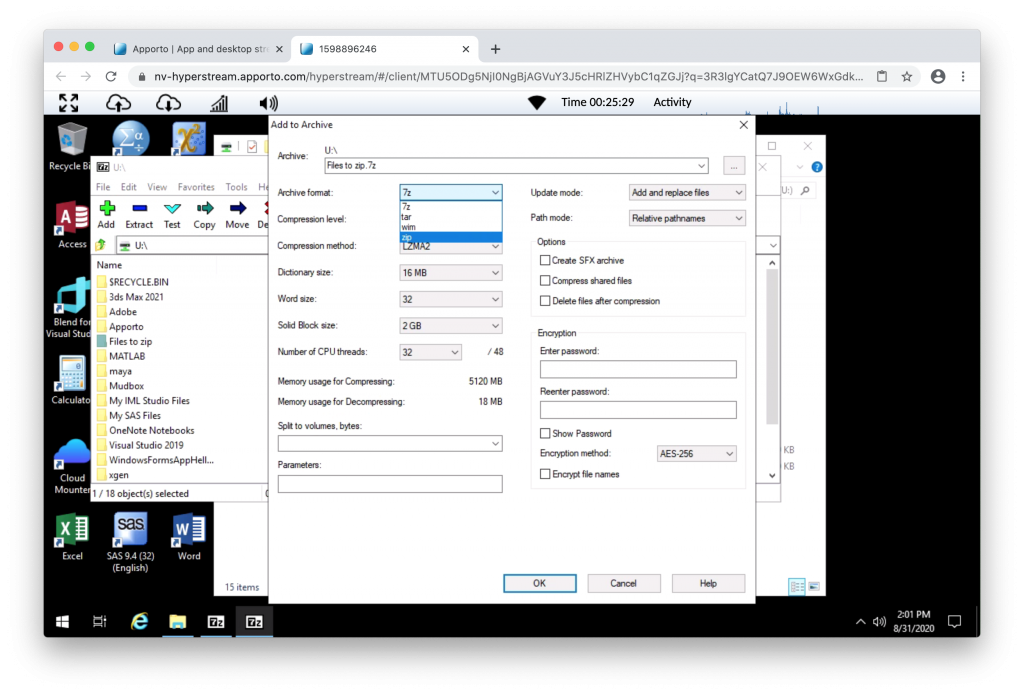
  1. Click on 7-zip then click “Add to Archive
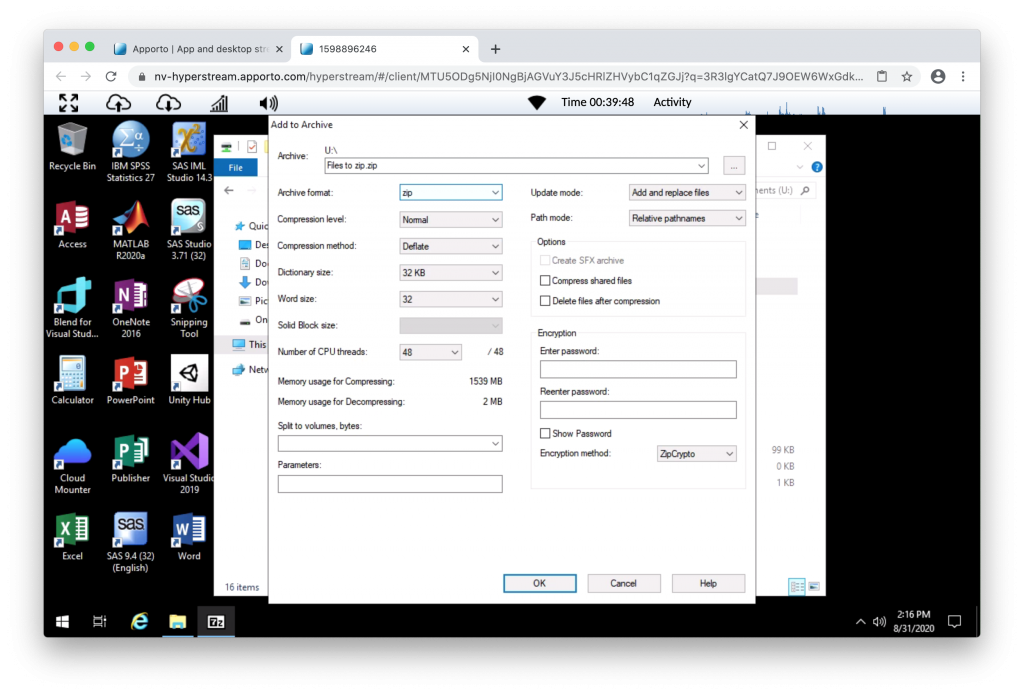
  1. Change Archive Format to “zip” like in the picture below, then click “OK” to zip your files

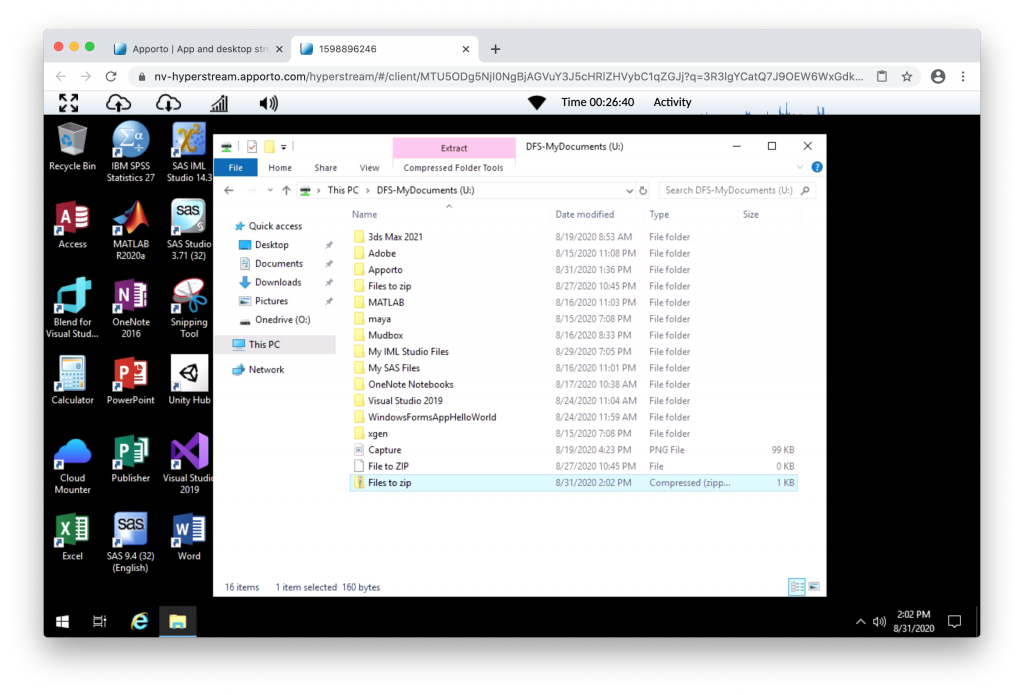
The zip archiving process could take some time depending on the size of the file. Once completed, the file will be in the same location as the folder. You can then email or upload your file to your professor.

Alternate Way to Zip Files

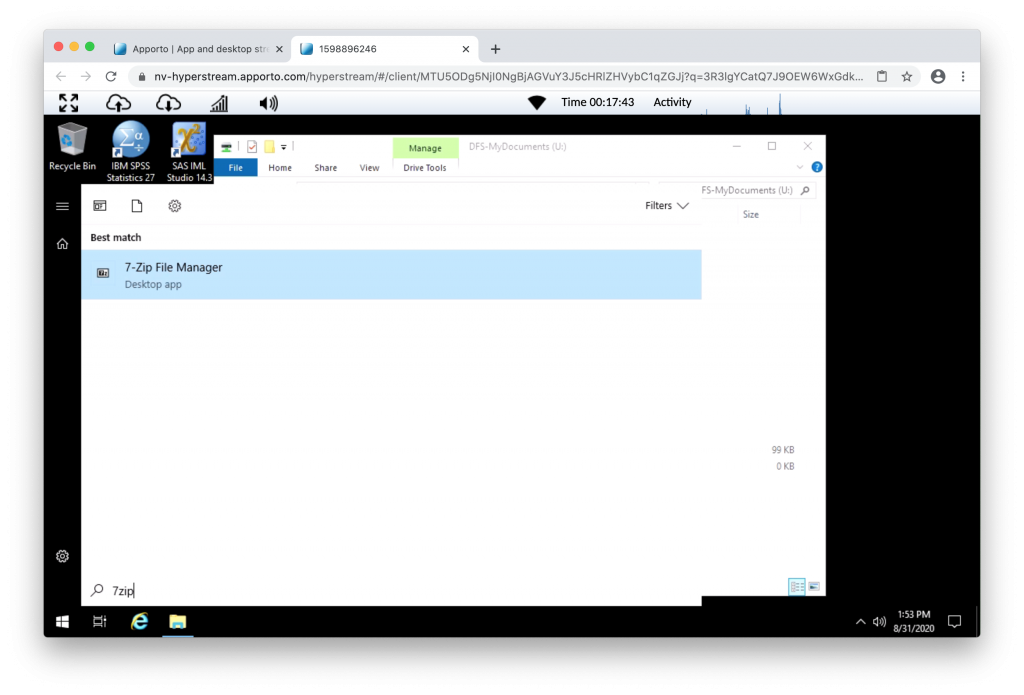
  1. Click “Start” on the taskbar on the left-hand side
  2. Type “7zip” and click on 7-zip File Manager that appears
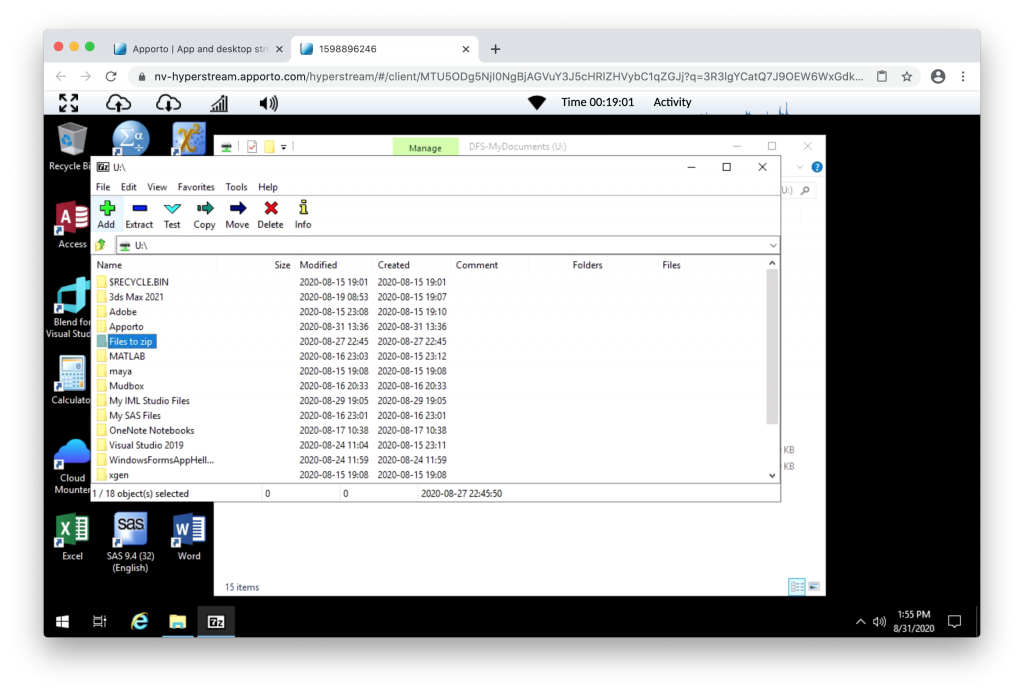
  1. Navigate to the location of your saved file/folder and click to highlight, then click the “Add” button at the top
  1. Change “Archive Format” to “zip” and then click “OK” to zip your files

The file will now be zipped and you will find your file in the same folder as the project folder or file you wanted to zip.

Note

The zip archive could take some time depending on the size of the file. Once completed, the file will be in the same location as the folder is. You can then email or upload your file to your professor.

Submitting Files to WebCampus

To successfully submit your coursework to WebCampus, it is best to use the Google Chrome, Mozilla Firefox, or Microsoft Edge web browser located on the desktop of FDU Anywhere.

To submit your coursework to Webcampus, you can log on from within FDU Anywhere. For more information on Webcampus visit:

Keyboard Shortcuts

Sometimes you may want to copy and paste content from your own computer to an FDU Anywhere desktop or application. You can do this using the copy-and-paste menus or keyboard shortcuts, for example, “Ctrl+C” and “Ctrl+V“.

Note

FDU Anywhere only allows copying from your personal computer into the FDU Anywhere desktop.

If you cannot copy and paste for any reason, we recommend using our FDU OneDrive service to access any files not found in FDU Anywhere.

Copy files from Windows OS Devices

Windows OS to FDU Anywhere

  1. Highlight the text you want to copy from your computer
  2. Press “CTRL+C” to copy the selected text
  3. Move the cursor to the paste location in FDU Anywhere
  4. Press “CTRL+V” to paste the text
close
Copy Files from Apple OS Devices

Your macOS to FDU Anywhere

  1. Highlight the text you want to copy from your computer
  2. Press “COMMAND+C “to copy the selected text
  3. macOS also supports “CTRL+C

Tip

You may find it easier to use CTRL + C when copying content to FDU Anywhere, so you don’t have to switch back and forth between COMMAND + CTRL.

  1. Move the cursor to the paste location in “FDU Anywhere
  2. Press “CTRL+V” to paste the text
close

Note

The copy and paste functions DO NOT work across all applications and browsers, including the copying and pasting of images. This is a limitation inherent in browser clipboards. We recommend the Google Chrome web browser for optimal clipboard capabilities.

Getting Support

For additional support, open up a support request by clicking the link below:

SAMI Support

Network Optimization

If you are experiencing issues while using FDU Anywhere, please use the following tips as guidelines to help improve your experience.

Power-cycle your Modem/Router

Power cycling your modem and router allows them to reset and re-establish a connection to your Internet Service Provider (ISP). Shut down your computer and unplug your modem/router. Plug them back in after 60 seconds and watch the lights on your modem/router. Once the lights are on and steady, start your computer.

Keep all your Local Components Up-to-date

Check that your modem/router and your local computer are totally up to date. This includes the operating system, driver, and browser updates.

Disconnect/Turn off any Devices that are not in use

Some devices could be using bandwidth while on standby. Gaming consoles, for example, might download and install updates. Turn off these devices to keep your bandwidth free.

Use an Ethernet Cable

Using a wired Ethernet connection will make your connection more stable and eliminate additional latency compared to a wireless connection.

Change your Wi-Fi Configuration

If a wired Ethernet connection is not possible or your device requires a wireless connection:

  • Connect to a 5GHz wireless network. Some routers offer both 2.4GHz connections and 5GHz
  • Place your devices (such as a computer or smartphone) and your router closer to each other

Note

You may need to contact your internet service provider for help with rebooting your router and/or to configure your wireless settings correctly.

Last Modified:

FDU Email with DMARC Authentication

Resources for:
icon Close

As part of an ongoing effort to combat phishing scams and enhance email security, the Office of Information Resources and Technology (OIRT) is implementing the Domain-based Message Authentication, Reporting & Conformance (DMARC) protocol. DMARC monitors mass mailing, hosted vendor applications, and mail servers used to send emails on behalf of the University (e.g., fdu.edu, wc.fdu.edu).

Important Email Delivery Requirements

For Individual FDU NetID Users

No action is required. You can continue to use Outlook as you normally would.

For Mass FDU Email Users

Fairleigh Dickinson University prioritizes information security and is enforcing these email authentication standards to ensure reliable and secure email delivery. All non-FDU services used by FDU users and departments must adhere to these best practices to ensure proper delivery of emails to FDU recipients. Failure to comply will result in email delivery failures.

If you plan to use any new service to send emails to FDU users, you must submit a DMARC Request form at least one month in advance. For any existing email delivery issues, submit a SAMI ticket.

DMARC Form

As an FDU user, you generally won’t need to manage the technical details of DMARC unless specifically requested by OIRT. While DMARC is typically managed by your email provider, individuals or departments using external services like CRM tools (e.g., Constant Contact, MailChimp) for bulk emailing must ensure that DMARC is enabled within those platforms. This helps prevent messages from being marked as spam.

OIRT will provide guidance and work with the service provider after you submit a DMARC Request form.

For those interested in the technical aspects of this email security standard, continue reading below.

How DMARC Works

DMARC is an email authentication, policy, and reporting protocol that operates in two primary ways:

  • It detects unauthorized activity and specifies how to handle unauthorized emails (e.g., placing them in the spam folder).
  • It identifies legitimate senders, including emails sent by FDU or approved/verified email services.

DMARC uses two key technologies to verify emails:

Domain Keys Identified Mail (DKIM)

What is it?

Domain Keys Identified Mail (DKIM) verifies the identity of an email sender to prevent email spoofing. It acts as a unique electronic signature, allowing recipients to confirm that a message claiming to be from you was indeed sent by you.

Why is it important?

DKIM helps email hosts (e.g., Microsoft, Google) detect phishing attempts. By verifying the message’s signature, DKIM ensures that the sender address belongs to its rightful owner and confirms that the message has not been tampered with during transit.

How does it work?

DKIM adds a hidden, unique digital signature to your outgoing emails. A public “key” is published online under your domain or subdomain. When a recipient receives your email, their system uses this public key to verify the signature. If it matches, the email is confirmed as authentic and unaltered, helping it reach the inbox and preventing spoofing.

close
Sender Policy Framework (SPF)

What is it?

Sender Policy Framework (SPF) is like a digital “authorized senders” list for a domain. When an email arrives, the recipient’s system checks whether the sending server is approved by the domain owner. If the server isn’t on the list, the email may be flagged as spam or rejected.

Why is it important?

SPF helps prevent spammers and phishers from forging the “from” address in email messages. It allows email hosts (e.g., Microsoft, Google) to verify that the server sending the email is authorized to send on behalf of the specified domain.

How does it work?

Your email provider (e.g., Microsoft 365) publishes a list of authorized servers that can send emails on behalf of your domain. When a recipient’s mail server receives a message, it checks this list to verify the sending server. If the server is authorized, the message is considered legitimate. If not, the recipient’s mail server may reject, quarantine, or flag the message as spam based on its policy.

close
Last Modified:

FDU Jamf Connect Login and Credential Sync 

Resources for:
icon Close

Welcome to our comprehensive guide on utilizing the FDU Jamf Connect for login and NETID credential synchronization on macOS. This article is tailored for the staff, faculty, and students at FDU, providing a detailed walkthrough of the Jamf Connect login interface.

Tip

Connecting to FDU-Secure is not supported on this login screen. Please use a wired connection while on campus.

Jamf Connect Interface Walkthrough

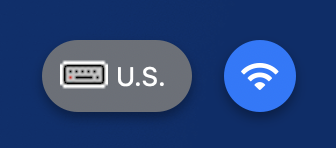
The Jamf Connect login screen consists of three sections: The login fields, the function buttons, and language and Wi-Fi.

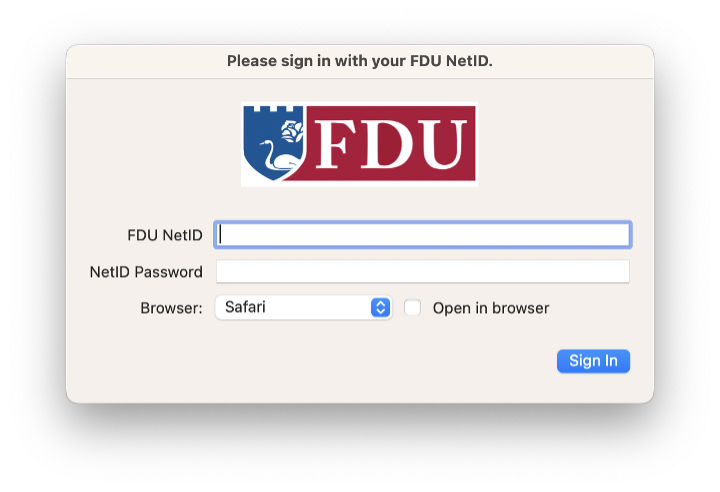
The login fields are used to enter the NetID and password while the login button initiates the login. The username can be entered in any form that is recognized by Okta.

  • Shut down: Powers the machine off
  • Restart: Reboot the machine
  • Help: Opens a mini browser to the FDU IT site
  • Language Selection: Changes language
  • Wi-Fi: Allows selection of wireless network
close
Logging into Jamf Connect
  1. Enter your “FDU NetID” and “Password” and click the “Login” button
  • You will see the message “Creating your account on this Mac” while the account is being created on the Mac
  • If you are using a non-standard account name that does not match your FDU NetID, you will be able to select this account at login and link it to your NetID
  1. Locate the account and click “Connect” to link it to your NetID. If you do not wish to link the existing, account click “Create Account” to proceed with a new account

Note

Any data stored under the old account will not be accessible if choose not to link it. 

  1. You will be prompted to enter the “existing password” for the local account. Click “Connect” to complete the link.
close
Synchronize NETID Password via Jamf Connect App

The Jamf Connect app is used to synchronize domain credentials with the local machine credentials.

  1. Enter your “FDU NETID” and “Password” and click the “Sign In” button
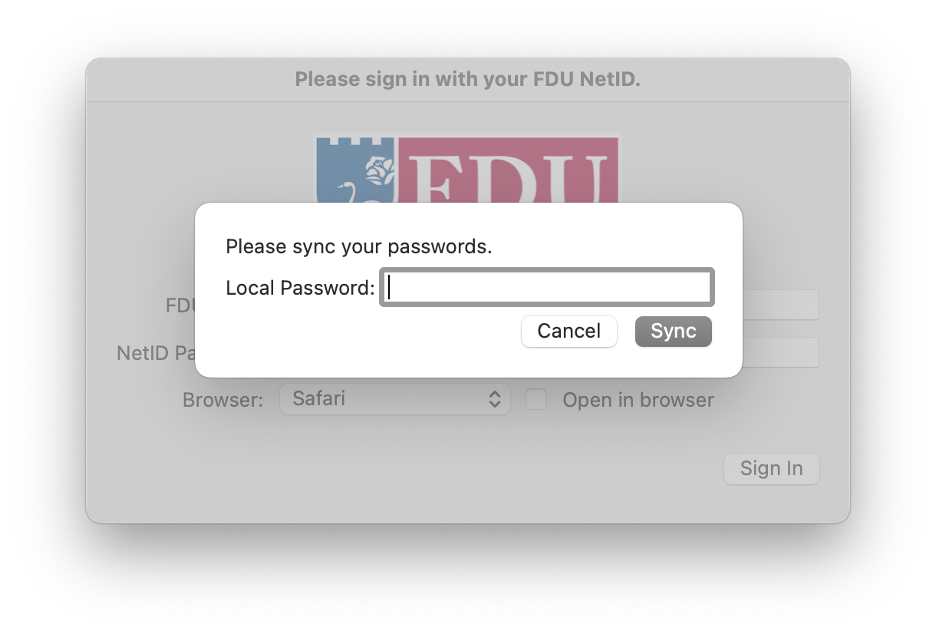
  1. If your NETID password is out-of-sync, you will be prompted to sync them by entering the Local Password you use to sign into the machine. Click “Sync” to sync the new NETID password
close
Last Modified:

FDU Procedure on Handling Data on Separating Employees

Resources for:
icon Close

I. OBJECTIVE

Create a standard procedure by which Manager’s and their employee’s transfer University data during the period of time from when an employee makes their intention clear that they are separating from the University or the transfer of University data at the time of an employee’s involuntary separation from the University.

II. PRODUCURES

Voluntary Separation

It is the manager or direct supervisor’s responsibility to work with the separating employee to extract any data or files that reside locally on their computer that would be needed for business continuity. The supervisor should also ensure they understand what shared drives the separated employee used and have access to those drives if need be.

Using appropriate security precautions, the manager should meet several times with the separating employee to ensure all information is transferred over either email, a shared drive, One Drive or a thumb drive.

During the separation process, through the Employee Separation Checklist, the employee’s manager can select the ability to access the separating employee’s email for up to 30 days and/or forward emails addressed to the separated employee for up to 60 days.

Upon receiving the separation notice, Computing Services will validate through our Backup system that the separating employee’s complete laptop or desktop Image has been backed up.

Computing Services will manually trigger an additional backup within three days of separation.

Immediately upon the effective date of the separation, the separating employee’s manager is responsible for turning over the separating employees’ computer to Computing Services.

Computing Services will store the computer for 14 days as a precaution, and then wipe the data from that computer, reimage the computer, and shelf the computer for redistribution.

If it is discovered that information that resided on the separated employee’s computer was missed during the separation process and needs to be retrieved at a later point, the supervisor would need to contact the Vice President of Human Resources and request the specific data that would need to be recovered from our Backup system.

Involuntary Separation

Upon the dismissal of the individual, Human Resources, would immediately engage Computing Services as well as the direct supervisor to view and extract any data that might be needed by the department to ensure business continuity. This would take place as soon as possible from the date of dismissal.

If a legal hold is required, Computing Services and USAN would be notified and the existing processes of extracting and encrypting the hard drive as well as protecting all email correspondence would be executed. Computing Services would then remove the computer.

If a legal hold is not required, Computing Services will validate through our Backup system that the dismissed employee’s Image has been properly backed up and remove the computer.

Computing Services will store the computer for 14 days as a precaution, and then wipe the data from that computer, reimage the computer, and shelf the computer for redistribution.

If it is discovered that information that resided on the separated employee’s computer was missed during the separation process and needs to be retrieved at a later point, the supervisor would need to contact the Vice President of Human Resources and request the specific data that would need to be recovered from our Backup system.

III. IN CASE OF QUESTIONS

Questions regarding this procedure can be directed to the Vice President of Human Resources.


Last Modified:

FDU Self Service Portal for Software

Resources for:
icon Close

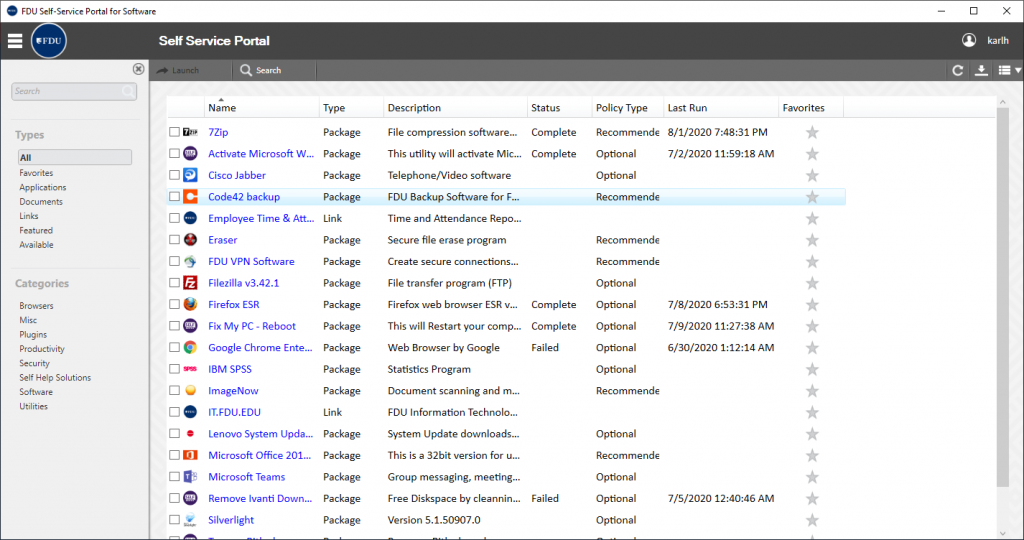
The FDU (Fairleigh Dickinson University) Self-Service Portal for Software is a a tool designed to enhance our community’s access to software and desktop related information. With the Self-Service Portal for Software, our Faculty and Staff can easily locate and install pre-loaded software onto FDU owned computers. Simply launch the portal and you will be presented with a variety of applications, each sanctioned and supplied by FDU. This portal will provide an easily searchable way to view all new applications made available to the user community, including Microsoft Teams, Cisco Jabber, the FDU VPN, and many more.

FDU Self Service Portal Icon

How to Use and Access the FDU Self Service Portal for Software

Windows
  1. Locate the FDU Self-Service Portal for Software icon on the desktop and double-click it to launch the application or…
    1. Select the ‘Windows’ logo/start button on the bottom left of the desktop
    2. Type ‘FDU Self Service Portal for Software’ into the search bar
    3. Left click ‘FDU Self Service Portal for Software’ app to launch
FDU Self-Service Portal for Software on Windows Devices
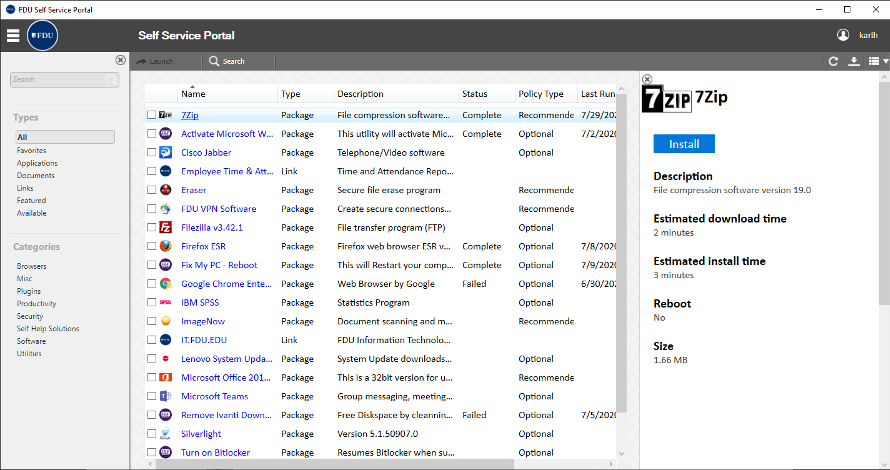
  1. To install a program, click on the name of the application, then click on the “Install” button to the right
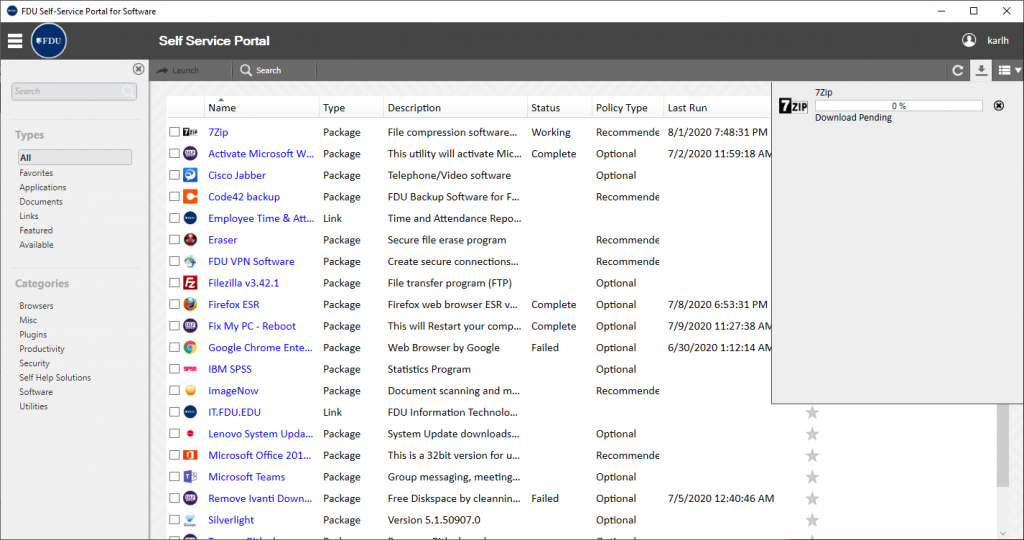
  1. A progress window will provide updates as the program is installed on your system. When complete, the Status column should indicate “Complete
  1. After the selected application finished downloading, it will automatically install and when completed, the status will show as “Completed
close
macOS
  1. Open the ‘Applications’ folder and locate and click the ‘FDU Self Service Portal’ icon or…
  • Select the ‘Launchpad’ icon from the dock

Launchpad Icon

  • Type ‘FDU Self Service Portal
  • Click the ‘FDU Self Service Portal’ icon to launch
FDU Self-Service Portal for macOS Devices
close
iOS & iPadOS
  1. Find the ‘Self Service Portal’ app icon and tap to launch
FDU Self Service Portal App on iPadOS

FDU Self Service Portal App on iOS

  1. Click ‘Install’ to install the requested item onto your device

Note:

The Android version of the FDU Self Service Portal will be available in the future.

Once the FDU Self-Service Portal application is open, you may then continue to select and install your desired software application. You may also access and use any self-service troubleshooting solutions that are available to you from within the FDU Self-Service Portal as well.

close
Last Modified:

FDU SSO Login Guide

Resources for:
icon Close

FDU’s Single Sign-On (SSO) experience has been improved and OKTA is the primary Single Sign-On provider. OKTA will replace our “Legacy” SSO login page for all applications over time.

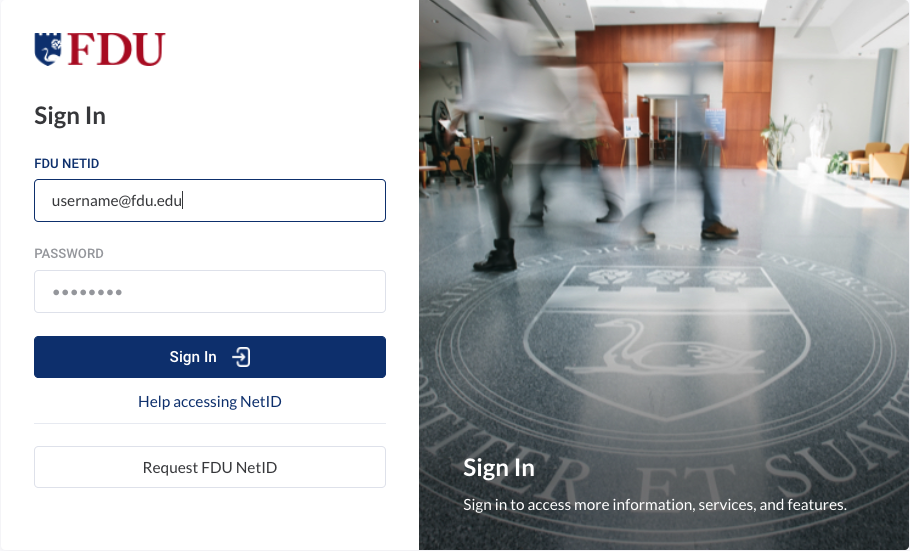
OKTA SSO Login Page

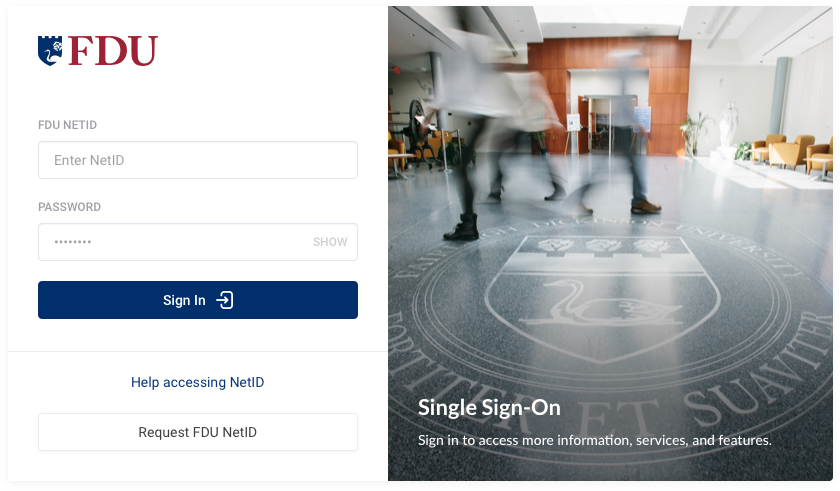
New and existing FDU NetID users who are logging into OKTA for the first time will need to finish setting up their multifactor authentication with DUO.

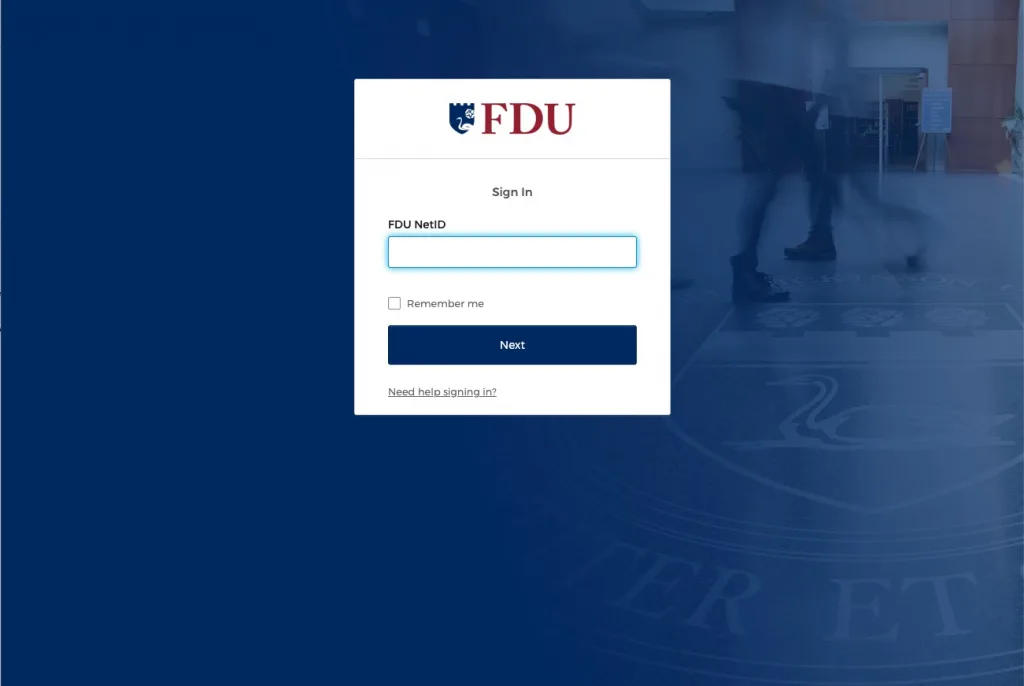
  1. Enter your FDU NetID and click “Next
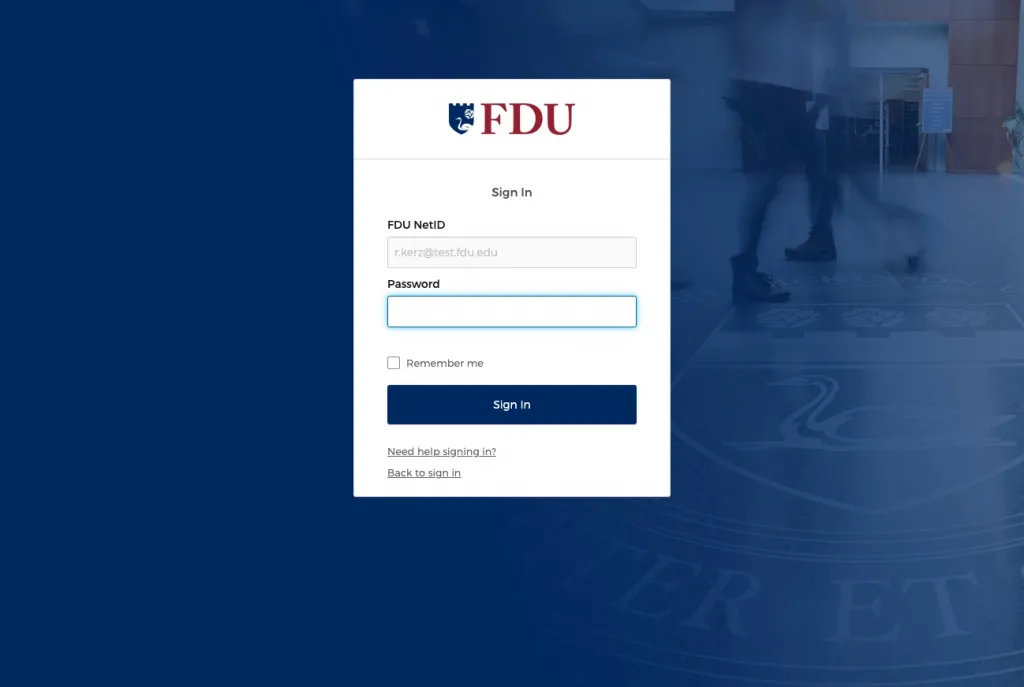
  1. Enter your FDU NetID Password and click “Sign In”
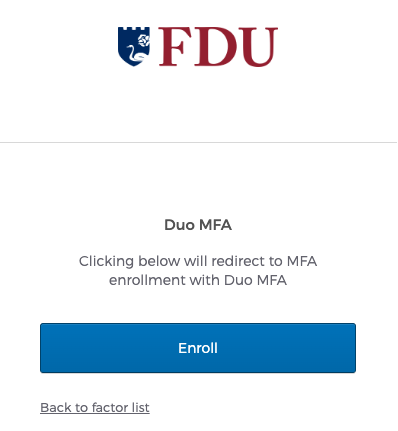
  1. For existing users with DUO configured please skip to step 4. For new users please click “Setup” then “Enroll” to continue the process

For instructions on setting up DUO for the first time, refer to our “Quick Start Guide

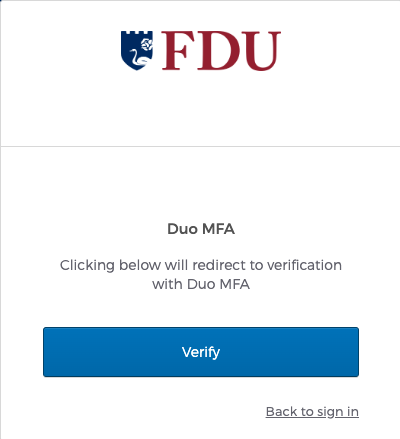
  1. If you are an existing DUO user, a prompt will be shown to redirect you to verification with Duo MFA. Click “Verify” to continue
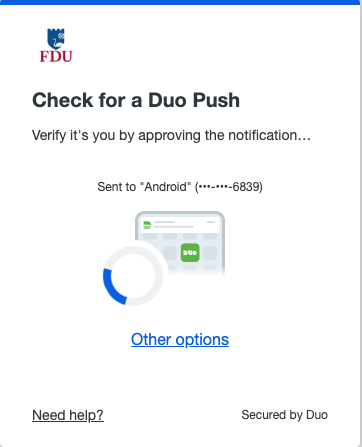
  1. Duo will automatically send a DUO Push to your registered device. Accept the DUO Push on your device to continue the authentication process
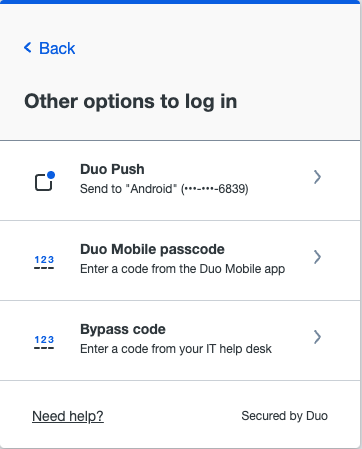
  1. If don’t want to use DUO Push to authenticate, select “Other Options” and choose your preferred method from the list

Legacy SSO Login Page

  1. Enter your FDU NetID and Password and click “Sign In
  1. Authenticate using DUO using any of the authentication options shown
Last Modified:

FDU Virtru Email Encryption Tutorial

Resources for:
icon Close

Virtru email encryption is a security enhancement to FDU’s Office 365 and Microsoft Outlook email environment, which provides Faculty and Staff the option of sending and receiving encrypted emails using their FDU email account.

index

Index

What is Virtru Email Encryption

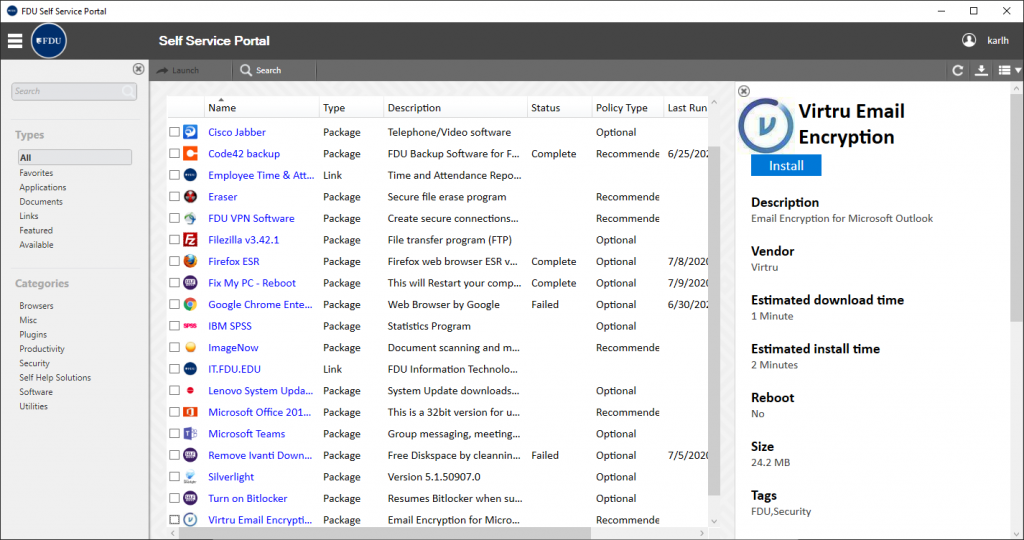
Virtru email encryption is a security enhancement to FDU’s Microsoft Office 365 and Microsoft Outlook email environment, which provides Faculty and Staff the option of sending and receiving encrypted emails using their FDU email account. Virtru for the Microsoft Outlook desktop email client is available for installation for approved FDU Faculty and Staff via the FDU Self Service Portal for Software on Windows 10 desktops and laptops owned by the University.

Virtru Email Client

The Virtru client provides a seamless experience when using the Microsoft Outlook desktop client. The Virtru Outlook plugin is only available on university laptops or desktops running Microsoft Windows.

Virtru for Office365

All Apple macOS users and users who access their FDU email through Office 365 can use Virtru email encryption to send sensitive information electronically.

Tip

Microsoft Office 365 is accessed by visiting office365.fdu.edu from any web browser.

What is Virtru Secure Reader?

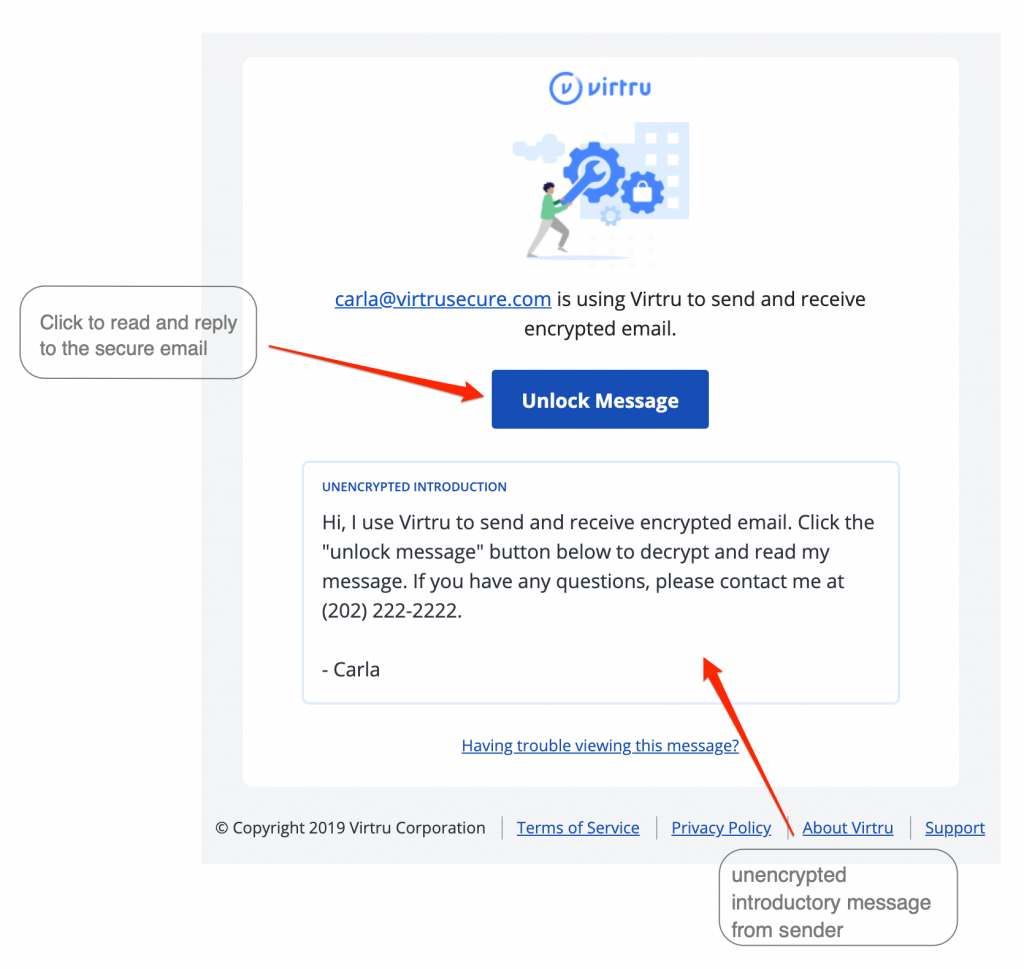
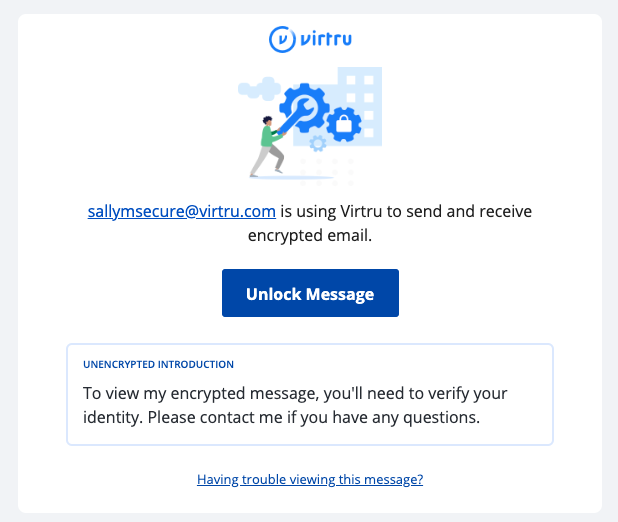
Virtru’s Secure Reader is a platform that can be accessed within FDU’s Outlook on the Web (office365.fdu.edu) and right on your web browser by clicking the “Unlock Message” button in your Virtru secured email. From there, all you have to do is quickly validate you are an authorized recipient of that email or file. Once complete, you can read and reply to the secure email directly in your browser.

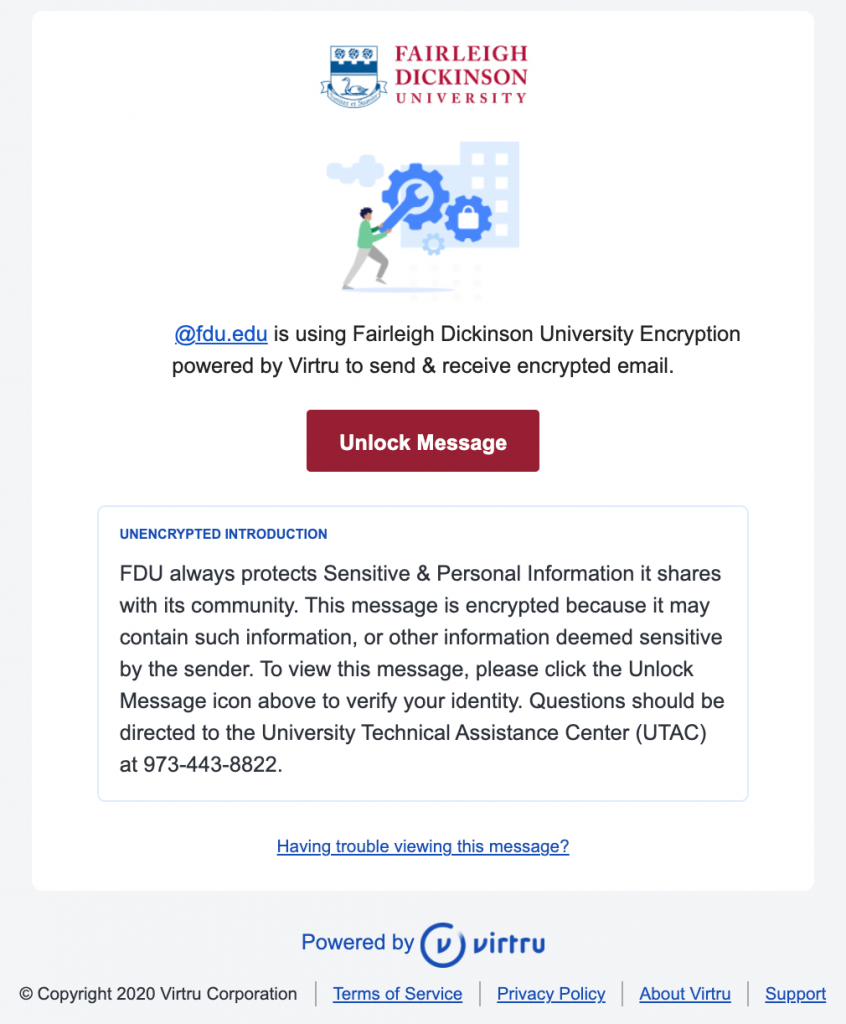
A secure message encrypted by Virtru will have a few key components, including a short unencrypted message from the sender, and a button that says “Unlock Message”.

Note

The Secure Reader is used when viewing encrypted emails from Microsoft Office on the web and any email client on mobile devices (AndroidOS and iOS)

Request Form

To obtain access to Virtru in order to send encrypted emails, you must fill out the request from below:

For additional support, please contact the Fairleigh Dickinson University Technical Assistance Center (UTAC).

Installing Virtru onto a University PC

  1. Open the FDU Self Service Portal for Software application. Locate and left-click Virtru Email Encryption and then click “Install

For additional information on the FDU Self Service Portal for Software, please click the following link:

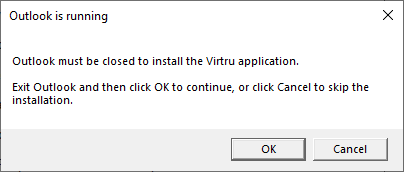
  1. A message box will appear notifying that Microsoft Outlook needs to be closed. Click “OK” and the installation will continue

Note

This window will only appear if the Microsoft Outlook Client is running.

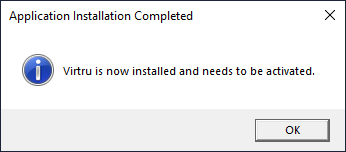
  1. A message will appear when Virtru is finished installing. Click “OK” to finalize the process

Virtru is now ready to be activated.

Activating Virtru on a University PC

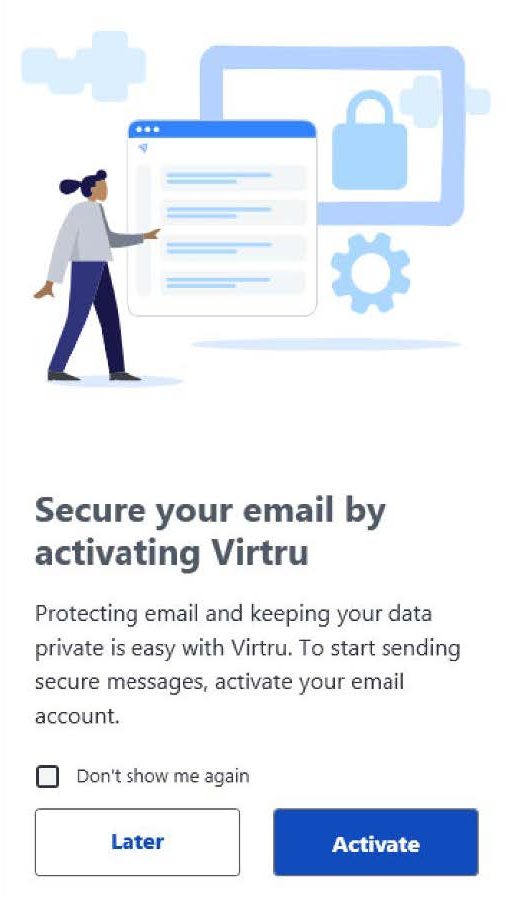
  1. When you open Microsoft Outlook after the Virtru has been installed, you will be prompted to activate your Virtru plugin. Click “Activate to begin. You may choose “Laterif you do not wish to activate at this time

Note

Check “Don’t show me again” before you click “Activate” or “Later” to prevent a pop-up window from re-appearing to prompt activation of un-activated account(s) whenever you start Outlook.

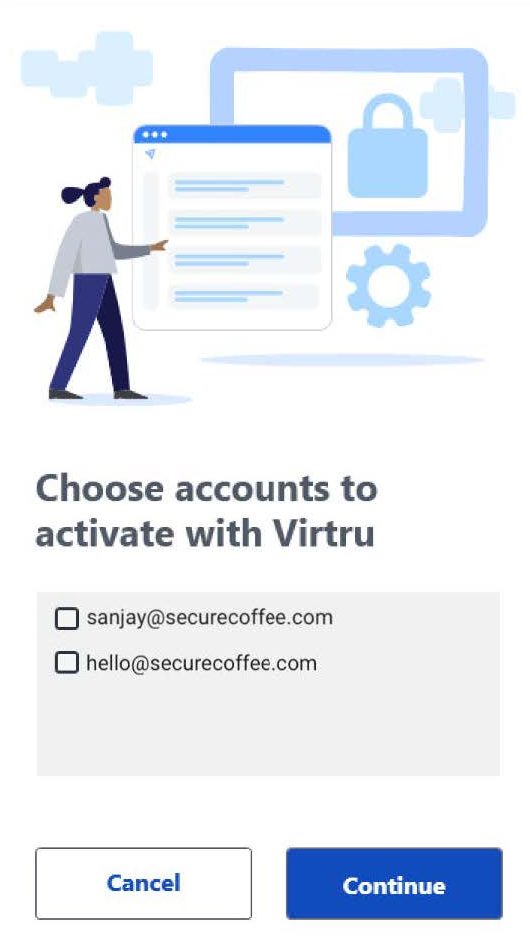
  1. You will be presented with a list of FDU email accounts configured to use in Microsoft Outlook. If your Microsoft Outlook application is associated with multiple email accounts, click on only those you will need to use Virtru email encryption. Then click “Continue
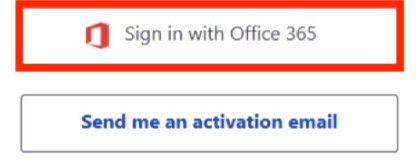
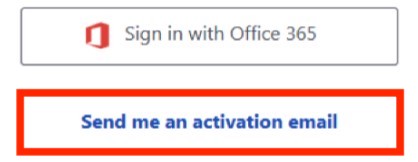
  1. After selecting the proper accounts, you will have the choice of signing in with FDU’s email provider (Microsoft Office 365) or choosing to receive an activation email. Choose “Sign in with Office 365

Activating Virtru through Office 365 Sign in

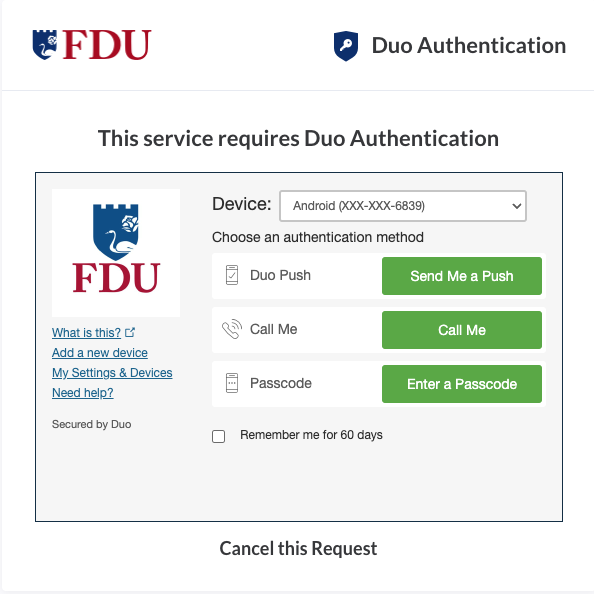
  1. Enter your FDU NetID credentials when prompted and proceed through the FDU Single Sign-on webpage, including completing Duo Multi-Factor authentication. If you experience issues, choose to “Send me an activation email” and follow the directions given below in item

Note

If you cannot activate your account(s) using “Sign in with Office 365”, choose to “Send me an activation email.”

Activating Virtru through Activation Email

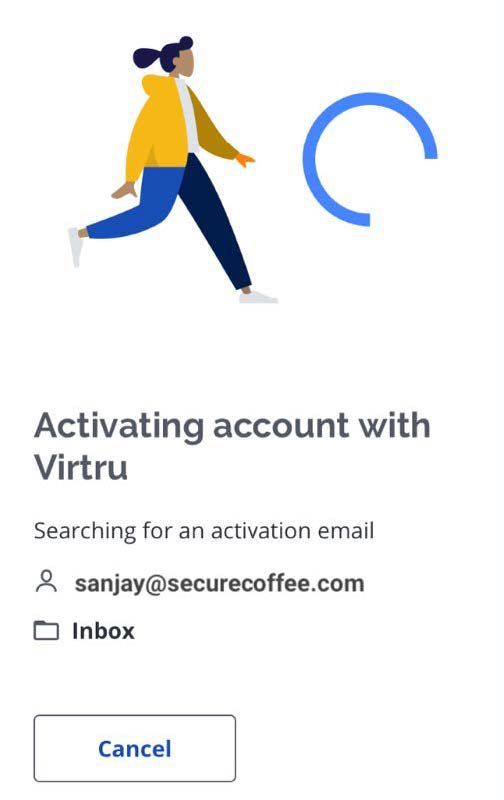
  1. If you are unable to activate your account(s) using “Sign in with Office 365,” choose to “Send me an activation email.” The process will take a few moments to complete in the background
  1. During this process, Virtru will send a unique email from noreply-activation@virtru.com to your mailbox. The Virtru plugin will search for this email in your inbox. When the activation email is found, Virtru will automatically delete the email from your email inbox, and the Virtru plugin will complete the activation

Tip

Click “Take a tour” for a brief walkthrough of your new Virtru features.

If your activation does not automatically complete in a few minutes, please contact the Fairleigh Dickinson University Technical Assistance Center (UTAC).

Activating from the Virtru Menu

If you have disabled automatic activations, you can still activate Virtru on your account(s) at any time.

  1. Select the ‘Virtru‘ menu tab from the top bar of the main Microsoft Outlook window
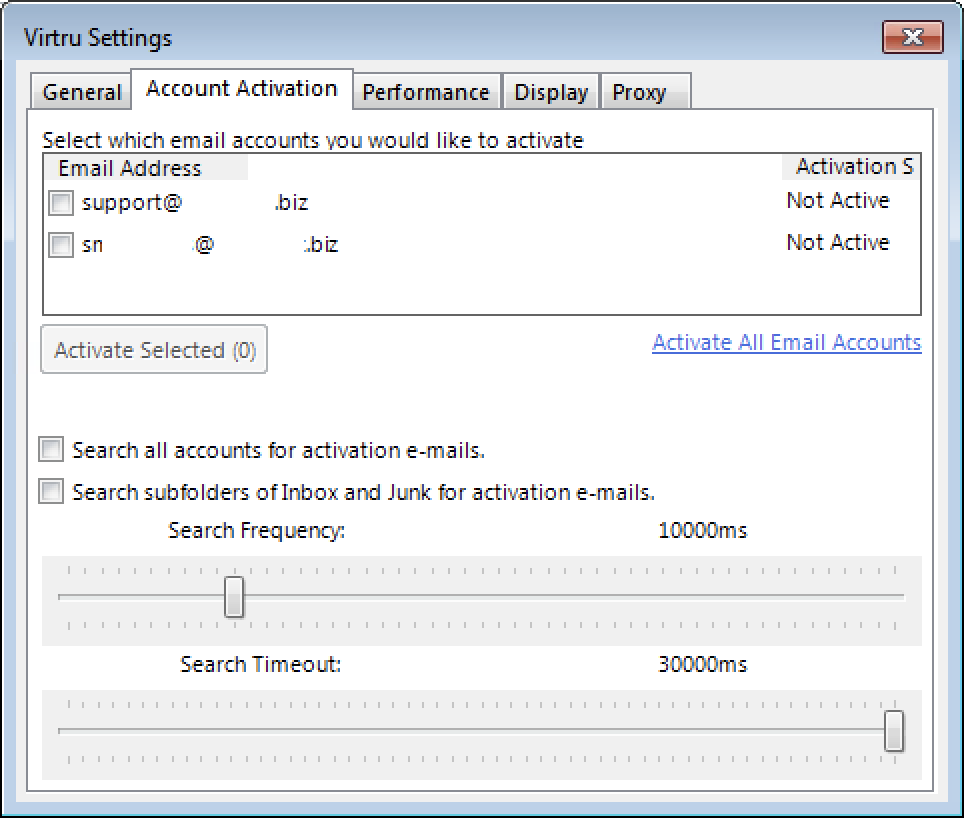
  1. Choose “Authorize Accounts” or “Options
  1. If you select “Options,” go to the ‘Account Activation‘ menu tab, select your FDU email account, and click on “Activate Selected
  1. You will then follow the activation process already illustrated above in “Activating Virtru through Office 365 Sign-on or “Activating Virtru through activation email” described above

Re-enabling a Virtru Account

FDU Virtru users will occasionally be required to reactivate their Virtru add-in due to the following:

  • You’ve cleared your registry
  • Your Virtru activation status has expired. For security purposes, Virtru will invalidate your activation status every
    • 120 days for users accessing their own mailboxes
    • 10 days for users accessing shared or delegated mailboxes
  • You are using Virtru on a new machine

You are automatically prompted when you need to re-activate. You can also proactively reactivate at any time via the ‘Virtru’ menu tab. This process was described above in “Activating from the Virtru Menu.”

Reset Activations

If you wish to fully deactivate all accounts in Microsoft Outlook, you can do so from the ‘Virtru’ menu tab:

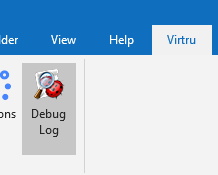
  1. Click on the ‘Virtru‘ menu tab at the top of your Microsoft Outlook window and select “Debug Log
  1. Click on the ‘Debug Commandsmenu tab option and select the “Reset Activations (clears registry only)” option
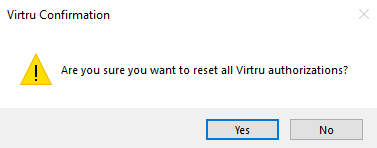
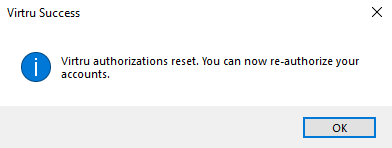
  1. Click “Yes” and then “OK” to confirm the changes
  1. From the ‘Virtrumenu tab, you can reauthorize by clicking on “Authorize Accounts

Virtru Walkthrough Video

Send a Virtru-encrypted Email in Outlook

With Virtru, you can easily protect your emails by encrypting messages and attachments in a few simple clicks.

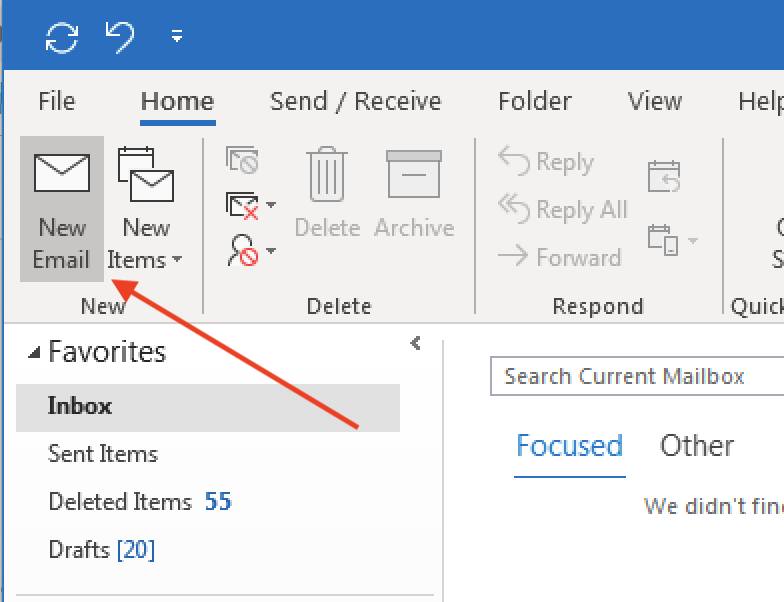
  1. Left-click “New Email” from the main Outlook window
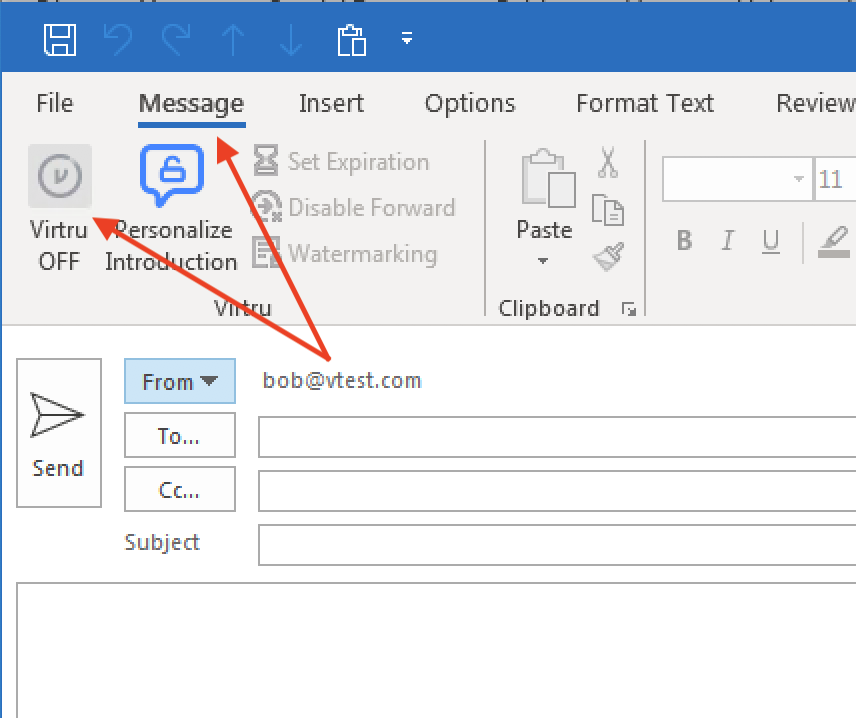
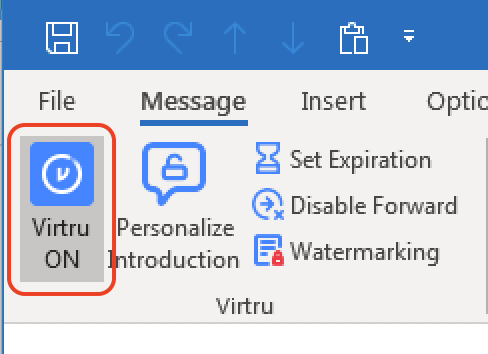
  1. Open the ‘Message menu tab and left-click the “Virtru button” to turn “Virtru ON.” The button should turn blue and read “Virtru ON
  1. Add recipients, a subject, the body of the email, and any relevant attachments

Tip

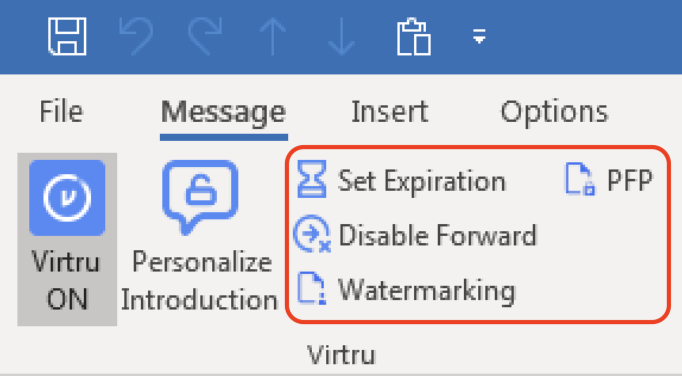
Additional security options for the message, including Disable Forwarding, setting an Expiration Date, and applying Watermarking and/or Persistent File Protection (PFP) to attachments are available to select for your Virtru-encrypted email. More details on these additional features can be on the “FDU Virtru Email Encryption Tutorial” under “Additional Resources.”

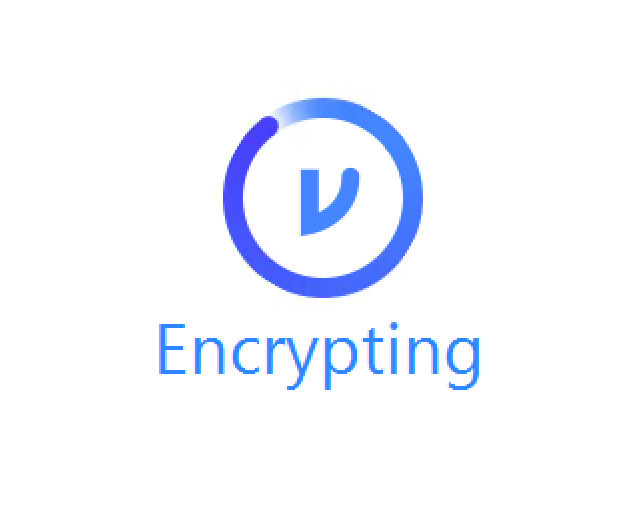
  1. When your message is ready, click “Send.” You should see a brief animation letting you know that the message is “Encrypting” before it is fully sent

FDU Virtru-encrypted Email Introduction for Recipients

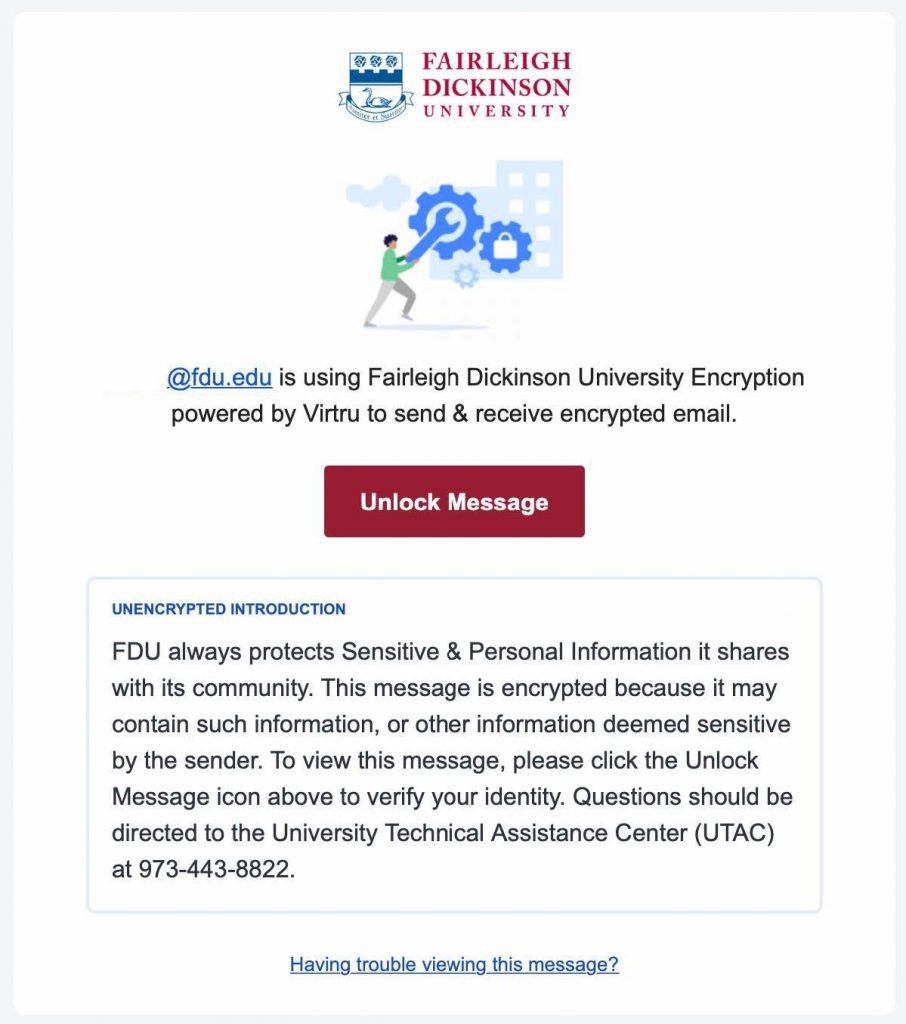
FDU includes a standardized introduction to inform the recipient that they are viewing a Virtru-encrypted email. Below is an example of what the recipient will see. If you have updated the introduction, it will be reflected accordingly

Personal Virtru-encrypted Email Introduction for Recipients

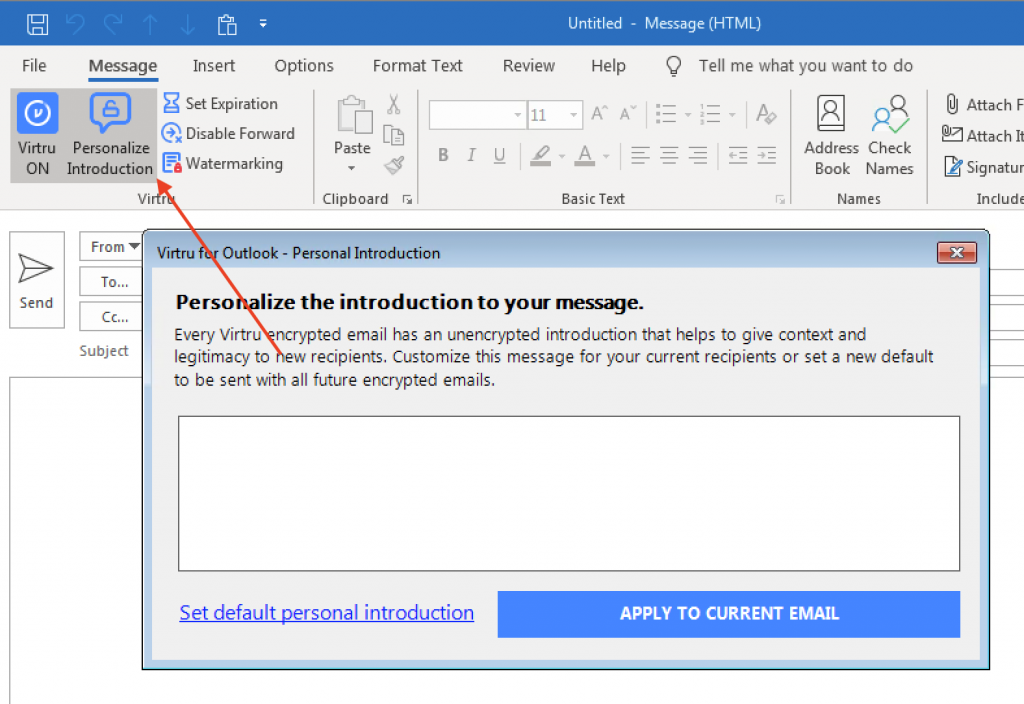
You can also set a one-time, unencrypted personal introduction for the message to either clarify the introduction of Virtru to the recipient or provide some context about the email. Left-click the “Personal Introduction” menu button in your email draft window.

Note

The Personal Introduction only supports plain text and line breaks. Special formatting is not supported.

Send a Virtru-encrypted Email on Microsoft Office 365

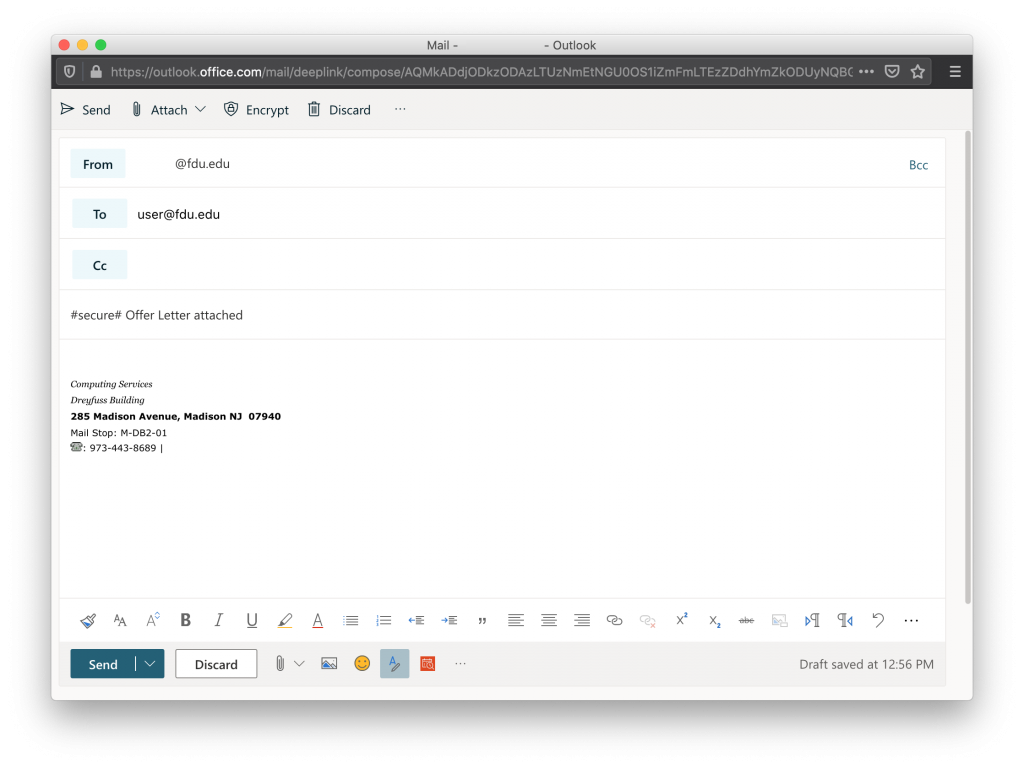
With Virtru, you can easily protect your emails by encrypting messages and attachments in a few simple clicks. To send Virtru encrypted emails from your Microsoft Office 365 email acount, simply prepend the subject line of your email as follows:

#secure#

Virtru-encrypted Email Recipient Experience

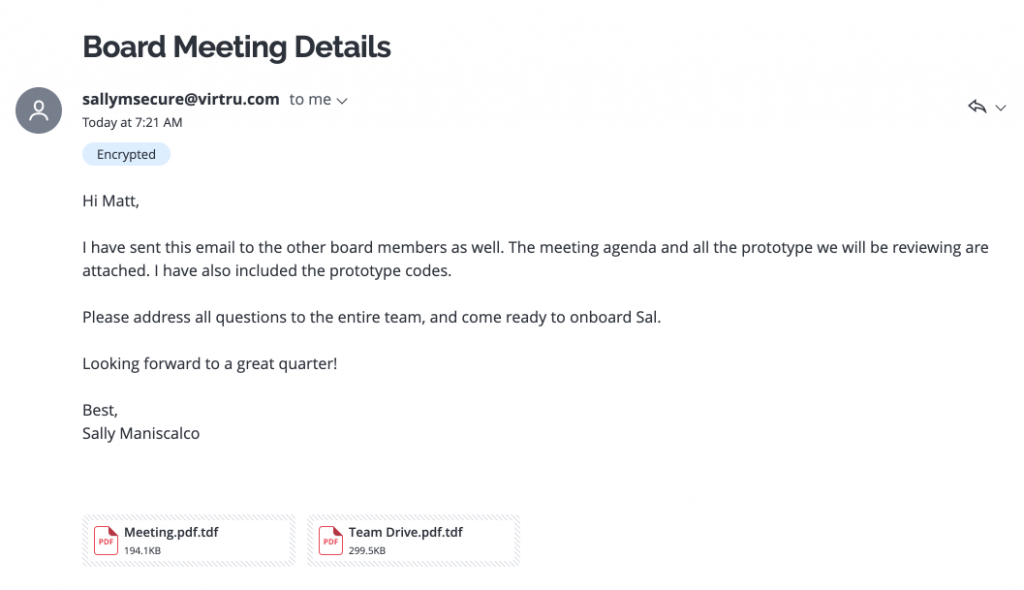
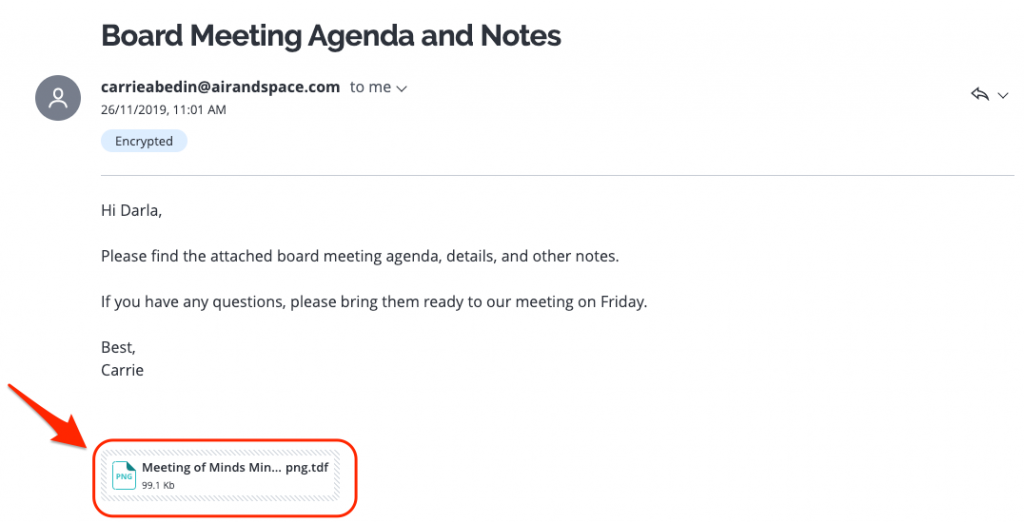
The recipient will receive an email that looks like this:

Read a Virtru Encrypted Email on Microsoft Office 365

In this article, we’ll show you how to quickly access and read your Virtru-secured message or attachment within Microsoft Office 365 using Virtru’s Secure Reader.

How to Access and Read your Message

  1. Login to FDU’s Microsoft Office 365 web portal using any web browser. Enter your FDU NetID credentials
  1. Open the Virtru-secured email in your inbox and left-click “Unlock Message.” A new tab will open
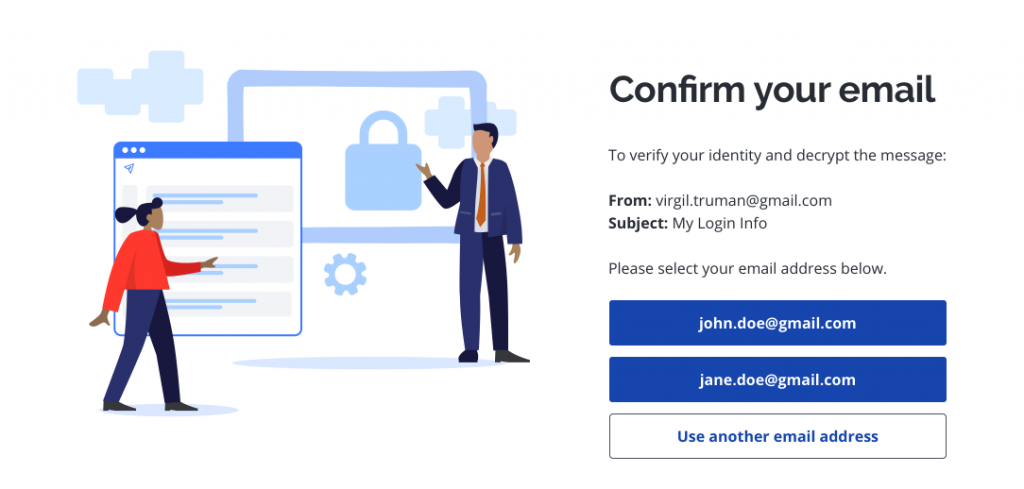
  1. When prompted, select your FDU email address

Tip

If you don’t see yours listed, left-click “Use another email address” and enter your email address.

Note

Please be sure to verify using the exact email address to which the secure message was sent. If the email was sent to an alias, group address, or distribution list address, you will need to select or enter that exact email address rather than your personal address.

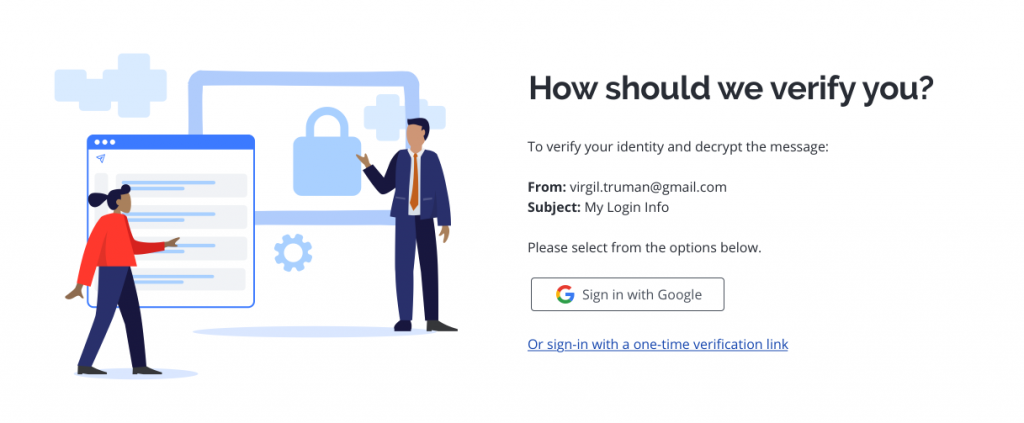
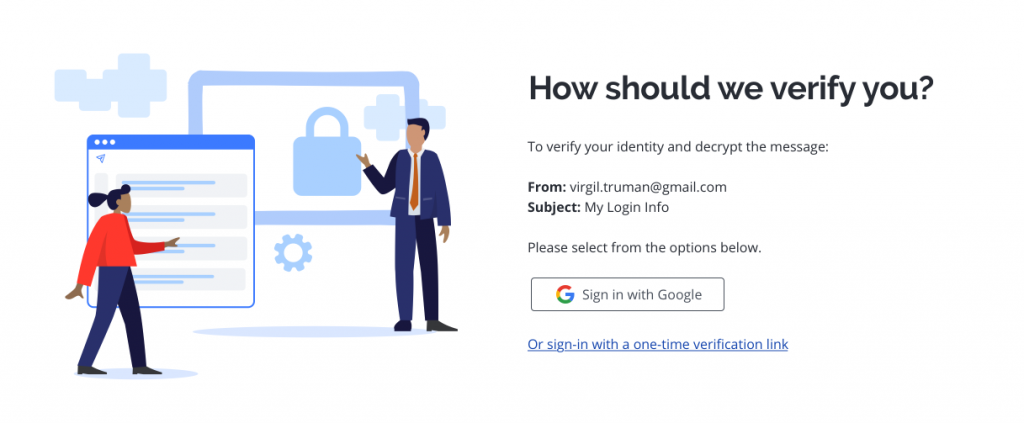
  1. Choose how you’d like to verify your identity
    • Microsoft Office 365 users can use their FDU NetID credentials to log into the Secure Reader using “Sign In with Microsoft.” If you choose this route, you can skip step #5 below.
    • Alternatively, users may choose “Or sign-in with a one-time verification link.”

Warning Warning

For emails sent to an alias, group address, or distribution list address, you will need to select the Or sign-in with a one-time verification link option. For group addresses and distribution list addresses, this action will send the verification email to all users on that group or distribution list.

  1. If you selected “Or sign-in with a one-time verification link,” check your inbox for your verification email. It will come from verify+xxxxxxxx@virtru.com (with each “x” being a digit). Open the verification email and left-click “View Message” to open your message

Note

Both the “Unlock Message” and “View Message” links need to be opened in the same browser on the same device in order to confirm your identity.

Please also note, Virtru offers a “cookie-less” verification pathway if we detect that tracking or cookies and local storage have been disabled in the browser. In these cases, we send a verification code via email. This code, once received, simply needs to be pasted into the proper field in your browser in order to grant access.

  1. Your message will open the Virtru Secure Reader in a new tab in the browser. You will also be able to view and access attachments at this time

For a variety of reasons, some recipients may occasionally receive an error message when trying to open a secure email or attachment. If you are having problems accessing your secure email and/or files, please contact the Fairleigh Dickinson University Technical Assistance Center (UTAC) for assistance.

Reply to a Virtru Encrypted Email on Microsoft Office 365

In this article, we’ll show you how to quickly reply to your Virtru-secured message or attachment within Microsoft Office 365 using Virtru’s Secure Reader.

How to Reply to a Secure Message

  1. Login to FDU’s Microsoft Office 365 web portal using any web browser. Enter your FDU NetID credentials
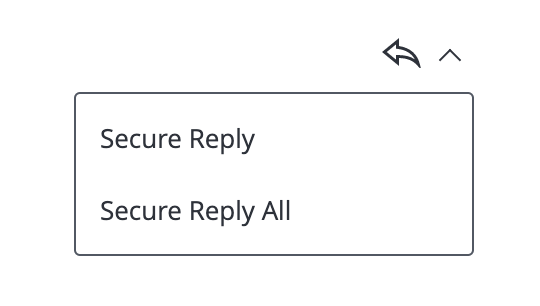
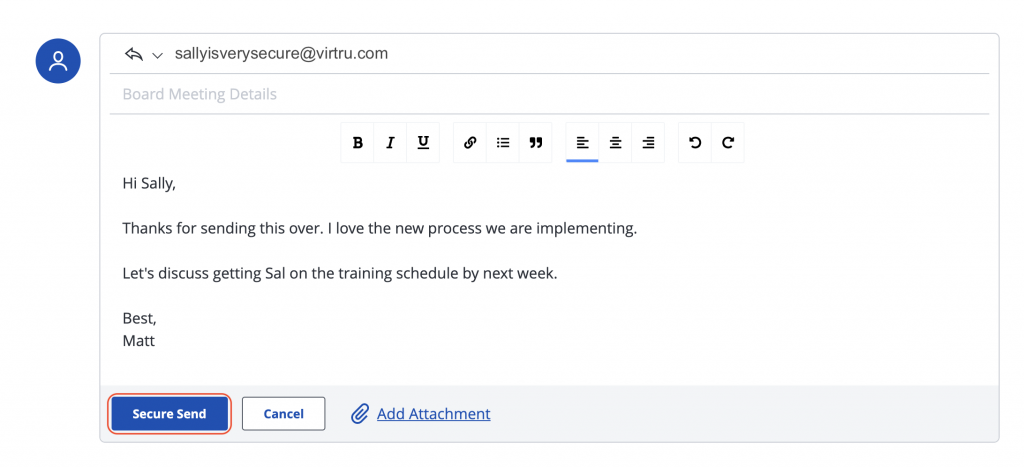
  1. After successfully opening the Virtru-secured message, to send a “Secure Reply,” scroll down the page below the main message, or click the icon in the top right with the arrow pointing to the left. You may also click on the arrow next to it to reveal additional options such as “Secure Reply All
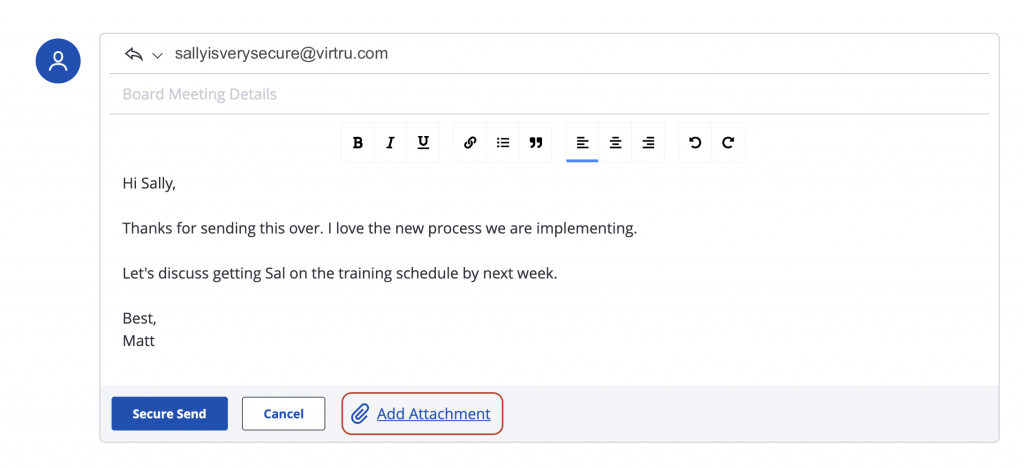
  1. Attachments can be added by clicking “Add Attachment.” These attachments will be sent securely as well
  1. When you are ready to send your email, hit the “Secure Send” button. Both you and all applicable recipients will receive a copy of your reply. Please note that your secure reply will be sent from secure-reply@virtru.com

Viewing a Secure File or Attachment on Microsoft Office 365

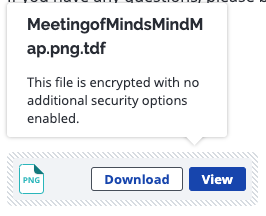
This article covers the different options you have for viewing and downloading secure attachments and files within Microsoft Office 365 using Virtru’s Secure Reader. Depending on the type of attachment you’ve received, you can view your file directly in the Virtru Secure Reader or download the file to your computer. The Virtru Secure Reader can preview various file types, including PDF, Word documents, most image files, and plain text files.

Viewing Directly in the Secure Reader

  1. Login to FDU’s Microsoft Office 365 web portal using any web browser. Enter your FDU NetID credentials
  1. If you’ve received an attachment in a Virtru secured email or an encrypted file that was shared directly with you, you can hover over the file name and choose “View” or “View Protected file” to view the attachment right in your web browser

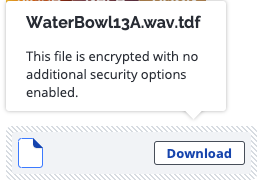
Downloading Unsupported File Types

If you’ve received a file that cannot be previewed in the Virtru Secure Reader, you will be prompted to download that file directly. There will be no “View” option.

Printing Attachments in the Secure Reader

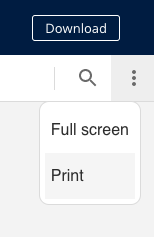
You can print a document from the Secure Reader by selecting the menu under the “Downloadbutton and then selecting “Print.” You may also choose to download it first, then open and print via a preferred program on your computer.

Note

Note that printing via your web browser’s File>Print option will not print the document as expected.

Using the Virtru Dashboard for Microsoft Office 365 Users

Users who access their FDU email through the Microsoft Office 365 web portal and all Apple macOS users will need to use the Virtru Dashboard to manage all of Virtru’s security options.

  1. To use the Virtru Dashboard, click the link below:

Tip

We will refer to the “Virtru Dashboard” many times, as this dashboard is used to change settings after an encrypted email has been sent. It is suggested that you bookmark this site for easy access.

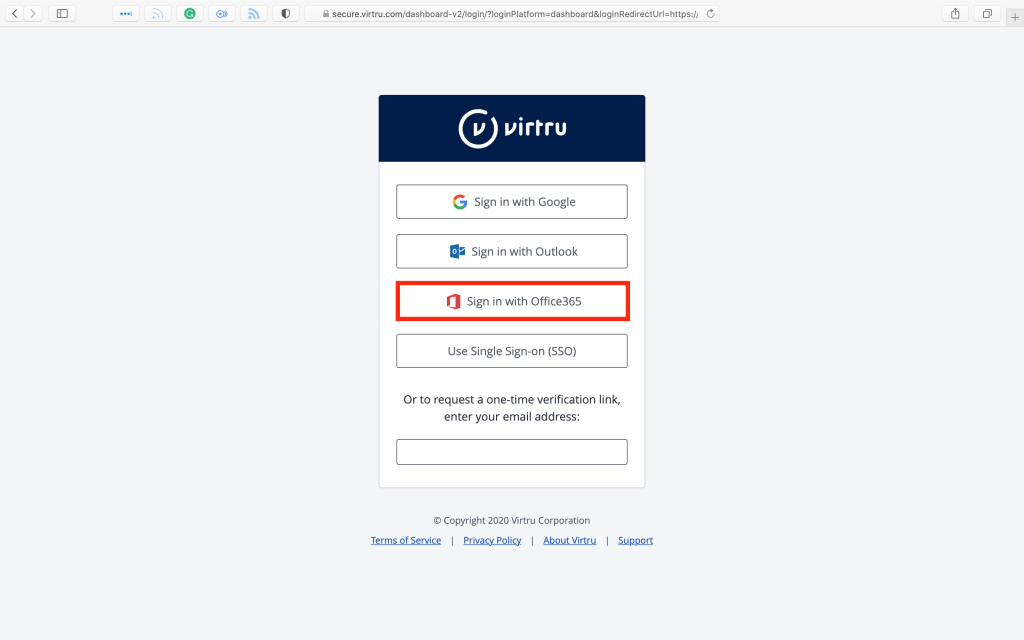
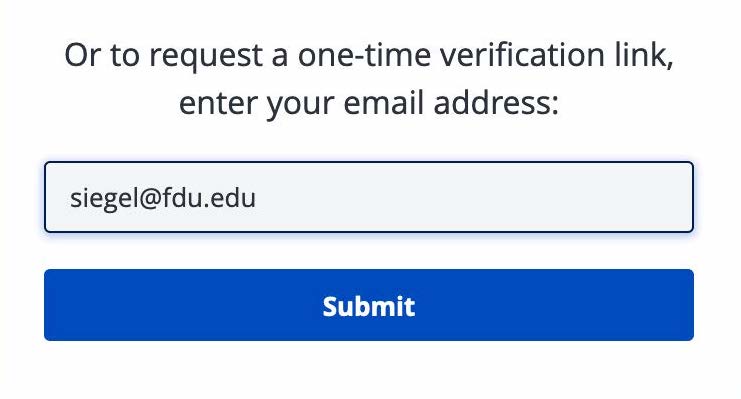
  1. Choose “Sign in with Office365“, and skip to Step 5. If you choose to request a one-time verification link, enter your FDU email address and click on “Submit
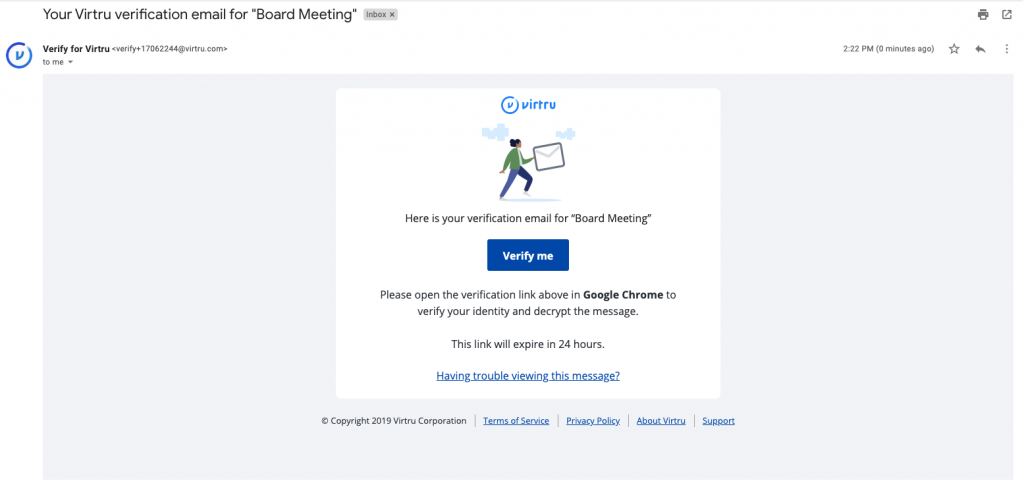
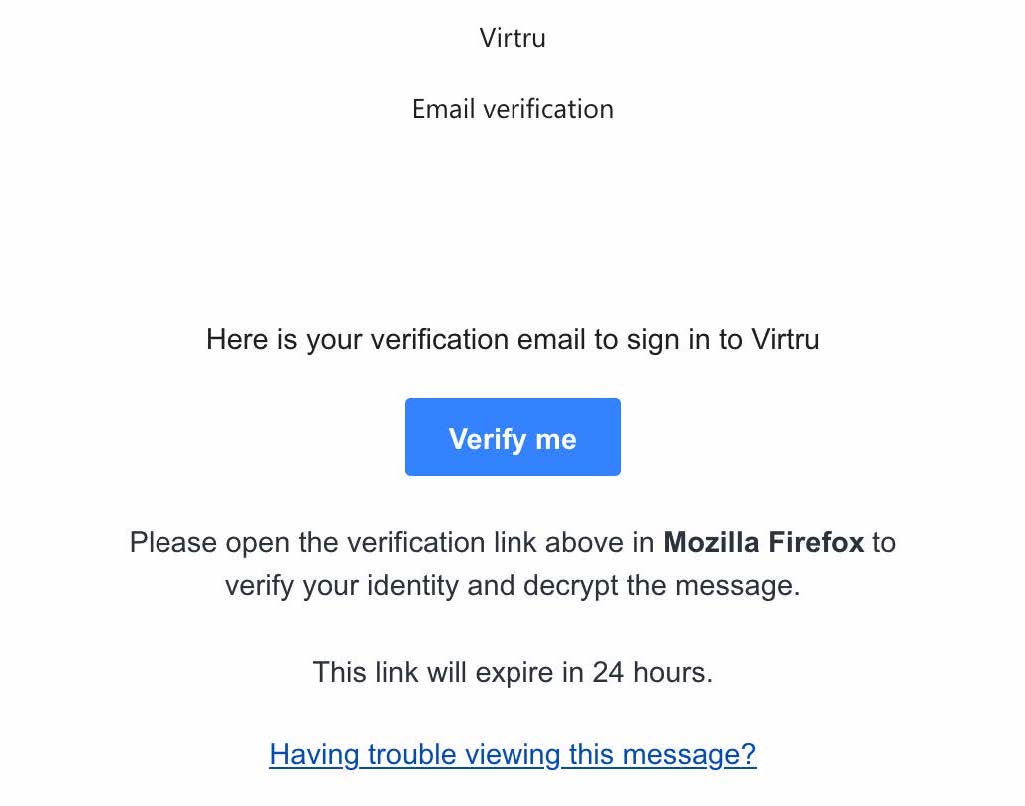
  1. If you request the one-time verification link, you will receive an email from Verify for Virtru, as shown below. If you are using different web browsers, such as Google Chrome or Mozilla Firefox, it will be reflected in the email message accordingly
  1. Click “Verify me” and choose “Copy Link Location.” Open a new browser tab and paste the link location into the URL space. Hit the “Enter” or “Return” key on your keyboard
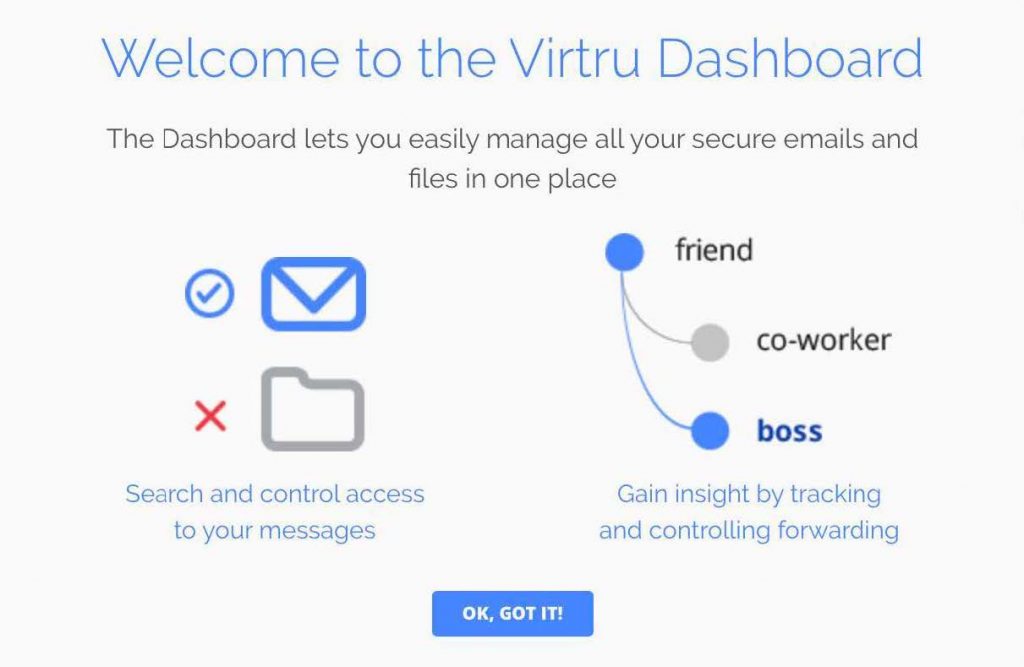
  1. When you log in to the Virtru Dashboard for the first time, you will see the message below. Left-click “OK, GOT IT!
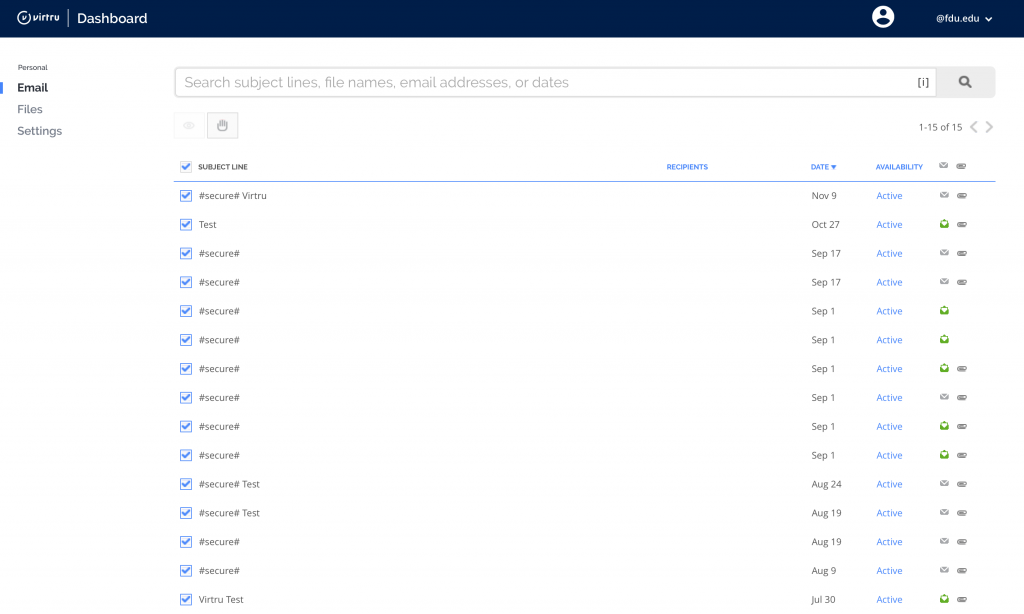
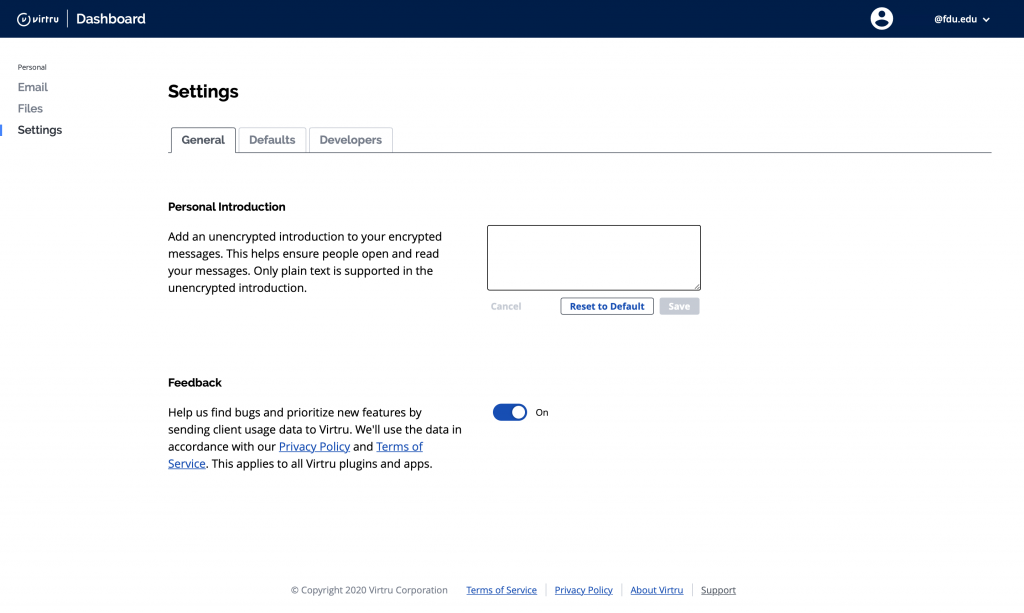
  1. You will now be able to view Virtru encrypted emails or files you have sent, as well as open the ‘Settings‘ menu tab to set behaviors for your Virtru account

Manage Virtru’s Expiration Date Security Option in Outlook

In addition to encrypting messages and files, Virtru users have the ability to apply additional security settings to protected content. Among these settings is the option to apply an “Expiration Date” to an encrypted email or file.

Typically, if a Virtru email recipient receives an encrypted message or file, they can indefinitely access that content. However, as the owner of that content, you can restrict access after a particular point in time. If a recipient tries to access the content after expiration, they will receive a prompt indicating their access is expired.

Manage Virtru’s Expiration Date Security Option in the Virtru Dashboard

In addition to encrypting messages and files, Virtru users have the ability to apply additional security settings to protected content. Among these settings is the option to apply an “Expiration Date” to an encrypted email or file.

Typically, if a Virtru email recipient receives an encrypted message or file, they can indefinitely access that content. However, as the owner of that content, you can restrict access after a particular point in time. If a recipient tries to access the content after expiration, they will receive a prompt indicating their access is expired.

Manage Virtru’s Disable Forwarding Security Option in Outlook

In addition to encrypting messages and attachments, Virtru users have the ability to apply additional security settings to protected content. Among these settings is the option to apply “Disable Forwarding” to a Virtru-encrypted email.

Typically, if a Virtru plugin for Microsoft Outlook user receives an encrypted message, they can use Virtru to forward the email to a new party. This will add the new recipient as an authorized user and allow them to unlock the message. “Disable Forwarding,” however, ensures that your recipients can access the encrypted content but will stop any additional users from gaining access to the message. If the original recipient passes the email to a new party, then the new user will not be added as an authorized user and will not be able to unlock the message.

Manage Virtru’s Disable Forwarding Security Option in the Virtru Dashboard

In addition to encrypting messages and attachments, Virtru users have the ability to apply additional security settings to protected content. Among these settings is the option to apply “Disable Forwarding” to an encrypted email.

Manage Virtru’s Watermarking Security Option in Outlook

In addition to encrypting messages and attachments, Virtru users have the ability to apply additional security settings to protected content. Among these settings is the option to apply “Watermarking” to an encrypted file.

Typically, if a Virtru recipient receives an encrypted file, they can preview the file in the Virtru Secure Reader and download a decrypted copy locally. When “Watermarking” is applied to a secure file, recipients will only have access in the Secure Reader and will see their email address watermarked across the document.

The addition of the watermark is visible but transparent enough not to obscure the contents of the file when viewed. A recipient will not be able to download a local decrypted copy of the file.

This feature can be applied using the Virtru plugin for Microsoft Outlook or the Virtru Dashboard. It supports the following common file types:

  • Microsoft Office documents: .docx, .pptx, .xlsx
  • Common image file formats: .jpeg, .png
  • PDF documents

Note

Although newer Microsoft Office file types are supported, older versions (.doc, .ppt, .xls) are not compatible. Additionally, these other common file types are NOT supported: .msg, .zip, .md.

Mange Virtru’s Watermarking Security Option in the Virtru Dashboard

In addition to encrypting messages and attachments, Virtru users have the ability to apply additional security settings to protected content. Among these settings is the option to apply “Watermarking” to an encrypted file.

Typically, if a Virtru recipient receives an encrypted file, they can preview the file in the Virtru Secure Reader and download a decrypted copy locally. When “Watermarking” is applied to a secure file, recipients will only have access in the Secure Reader and will see their email address watermarked across the document.

The addition of the watermark is visible but transparent enough not to obscure the contents of the file when viewed. A recipient will not be able to download a local decrypted copy of the file.

This feature can be applied using the Virtru plugin for Microsoft Outlook or the Virtru Dashboard. It supports the following common file types:

  • Microsoft Office documents: .docx, .pptx, .xlsx
  • Common image file formats: .jpeg, .png
  • PDF documents

Note

Although newer Microsoft Office file types are supported, older versions (.doc, .ppt, .xls) are not compatible. Additionally, these other common file types are NOT supported: .msg, .zip, .md.

Revoke Virtru Encrypted Content in Outlook

When a Virtru user sends encrypted content, they have full control over access to the message(s) and/or file(s). Even if a recipient receives encrypted content, the sender has the ability to revoke (or reauthorize) access at any time. Virtru even allows the sender to revoke access to specific recipients.

Note

Virtru can only revoke emails that were sent securely with Virtru. Any messages sent prior to having Virtru installed or messages sent unsecured after Virtru has been installed cannot be revoked.

Revoke Virtru Encrypted Content in the Virtru Dashboard

When a Virtru user sends encrypted content, they have full control over access to the message(s) and/or file(s). Even if a recipient receives encrypted content, the sender has the ability to revoke (or reauthorize) access at any time. Virtru even allows the sender to revoke access to specific recipients.

Note

Virtru can only revoke emails that were sent securely with Virtru. Any messages sent prior to having Virtru installed or messages sent unsecured after Virtru has been installed cannot be revoked.

Using Virtru’s Persistent File Protection (PFP) Security Option

Note

Please note that Persistent File Protection (PFP) Security Option is only available from the Virtru add-on to the Microsoft Outlook Desktop Application. It is not available when using Outlook on the Web (office365.fdu.edu) or the Virtru Dashboard.

In addition to encrypting messages and attachments, Virtru users have the ability to apply additional security settings to protected content. Among these settings is the option to apply “Persistent File Protection (PFP)” to an encrypted file.

PFP provides a secure file container that is portable, universally accessible, and built on top of open standards. Regardless of where files are stored, PFP allows you to select, protect, and share a file with anyone while maintaining full visibility into how it is being used and retaining the ability to revoke access at any time. Any file protected with PFP will convert into the .tdf.html file format. This ensures that the contents are only accessible in Virtru’s Secure Reader, and only authorized parties can view it.
This feature can be applied using the Virtru plugin for Microsoft Outlook on Windows Operating Systems only. It supports the following common file types:
  • Microsoft Office documents: .docx, .pptx, .xlsx
  • Common image file formats: .jpeg, .png
  • PDF documents

Note

Although newer Microsoft Office file types are supported, older versions (.doc, .ppt, .xls) are not compatible. Additionally, these other common file types are NOT supported: .msg, .zip, .md.

Last Modified:

FDU Wireless Network Coverage Maps for NJ Campus’

Resources for:
icon Close

The maps below highlight the buildings at Fairleigh Dickinson University with wireless networking on the Metropolitan Campus, and College at Florham.

Metropolitan Campus

Click or Tap Image to Enlarge

1. Bancroft Hall – General Coverage
2. Williams Hall -– General Coverage
3. Fitness Center – General Coverage
4. Northpointe Residence Hall – General Coverage
5. Robison Hall – General Coverage
6. Robison Hall Annex – General Coverage
7. Muscarelle Center – General Coverage
8. Kron Administration Building – General Coverage
9. University Hall – General Coverage
10. Alumni Hall – General Coverage
11. Metropolitan Campus Library – General Coverage
12. Becton Hall – General Coverage
13. to 22. University Court Residence Halls 1 to 10 – General Coverage
23. Public Safety Office – General Coverage
24. Interfaith Chapel – General Coverage
25. International Student Services – General Coverage
26. EOF Office – General Coverage
27. 840 River RoadNo Coverage
28. HousekeepingNo Coverage
29. 835 SUB Lane – General Coverage
30. 839 SUB LaneNo Coverage
31. Dean of Students – General Coverage
32. Greg Olsen Student Union – General Coverage
33. to 40. Linden Court Residence Halls – General Coverage
41. Knight Spot – General Coverage
42. Residence Life – General Coverage
43. Banta Coe HouseNo Coverage
44. River House – General Coverage
45. Student Counseling and Psychological Services – General Coverage
46. University Mail Services (10 Woodridge Ave) General Coverage
47. External Building (1 Woodridge Ave)No Coverage
48. Center for Psychological Services (131 Temple Ave) – General Coverage
49. Center for Psychological Services (139 Temple Ave) – General Coverage
50. Rothman Center – General Coverage
51. Dickinson Hall – General Coverage
52. Softball FieldNo Coverage
53. Edward Williams Hall – General Coverage
54. Field House – General Coverage
54b. Naimoli Family Baseball ComplexNo Coverage
54b. Soccer Field – General Coverage
54b. Tennis CourtsNo Coverage
55. 1154 River Rd. – General Coverage

College at Florham

Click or Tap Image to Enlarge

1. Hennessy Hall (Mansion) – General Coverage
2. Reuter’s RockNo Coverage
3. Science Building – General Coverage
4. East Cottage – General Coverage
5. West Cottage – General Coverage
6. Zen Building (Stadler-Zenner-Hoffmann La Roche) – General Coverage
7. Ferguson Recreation Center – General Coverage
8. Dreyfuss Building – General Coverage
9. Rothman Building (Admissions Office) – General Coverage
10. Black Box Theater – General Coverage
11. The Barn (Public Safety, Campus Facilities) – General Coverage
12. Chaine House – General Coverage
15. Monninger Center (Library) – General Coverage
16. Orangerie – General Coverage
17. Public Relations – General Coverage
18. Frank Santoloci Student Center – General Coverage
19. Twombly Residence Halls – General Coverage
20. Village Residence Halls – General Coverage
21. Park Avenue Residence Halls – General Coverage
23. Rutherford Residence Hall – General Coverage
24. Wellness Center – General Coverage
25. Gatehouse – General Coverage
25b. Baseball Field – General Coverage
25b. Soccer FieldNo Coverage
25b. Football Field – General Coverage

Last Modified: