According to FDU’s Written Information Security Program (WISP), in no case should they be sending or storing WISP protected information without the explicit authorization of the Chief Information Security Officer (CISO). If approved, these instructions will provide you with guidance on the methodology.
Instructions for Windows
If you do not have a university issued laptop or desktop, you must download and install 7-Zip on your computer in order to proceed with the instructions. Please follow the following steps in order to download and install 7-Zip on to your personal device:
- Download 7-Zip:
- Launch the 7-Zip installer “7z1900-x64.exe” or “7z1900.exe”
NOTE: The Installer file name may change as newer versions are released.
- Click “Yes” if asked to run an unknown app from User Access Control
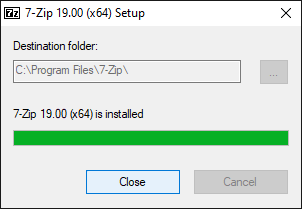
- Click “Install” on the setup screen

- 7-Zip will now install, when completed, click “Close“
Preparing an Encrypted 7-Zip File
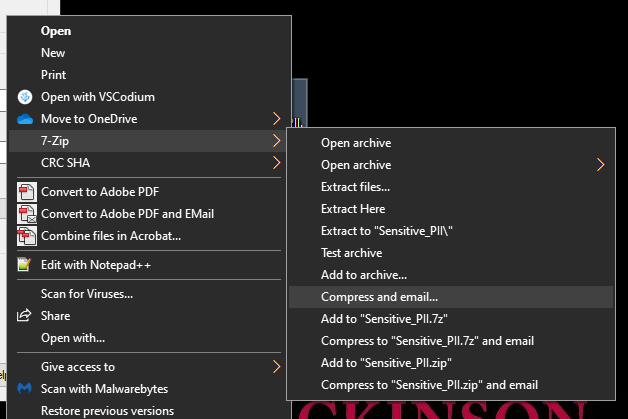
- Single “Right” click on the file
- Highlight “7-Zip”
- Navigate and “Left” click on “Compress and Email…”
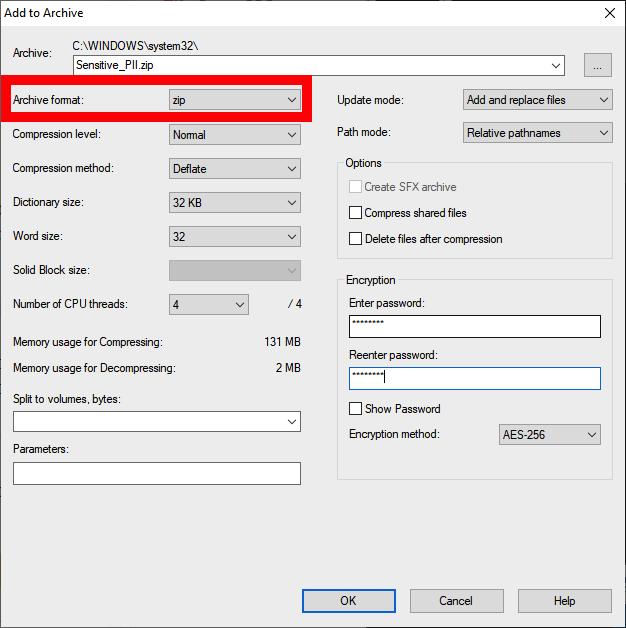
- Change Archive Format to “ZIP”
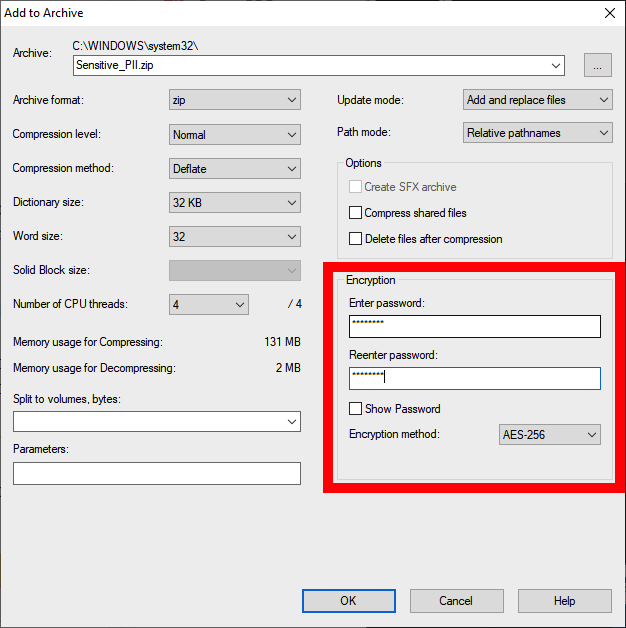
- Enter and Retype a password in the “Encryption Section” and check the box to “Encrypt file names”
- Change the Encryption Method to “AES-256“
NOTE: The password must be a complex password that contains the following:
- At least one capital letter
- At least 2 numbers 0-9
- At least 1 special character (%, ^, &, ! , @ , !, ….)
- Be at least 8 characters long
- Click “OK“
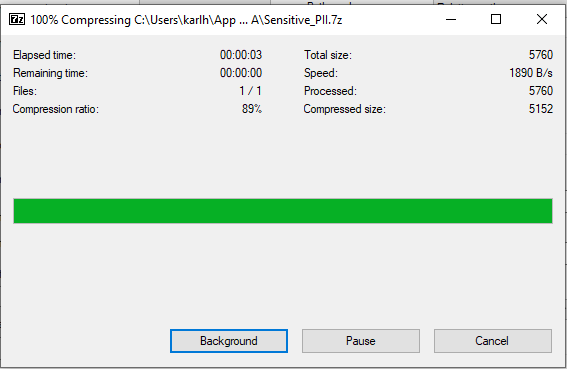
NOTE: A progress bar will open to encrypt and zip the file. Depending on the size of the file, this may take a few minutes.
- An email message to compose your new email with the compressed and encrypted file will appear
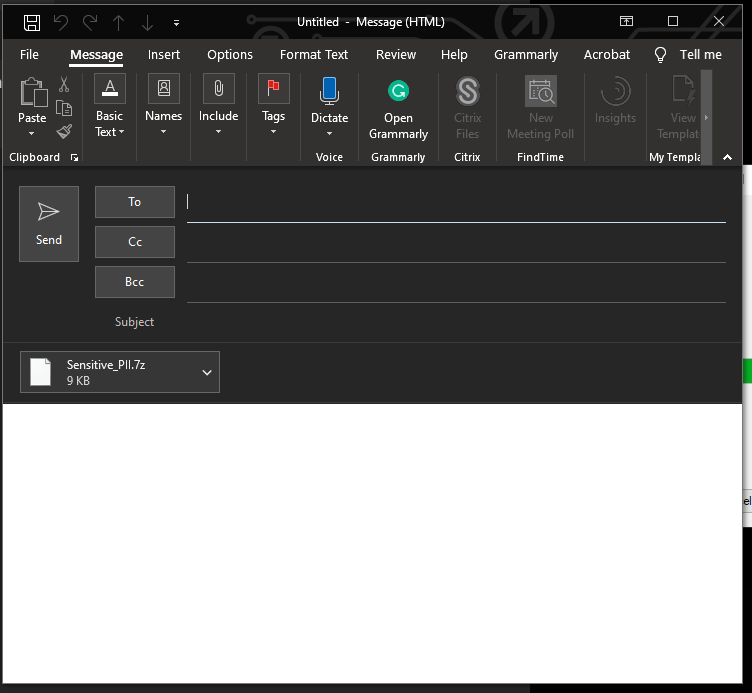
- Address and compose your email as desired
CAUTION: Never send an email that contains both the password and file together. These must be sent separately.
- Compose and send a separate email, or place a phone call, to the receiving parties which contains the password for the compressed file for them to read
NOTE: Without the password, the receiving party will not be able to open and view the file.
Opening an Encrypted 7zip File
- Open the email that contains the encrypted file
- Click the arrow “V“’ and select “Save As”
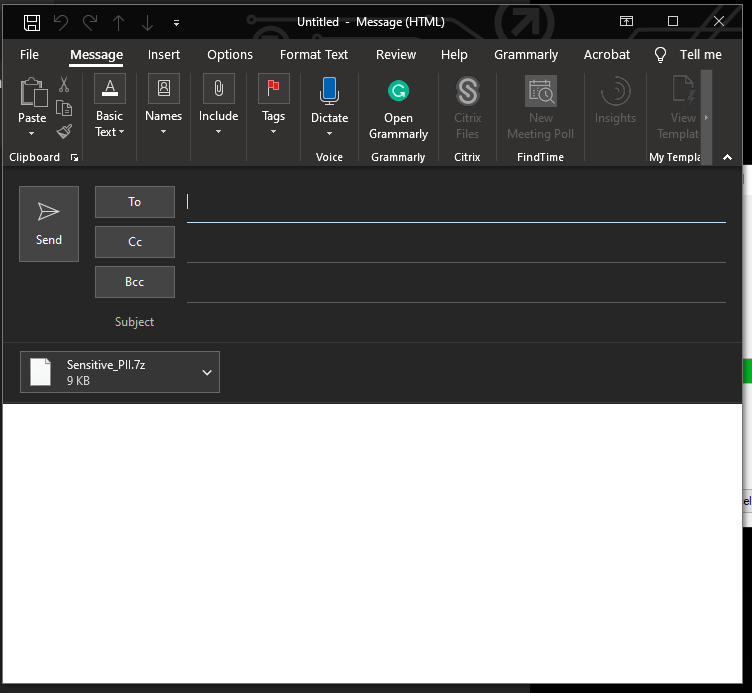
- From the saved location open the encrypted file
- Enter the password provided to you from the sender
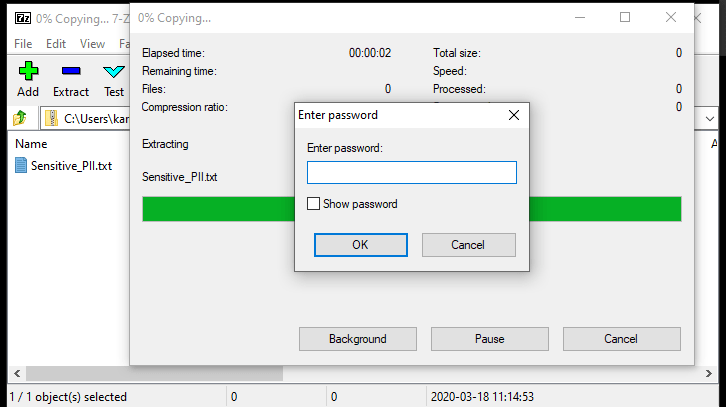
Once the password is entered correctly, the enclosed document will then load, and you can make any changes and save inside the protected file. If needed, the file can be returned to the sender with needed information.
NOTE: The Archive Window must not be closed if making any changes that need to be saved.
IMPORTANT: After the document is no longer needed, the encrypted file should be SECURELY DELETED from your hard drive. At no time should this be saved for later use.
Instructions for macOS
- Download Keka:
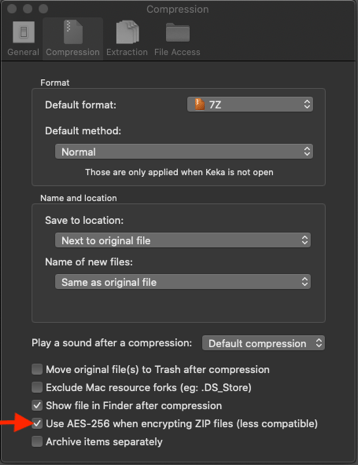
- Open Keka Preferences and check the box next to Use AES-256 when encrypting ZIP files (less compatible)
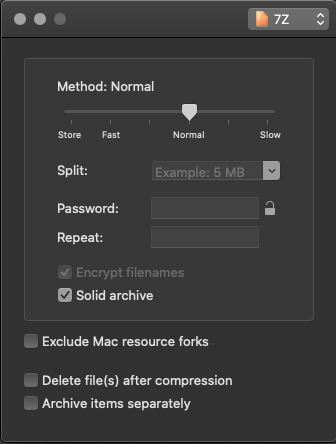
- Set a password for the file
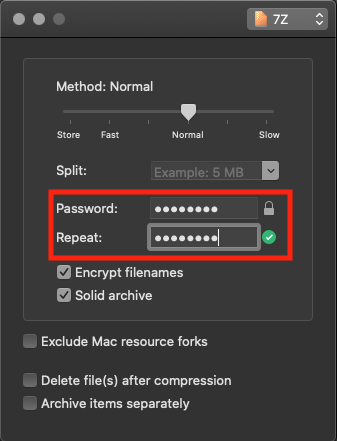
- Drag your file onto Keka to compress and encrypt. The encrypted file will be placed next to the original file
- If you need to extract an encrypted file, simply drag it onto the Keka window and enter the file password in the prompt. The file will be extracted in the same location as the original


